


Dynamics NAV Development for Non-Developers: Part 4 – Moving Object Changes
In Microsoft Dynamics NAV development you will always want to make changes in a non-Production database first. You will need to understand the mechanics of moving those changes to Production, once tested and approved. This entry in the series will walk through the process of moving object changes.
Considerations for Moving Object Changes
Backup the Production database (optional)
If you are moving table changes, a SQL backup of the Production database is recommended. If you are moving other objects (pages, reports, etc…), a backup is not necessarily needed. If a non-table object was inadvertently overwritten or corrupted, it would be relatively straight-forward to pull the “old” version back from a recent nightly backup. Table object moves aren’t quite as simple, so it is possible you would want/need to restore the entire backup.
Verify the object to be moved contains all of the logic already in Production.
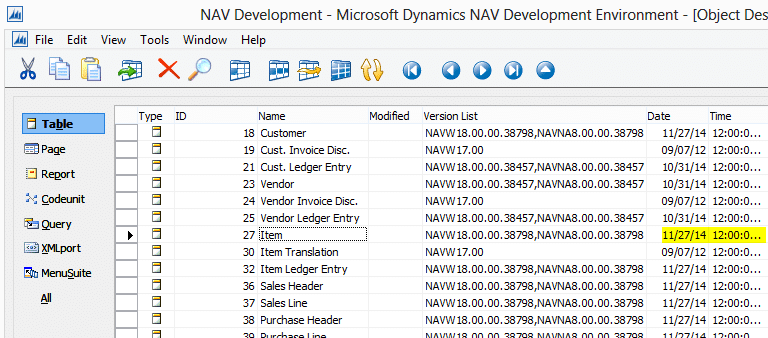
Before making changes to an object in a non-Production database, you should always double-check that the date and time stamps on the object are consistent between the Production database and the one in which you will be working. On the chance that this step may have been skipped, you will want to consider the date and time stamps on the production object to determine if it has been modified since the Test/Dev database was last refreshed (i.e. you did start with an exact copy of the Production object before making your changes).
If you are moving table changes, verify that users are out of the system
Depending on the nature of the changes, data loss can occur when moving table changes. While this is rare, it can happen. Reasons include inadvertently removing a field that contained data, changing the definition of an existing field, the specific build of NAV, and current schema synch status with the server. As mentioned above, you should take a backup first. Directly related, all other users should be out of the application when making table moves.
Process of Moving Object Changes
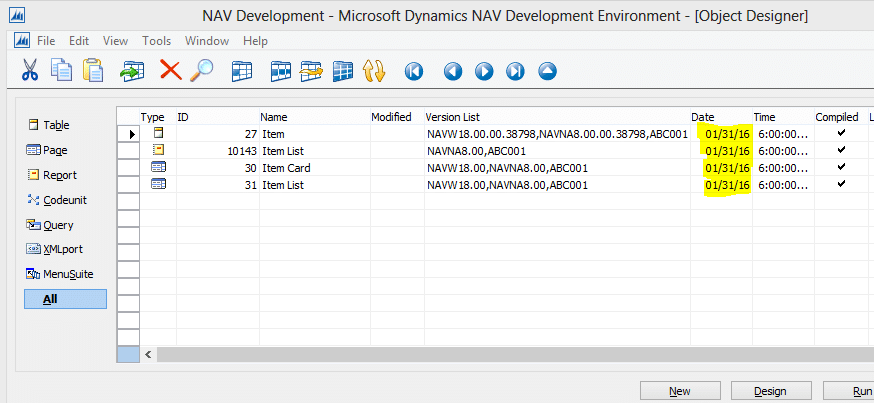
Select objects to be moved (from test/development database)
If you have a single object to move, simply select that line in the development environment (object designer). If you have multiple lines, you can filter the objects by Date, Version List, through the use of toggle marking, or by using Ctrl+mouse click to select lines (like Excel). Then select/highlight all objects to be moved.
Export objects
With the objects highlighted, select File – Export from the toolbar. Select a location and provide a name for your exported object file. An example might be “ObjectsForProd_20160131.fob”. The file extension should always be .fob. Save the file to close the window.
Import objects
Open the target database (Production) from the development environment (object designer) and select File – Import from the toolbar. Select the location/file you exported in step 2 and then the “Open“ button. You should receive a message asking whether or not to open the Import Worksheet. You should always select the option that opens the Import Worksheet. NAV will then return a list of the objects to potentially apply to Production.
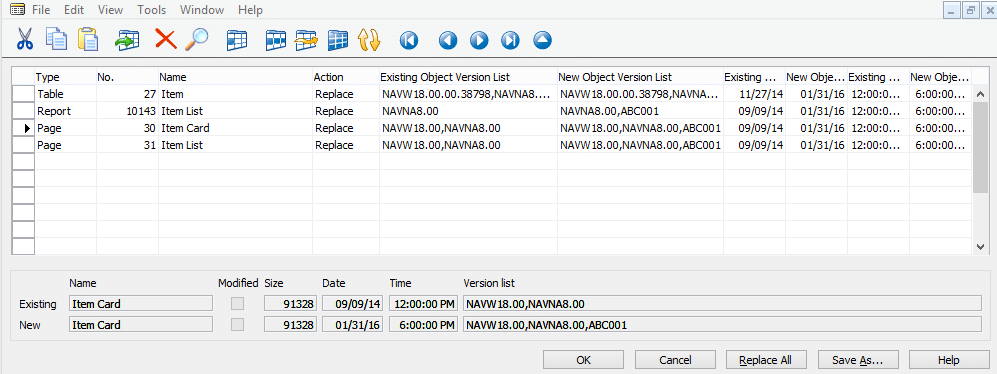
Process the Import Worksheet
As a matter of habit, always select the “Replace All” button. This will ensure that the objects imported will overwrite the existing objects – or set them to the ‘Create’ Action when they are new. Other Actions include Skip and Merge, but these should not be needed unless you are working with more complicated object movement scenarios. Note the “Existing” and “New” date and time stamp columns (you may need to show them in the worksheet). These help provide a quick view to ensure you are not potentially overwriting a recent change in Production. When comfortable with the actions, select OK.
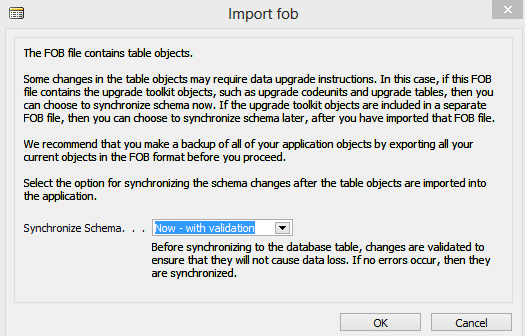
Synchronize Schema (if tables)
If tables are included in the import, select the ‘Now – with validation’ option to “Synchronize Schema” – when presented. This ensures that the server validates the changes and recognizes the same table definitions as are in SQL. If you are dropping/deleting a field for any reason, you would need to instead select the ‘Force’ option here. This option should only be used if you are 100% certain that the field you are dropping is not needed. Select OK when ready. You will be also be presented a final warning about tables. Select ‘Yes’ to this as well – which should return a Synchronize Schema Changes “State” of ‘Operational’.
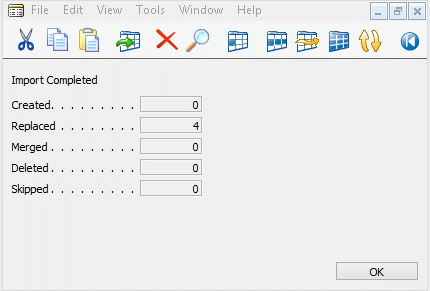
Review the confirmation message
This message provides a summary of the changes applied. Select OK to close the window.
The process to move objects in Dynamics NAV is actually very efficient once you understand and have been through these steps a couple times.
For more on Dynamics NAV Development for Non-Developers, check out the rest of the series.

Under the terms of this license, you are authorized to share and redistribute the content across various mediums, subject to adherence to the specified conditions: you must provide proper attribution to Stoneridge as the original creator in a manner that does not imply their endorsement of your use, the material is to be utilized solely for non-commercial purposes, and alterations, modifications, or derivative works based on the original material are strictly prohibited.
Responsibility rests with the licensee to ensure that their use of the material does not violate any other rights.