


EFT Payments in Dynamics 365 Business Central: Stop Relying on Paper Checks
Transitioning to EFT payments in Dynamics 365 Business Central from paper checks is an easy process once you know the steps to implement them.
In this blog, we will highlight some drawbacks of traditional check-based processes, and how you can address those by using EFT payments in Dynamics 365 Business Central. This will streamline your financial processes and enhance efficiency within your organization.
The Benefits of Implementing EFT Payments in Dynamics 365 Business Central
A crucial initial step in making this pivotal decision involves recognizing the benefits of digital payments compared to traditional check-based transactions. These advantages include:
- Increased efficiency - ACH payments (detailed below) are not delayed by mail delivery, cannot be lost, and do not require manual entry.
- Enhanced security - Payments are encrypted and secure, reducing the risk of fraud and bounced checks.
- Convenience - These payments can be made from anywhere as long as you have an internet connection.
- Easier Recordkeeping - D365 Business Central keeps track of canceled checks, which can be a hassle to do manually with paper checks.
- Cost-saving - Printing and mailing checks can be very expensive, so switching to EFT payments saves you money.
- Time-saving - Writing, processing, and clearing checks takes a lot more time than a digital system.
As you might already know, EFT (electronic fund transfers) involves the transfer of money between banks and individuals. This includes direct deposits, credit card transactions, ATM transactions, electronic checks, and automated clearing house (ACH) transactions, which we mentioned above. In this blog, we will focus on ACH payments, focusing on facilitating bank-to-bank money transfers that require you to create an EFT file in D365 Business Central and provide it to a bank.
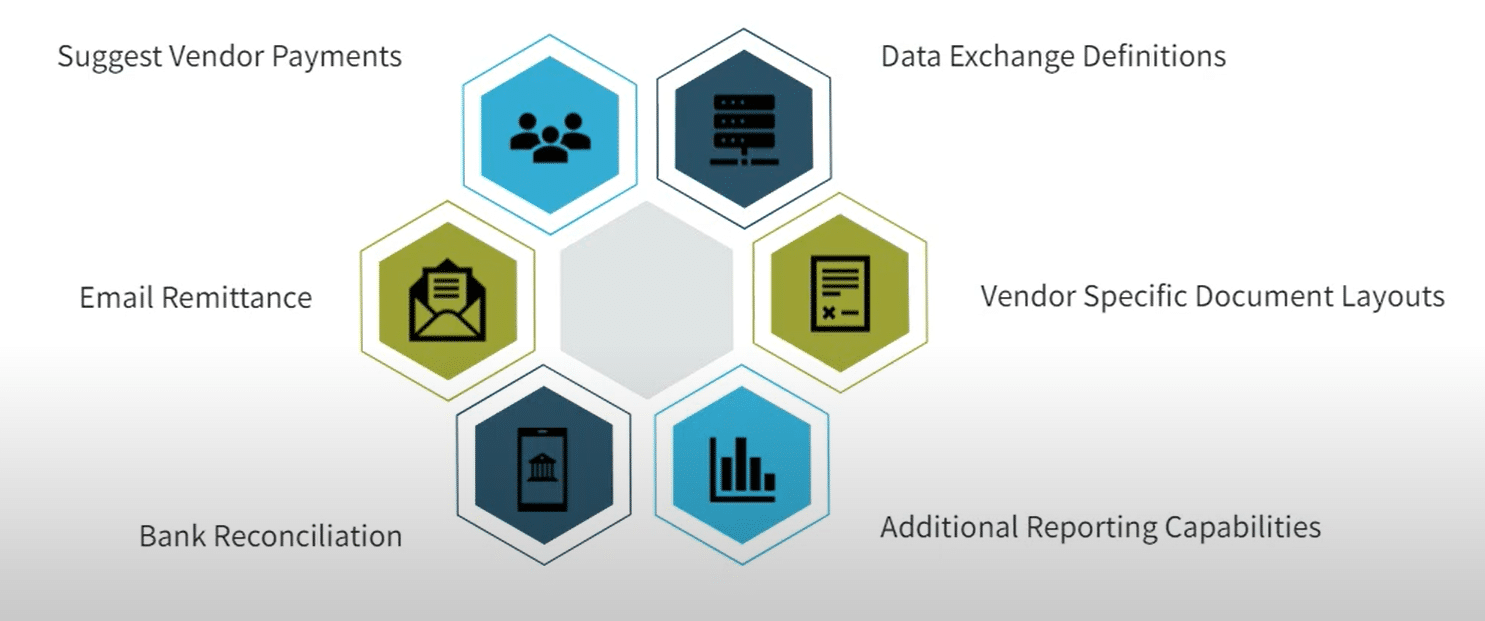
Using ACH payments in D365 Business Central also provides you with several additional advantages:
- Suggest Vendor Payments
- Email Remittance
- Bank Reconciliation
- Additional Reporting Capabilities
What You Need to Do to Set Up EFT Payments in Dynamics 365 Business Central
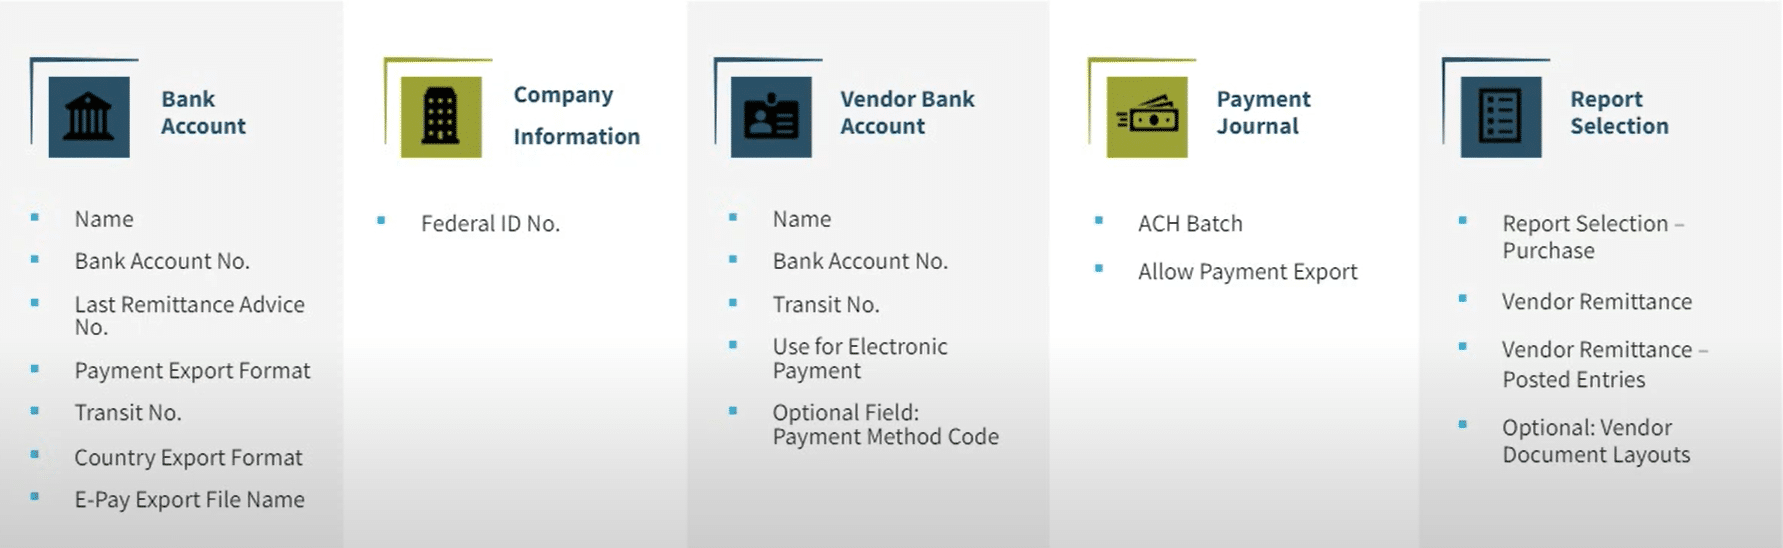
There are several configurations in Dynamics 365 Business Central you will need to set up to enable vendor payments via ACH. This involves updating bank account and company information as well as vendor bank account details. Additionally, you will also have to correctly set up specific payment journal settings and report selections to ensure that the process runs as smoothly as possible.
Here are the steps on how to do each of those:
Bank Account Settings
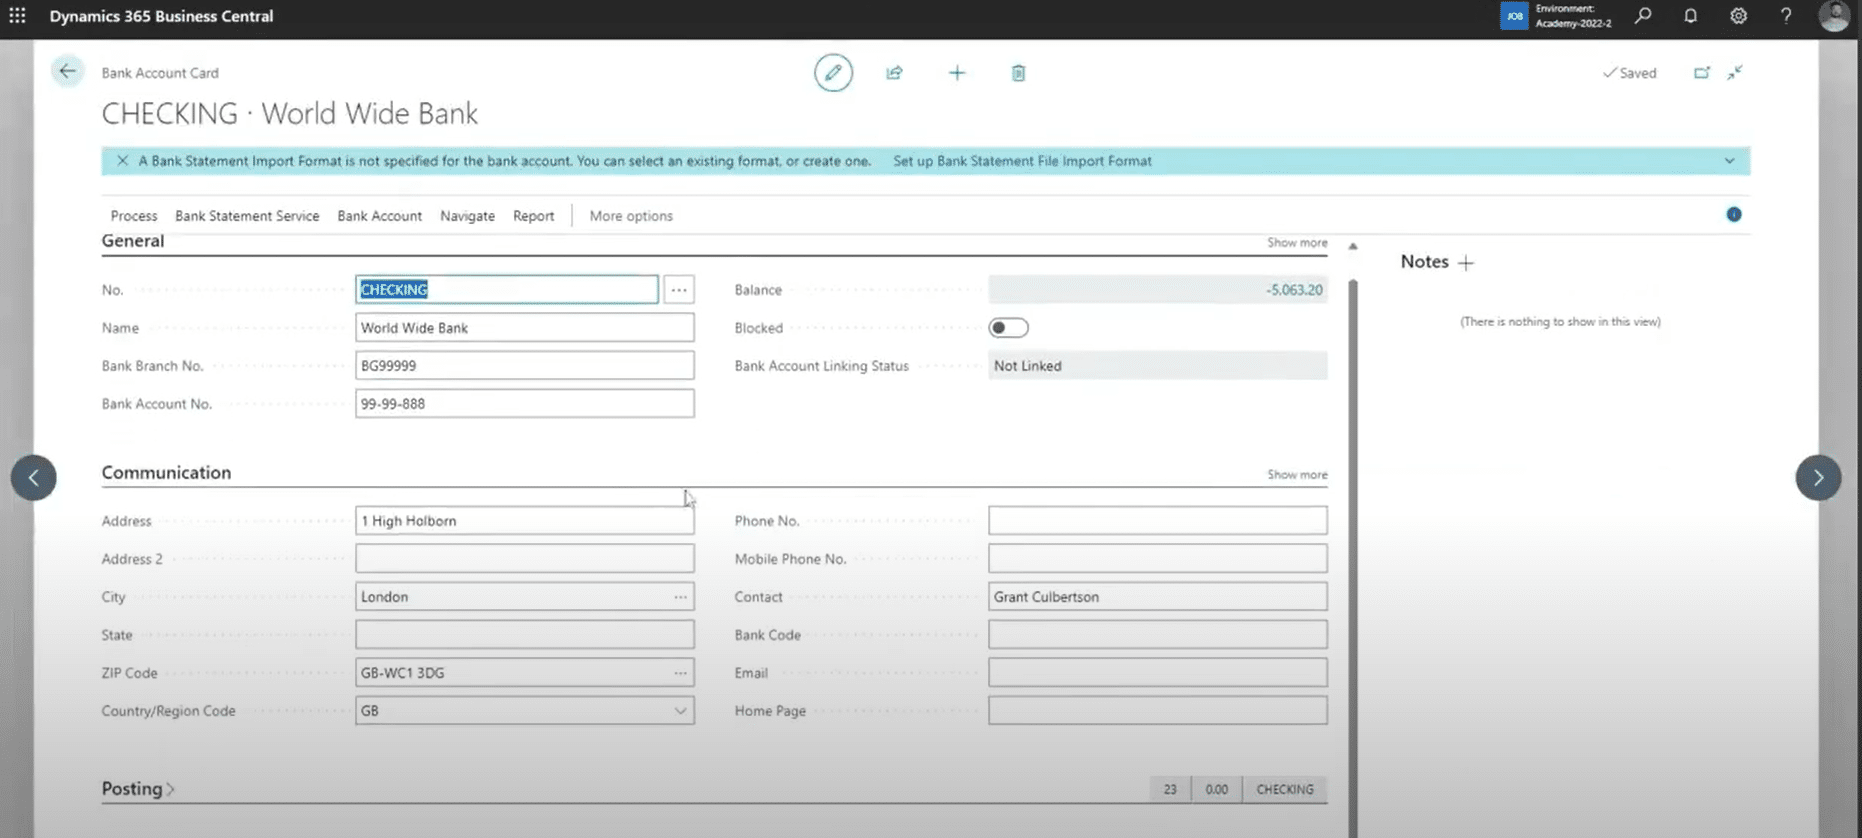
- Navigate to your Bank Account details in D365 Business Central and access the checking details.
- Enter the bank name and account number.
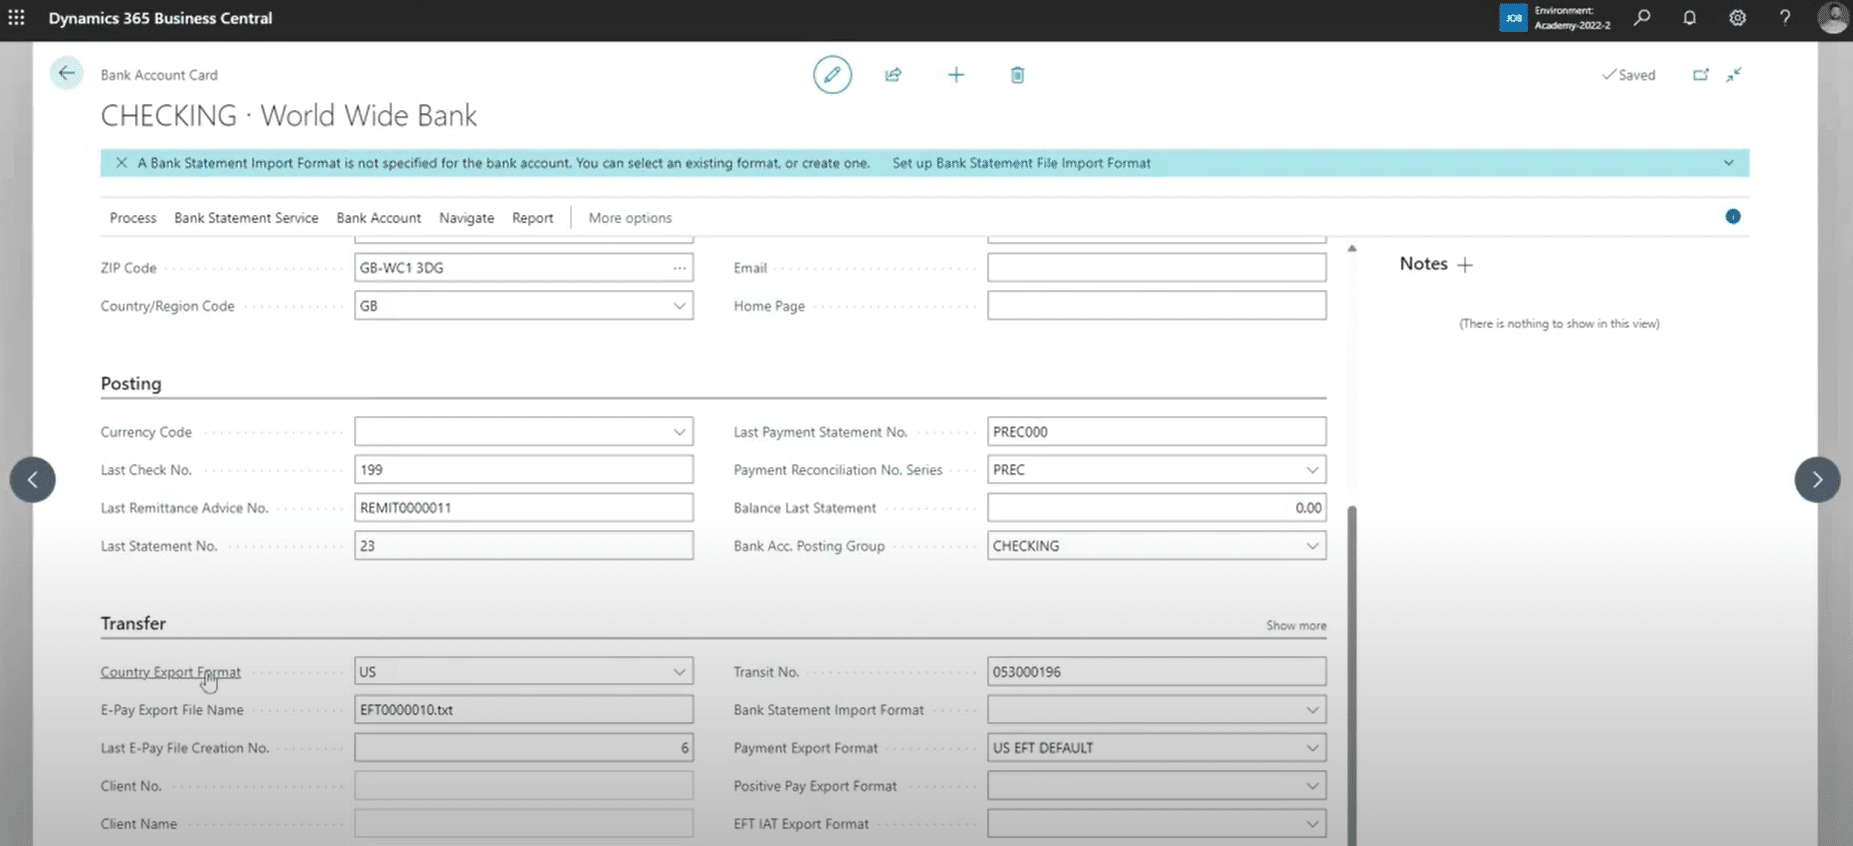
- Fill in your last remittance advice number in the Posting options.
- In the Transfer tab, specify the country export format, ePay file name, and transit number (routing number).
- Set the payment export format, customizing it if needed for your bank.
Company Information
For this, all you have to do is navigate to the Company Information section and ensure the Federal ID number is filled out properly.
Vendor Bank Account Setup
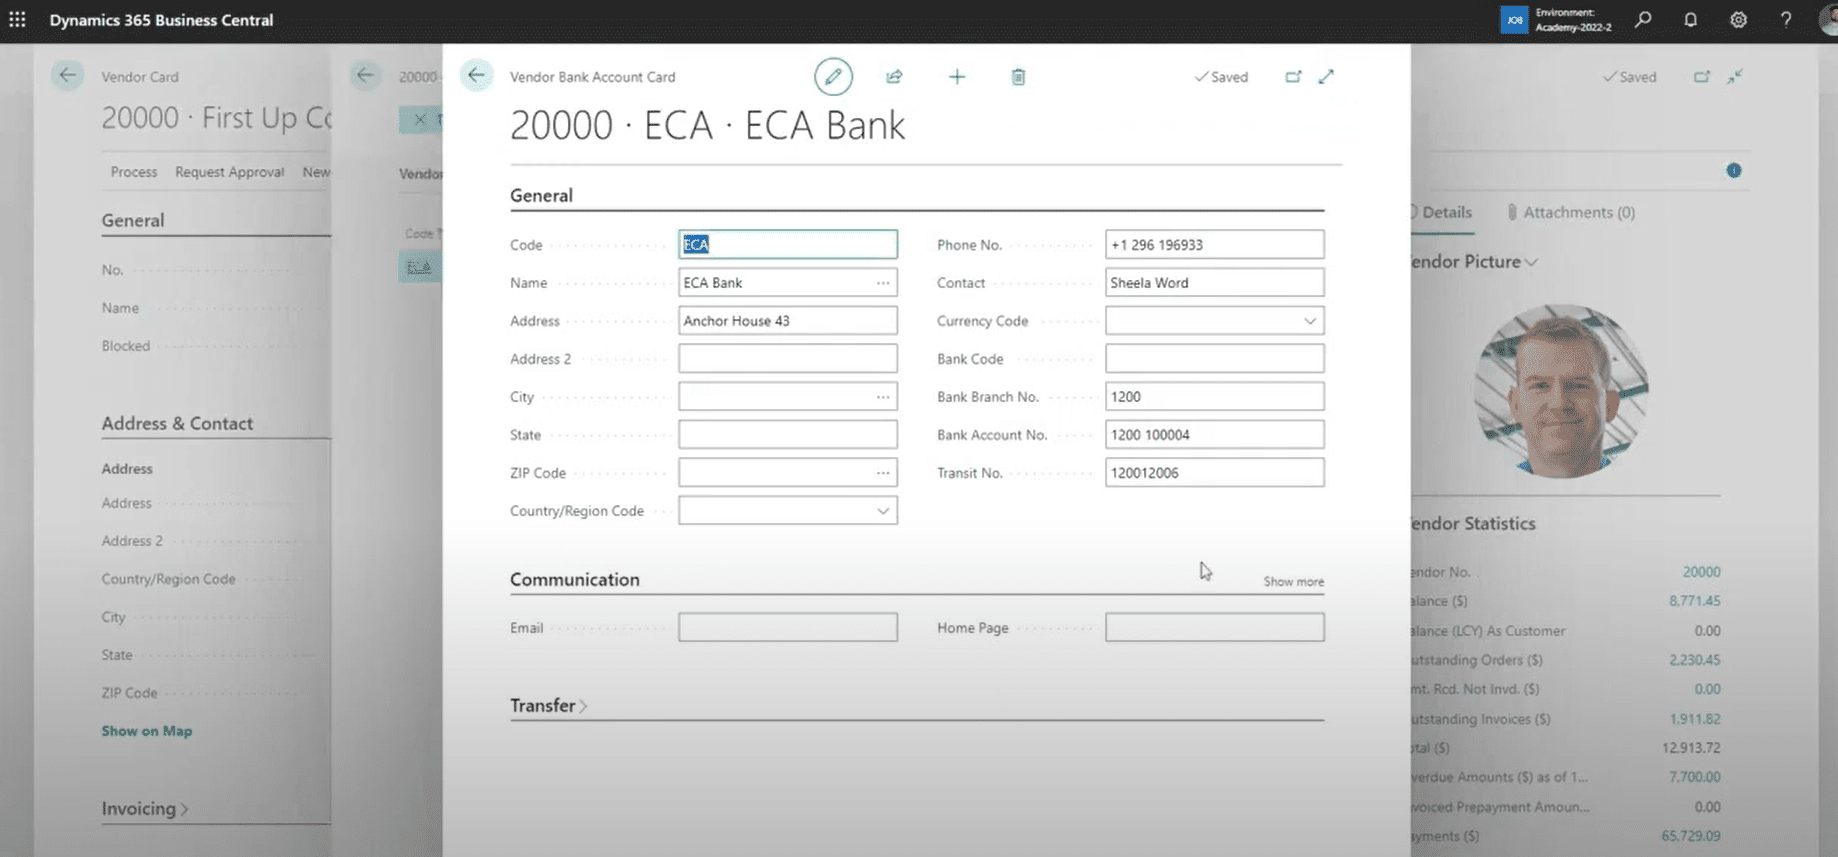
- Navigate to the Vendor tab and select a vendor card
- On the vendor bank account card, complete the required fields: bank name, bank account number, and transit number (routing number).
- In the Transfer tab, enable "Use for Electronic Payments" to facilitate ACH payments.
- Payment method codes - This step is optional, but you can set payment method codes for vendors and choose from predefined options (e.g. "Bank", "ACH", "EFT"). This can be useful for specifying preferred payment methods and filtering in reporting or payment suggestions.
Payment Journal Setup
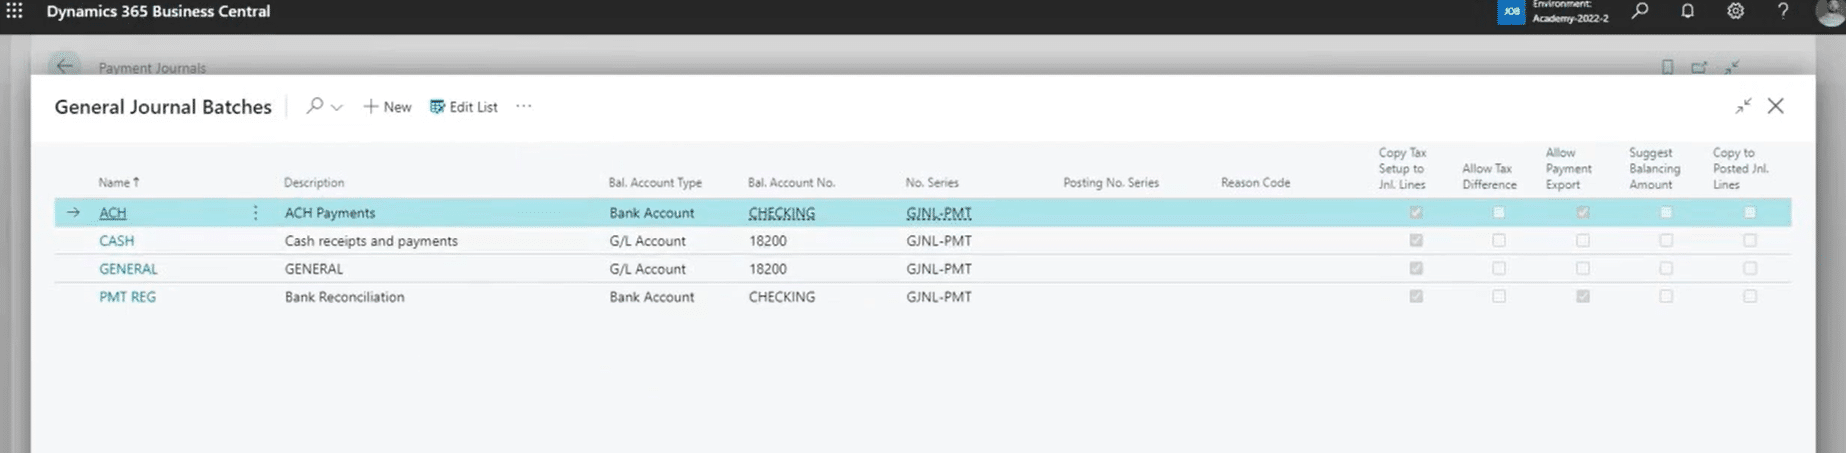
- Search for "Payment Journal" within the search feature.
- Open your Payment Journal batch settings and create a specific ACH Batch:
- Set up a dedicated ACH batch, especially if dealing with multiple banks.
- It's important to note that it is crucial to select the "Allow Payment Export" checkbox for batches intended for EFT export.
- Within the Balancing Account Configuration settings, configure the balancing account type and number in the batch settings.
- Also, for it to work correctly, be sure to choose the bank account used for processing ACH payments.
Later, you can revisit the vendor card to ensure the bank account setup aligns with the ACH batch configuration. Verify that the preferred bank account code, if defined, matches the chosen bank account in the batch.
Report Selection

There are various sections within Report Selection where you can establish settings that will help you implement ACH payments, including:
Vendor Remittance Options:
- Explore the purchasing report selection options, focusing on "Vendor Remittance" and "Vendor Remittance Posted Entries."
- Two standard report options are offered, considering using Report ID 11383 for a cleaner and visually appealing vendor remittance document.
- Note: "Vendor Remittance Posted Entries" produces the same information. You will do that after you are done posting.
Generate Vendor Remittance:
- In the payment journal, use the "Suggest Vendor Payments" feature.
- Utilize payment method codes to efficiently filter and select invoices for ACH payments.
- Update necessary batch settings and payment dates.
- Bank Payment Type: Ensure the "electronic payment option is selected for ACH payments.
- Via personalization include the "Export to Payment File" option, similar to the "check printing" process if you are using traditional paper checks. This step enables the export of the EFT file.
Export Vendor Remittance:
- Alternatively, you can personalize this option to appear next to the export function in the bank tab to make things easier in the future.
- In the Bank tab, choose "Export", ensuring the correct setup for the bank account, report selection, and journal information.
- Confirm the remittance email is configured in vendor document layouts for email functionality.
Email Vendor Remittance:
- Send the vendor remittance to the designated email address, ensuring proper setup in the vendor document layouts.
Generate EFT Files:
- After exporting the remittance, the "Generate EFT File" option becomes available.
- Access the "Generate EFT Files" function, creating text files with the defined syntax.
Post Payment Journal:
- Once you generate the EFT file, post the payment journal to finalize the payment.
Additional Features to Help You Optimize EFT Payments in Dynamics 365 Business Central
There are a few additional features we wanted to highlight that may be helpful as you navigate the world of EFT payments.
Voiding Electronic Payments in Business Central
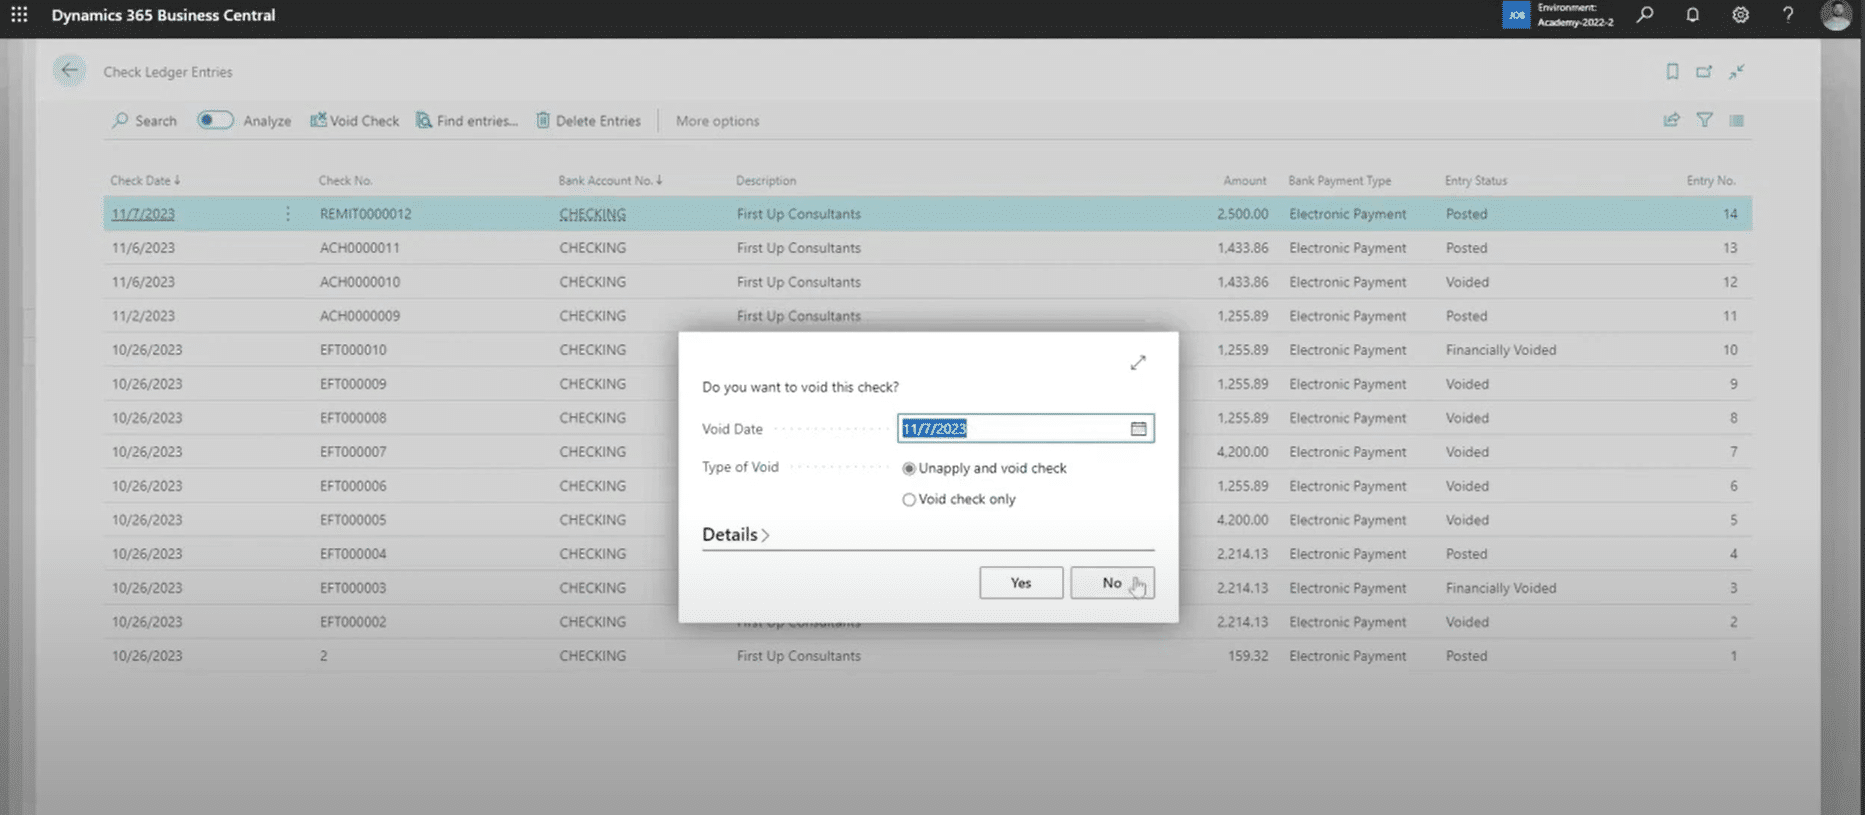
- To void an electronic payment, navigate to the “Check Ledger Entries”.
- Select the payment entry and choose "Void Check."
- Opt for "Void and Unapply" to cancel the payment, reverse journal entries, and reopen associated invoices.
This process mirrors the standard method of voiding checks in D365 Business Central and applies to electronic payments as well.
Enhanced Reporting Capabilities Updated 2023 Dynamics 365 Business Central
Lastly, there are improved reporting capabilities available within the newly updated D365 Business Central (2023) that we wanted to highlight. Within the newly released xx, you will have the enhanced capability for analyzing list information in an Excel-like format. For example, you will be able to open invoices by payment method quickly analyze different payment methods, and identify outstanding invoices, which will increase your efficiency.
Want More Information on How to Optimize Your Dynamics 365 Business Central System?
Adopting EFT payments in D365 Business Central represents more than just a modernization of payment methods—it's a strategic leap towards heightened efficiency and security. While this blog serves as an informative initial step towards unlocking the full potential of EFT payments within D365 Business Central, for a more in-depth understanding of the requirements and a seamless transition, we invite you to watch this detailed video by Brady Soderstrom, a Microsoft certified Dynamics 365 Business Central functional consultant at Stoneridge Software.
{
"@context": "http://schema.org",
"@type": "VideoObject",
"name": "Checks Suck! Save a Tree with Digital Payments in Dynamics 365 Business Central",
"description": "",
"thumbnailUrl": "https://i.ytimg.com/vi/bfXHOSOs8vY/default.jpg",
"uploadDate": "2023-11-29T17:15:42Z",
"duration": "PT28M44S",
"embedUrl": "https://www.youtube.com/embed/bfXHOSOs8vY",
"interactionCount": "18"
}
Please reach out to Stoneridge Software if you have any questions.

Under the terms of this license, you are authorized to share and redistribute the content across various mediums, subject to adherence to the specified conditions: you must provide proper attribution to Stoneridge as the original creator in a manner that does not imply their endorsement of your use, the material is to be utilized solely for non-commercial purposes, and alterations, modifications, or derivative works based on the original material are strictly prohibited.
Responsibility rests with the licensee to ensure that their use of the material does not violate any other rights.