


How to Update Dynamics 365 Business Central Data with Excel
Have you ever wished you could set up a financial report in Microsoft Dynamics 365 Business Central, export it to Excel and then keep updating the same file with new data? Do you want to save time, energy and brain cells? Well, have I got a treat for you! I’m going to show you how to update Account Schedule data, as needed, in D365 Business Central with Excel. We’ll use Business Central's out-of-the-box balance sheet as an example.
Before you get started, there are a few basic Excel skills/concepts you might want to make sure you understand:
- Create a copy of a worksheet
- Reference a cell or range of cells in another worksheet. Also called “linking cells” or “off-sheet cell reference”
- Basic cell formatting – cell borders, number format
- Hide columns, rows or worksheets
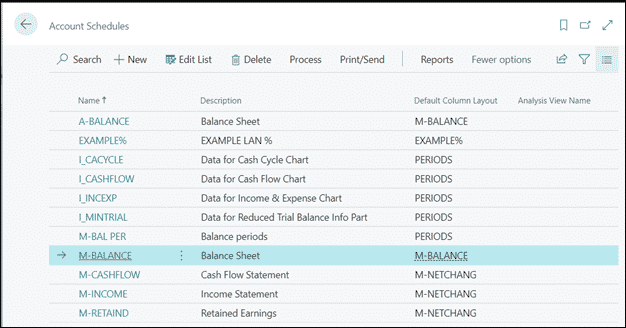
Dynamics 365 Business Central Account Schedules
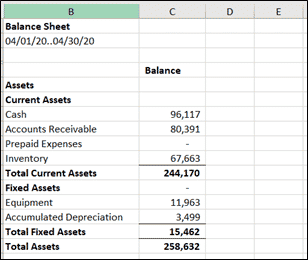
In Business Central, search for Account Schedules and open the Balance Sheet.
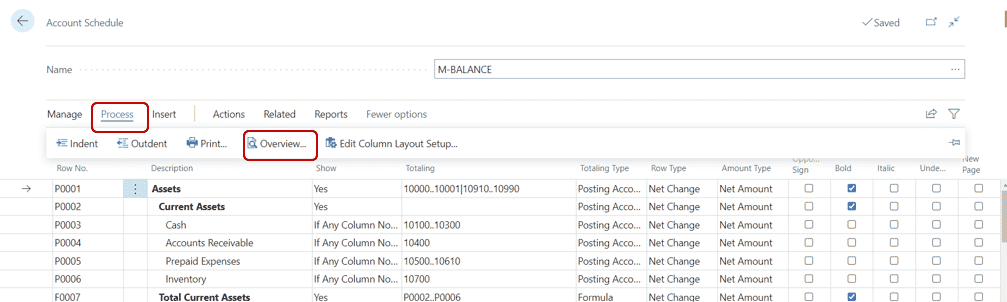
When the account schedule – balance sheet, in this example – has opened, click Process >> Overview.
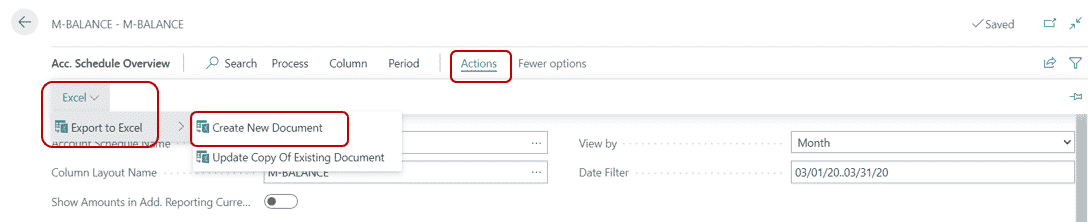
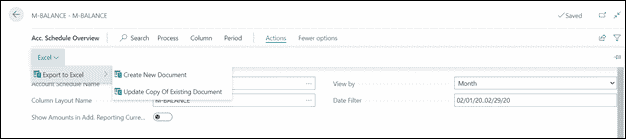
The Acc. Schedule Overview opens. Review the page and ensure filters are set as needed. Click Actions >> Excel >> Export to Excel >> Create New Document.
D365 Business Central creates an Excel file with a single worksheet using the name of the Business Central report (M-BALANCE in this example). Here’s what we’re going to do to this file:
- Excel: Enable editing
- Excel: Create a copy of the report worksheet and rename it
- Excel: Create cell references from the report worksheet to the new worksheet
- Excel: Format the report worksheet
- BC: Update the data in the Excel file
Before any changes can be made, make sure to Enable Editing in Excel –the yellow message bar at the top of the screen.
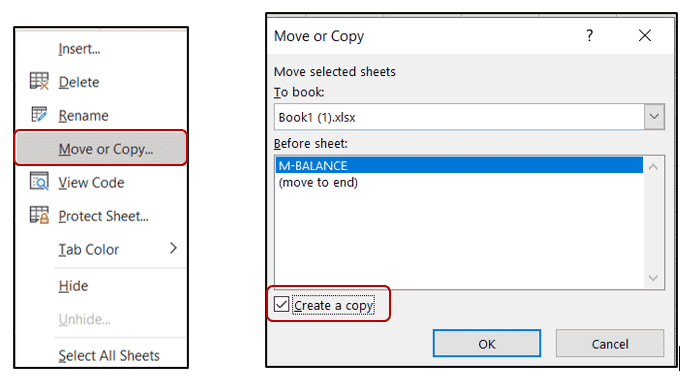
Create a copy of the worksheet. Rename it “DATA.” Ensure the new worksheet is to the left of the report worksheet.
Excel quick tip: To create a copy of a worksheet, right-click the original worksheet >> Move or Copy >> check the box to Create a copy. Right-click the new worksheet tab to rename it.
Now there are two worksheets.
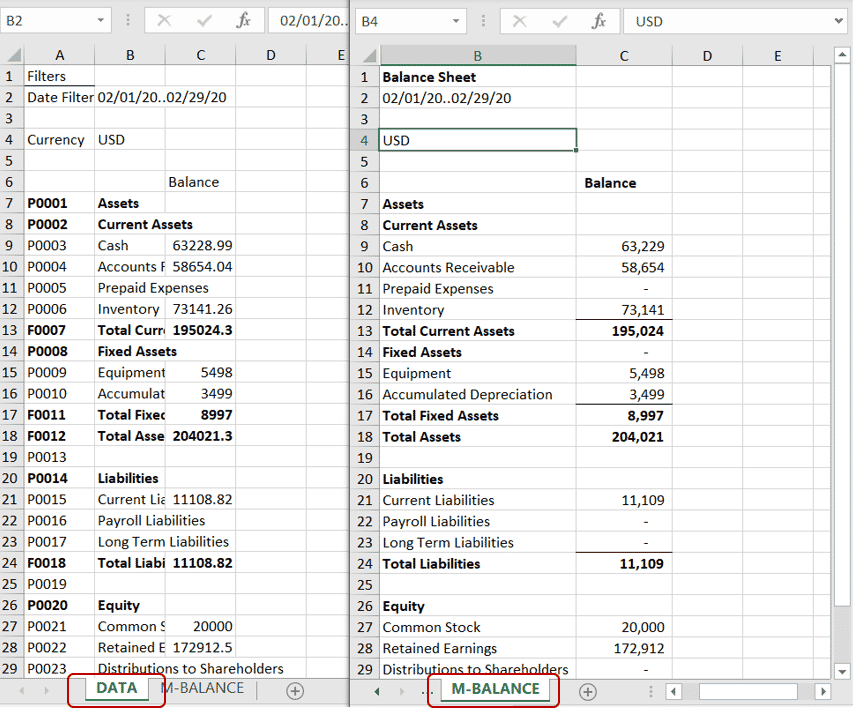
It’s important that worksheets contain the same values. To achieve this, link the cells with values from the M-BALANCE worksheet to the DATA worksheet using off-sheet cell reference. BEFORE linking the cells, change the cell format of the date range from Text to General; this is the only cell that requires a specific format.
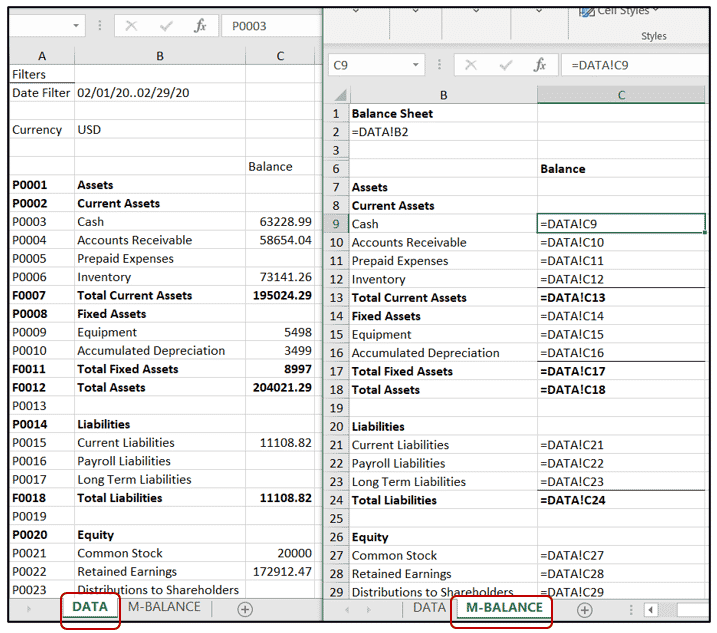
Excel quick tip: Select a cell on the worksheet that needs to be linked (M-BALANCE), type the = sign, click into the other worksheet (DATA), select the cell to link to, and hit Enter key. In the M-BALANCE cell, it will look something like this: =DATA!C2. This technique ensures that when the DATA worksheet is updated, the value in the cell on the M-BALANCE worksheet will also update.
All cells containing numerical values on the M-BALANCE worksheet should be linked to the DATA worksheet. It’s fine to copy/paste the formula down or across. The screenshot below shows the M-BALANCE worksheet referring to the DATA worksheet using Excel’s Show Formulas command.
Now that we have two worksheets (DATA, M-BALANCE) linked using cell references I’ll focus on the M-BALANCE worksheet. It’s plain, so I’m going to add some formatting.
BEFORE: It’s a little homely!
AFTER: It’s fine to hide or add rows to the report worksheet. Do not delete anything. Added a title; changed the number format; added cell borders.
When the file is formatted, hide the DATA worksheet, close the file and return to BC.
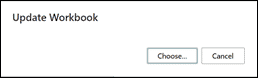
In Business Central, open the Acc. Schedule Overview page and change the date filter. Click Actions >> Excel >> Export to Excel >> Update Copy of Existing Document.
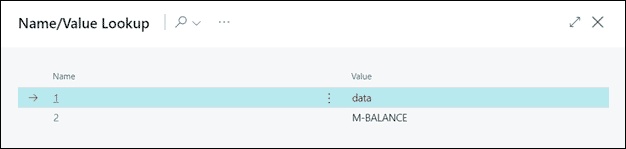
Select the file you created previously. When the Name/Value Lookup box opens, select the DATA worksheet and click OK.
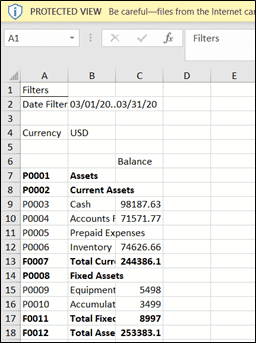
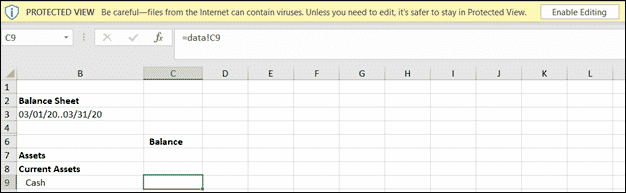
Business Central downloads a new version of the file you just created. Don’t worry that all the values are gone. Enable Editing will populate the data based on the new date range selected in Business Central.
You now know how to update an Excel file with Business Central data!

Under the terms of this license, you are authorized to share and redistribute the content across various mediums, subject to adherence to the specified conditions: you must provide proper attribution to Stoneridge as the original creator in a manner that does not imply their endorsement of your use, the material is to be utilized solely for non-commercial purposes, and alterations, modifications, or derivative works based on the original material are strictly prohibited.
Responsibility rests with the licensee to ensure that their use of the material does not violate any other rights.