


How to Use the Stoneridge Support Portal
Stoneridge Software's support portal is an intuitive and useful function that makes it easy for you to access resources to answer important questions or connect you with a Stoneridge expert who can help you find a solution.
Stoneridge Support Portal: Ease of Use for Peace of Mind
Registering for and using the portal is easy if you follow these steps:
- We will send you an invitation to access the portal to your email address
- Once you receive the email, click on the link shown in the picture below
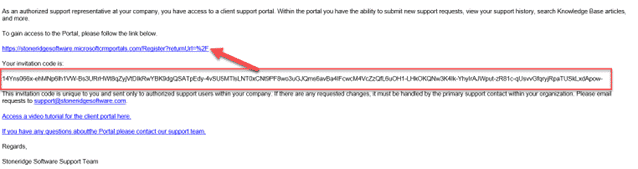
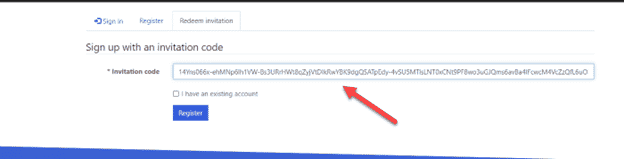
- Enter your invitation code
- Click "Register"
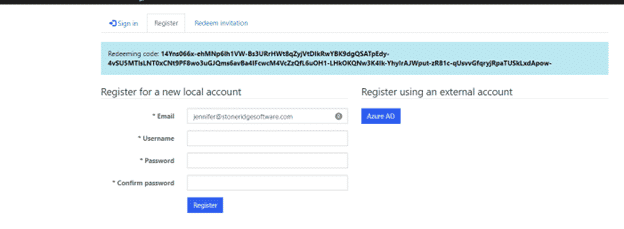
- Confirm that your email is correct
- Create a username and password
- Click "Register:
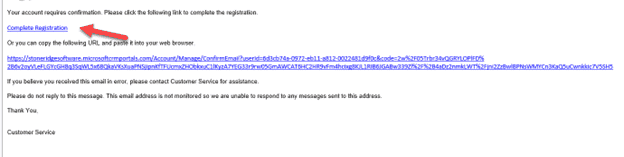
- You will then receive another email to confirm your email address
- Then you will click "Complete Registration"
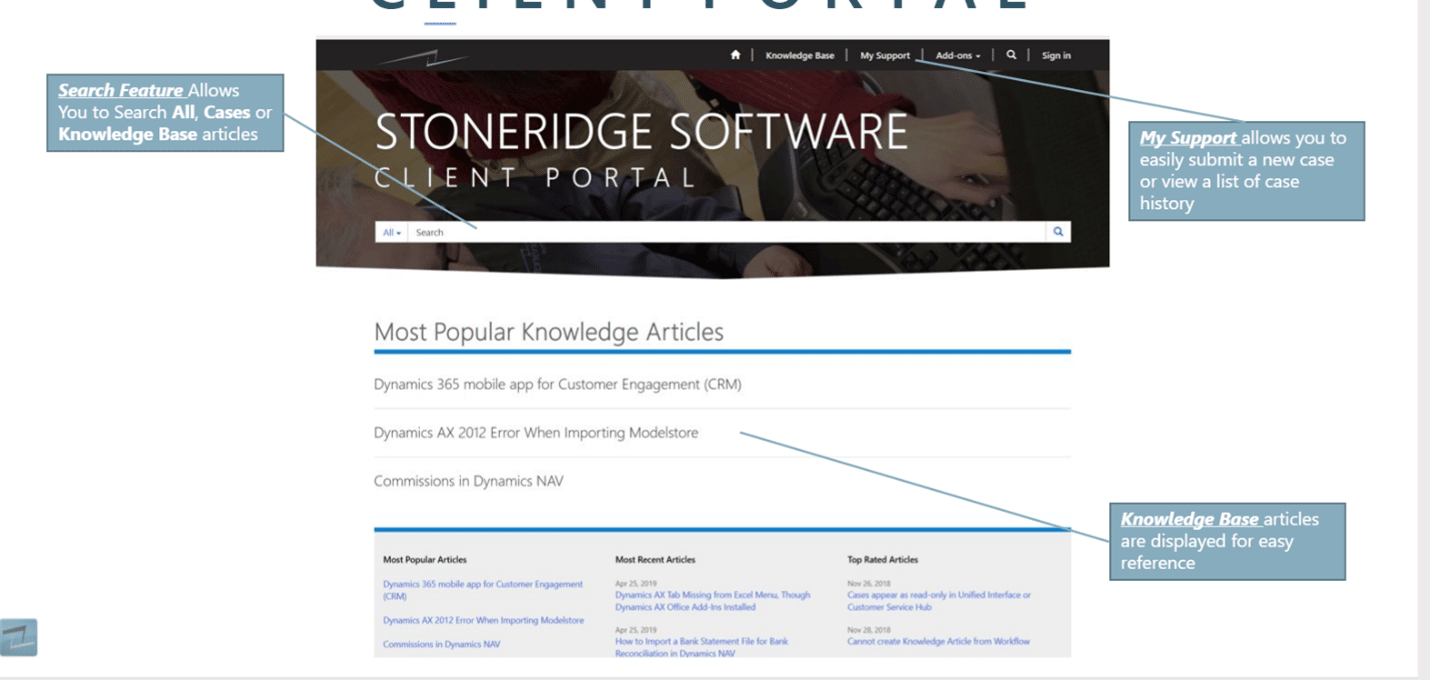
There are a lot of unique features in the portal you can use to help you on your support journey. The portal can also connect you with a Stoneridge expert or it can give you the resources to answer your questions by reading knowledge-base articles.
Stoneridge Support Portal: How to Submit a Case
Now that you have registered, submitting a support case is easy! Just follow these steps:
- Login to the support portal by going to https://portal.stoneridgesoftware.com/
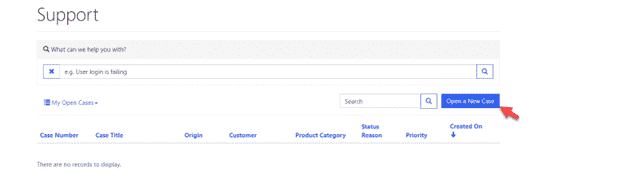
- Click on "My Support"

- Click on "Open a New Case"
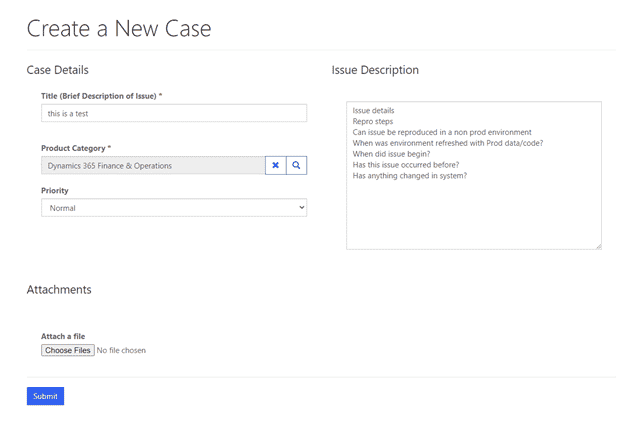
- Describe your issue in the "Description" field
- In the "Product Category" field, enter the version you are currently on
- Fill out the "Priority of the case"
- Add any attachments you might have
- Enter the "Issue Description"
- Click "Submit"
- Your case is now submitted to our support queue and assigned to one of our support consultants
- Depending on the "Priority" you set for your case, you will see one of the following commitments from us:
- Critical - Vey high or high priority
- Important - Normal or low priority

It's as easy as that! Stay tuned for the second part of this blog series, where we will give you tips on how to submit a great support ticket!
Questions?
Reach out to our team of experts if you have questions about this or any other topics regarding your business solutions.
Under the terms of this license, you are authorized to share and redistribute the content across various mediums, subject to adherence to the specified conditions: you must provide proper attribution to Stoneridge as the original creator in a manner that does not imply their endorsement of your use, the material is to be utilized solely for non-commercial purposes, and alterations, modifications, or derivative works based on the original material are strictly prohibited.
Responsibility rests with the licensee to ensure that their use of the material does not violate any other rights.