


Management Reporter – Reporting Amounts by Each Day of the Month for an Accounting Period
I had a report request in Management Reporter, to show revenue by each day of the month at the row level. I had to think about how to design it, so I could make this automatically pick up the correct days of the accounting period without going into the row or column definition and changing the dates every month.
Below is how I designed the report to deliver the customer’s request without modifying the report each month.
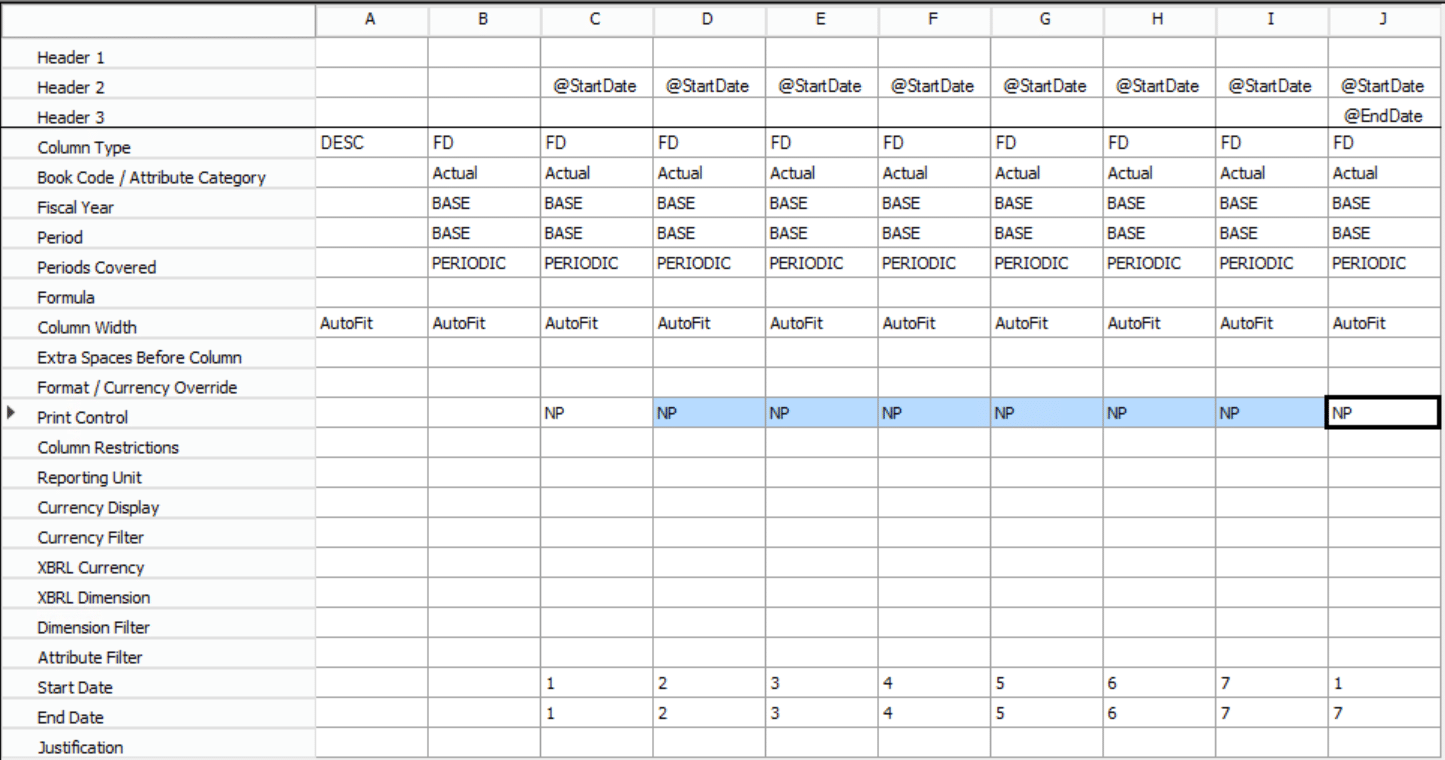
Column Definition: I created this for one week, but can easily expand it to a full month.
Key things to point out
- Column Type – ‘FD’
- Periods Covered – Periodic
- Start Date (here you are telling MR which day of the month you want in the column to start with, do not put an actual date in there)
- End Date (here you are telling MR which day of the month you want in the column to end on, put the same number as the Start Date)
- Header 2 – I added an Auto Text of ‘StartDate’ to make sure I had the correct days in the columns
* Change the Print Control to ‘NP’ (Don’t print this column) after you have verified your numbers
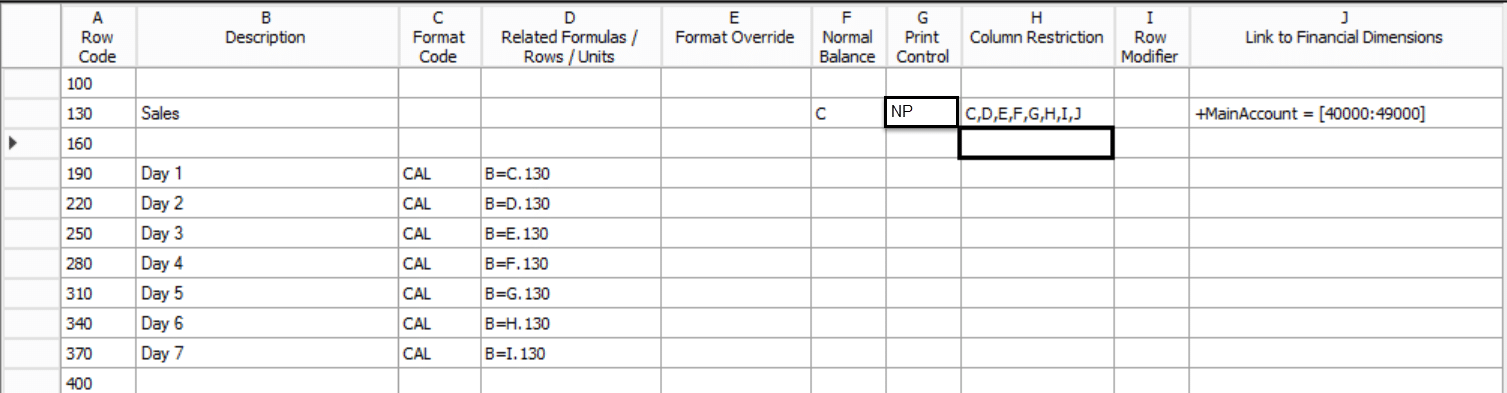
Row Definition: Because the customer did not want the Revenue going across in columns, I had to use the ‘CAL’ (calculation) Format Code to get the amounts to show in each row.
- I first had to add my Revenue accounts in Link to Financial Dimensions (J) that I wanted the information based off of
- I populated Column Restriction only because I wanted to see the numbers in the day columns for verifying the amounts to each day
- I manually added the Description (B) to what the customer wanted
- Select ‘Cal’ in the Format Code (C) column for each day
- In the Related Formulas/Rows/Units (D) add the relationship to the Column Definition that belongs in each row. Formula - B=C.130
- B – is the B column in the Column Definition where you want the amount to populate in, for the row you are on
- C.130 – C is the column in the Column Definition you want to pull in |130 – is the Row Code in the Row Definition that defines the Revenue
- As you see below, each row has a different column defined in the formula (e.g.C.130, D.130, E.130, etc…) to pull the correct day into that row
* Change the Print Control to ‘NP’ (Non-Printing) after you have verified your numbers
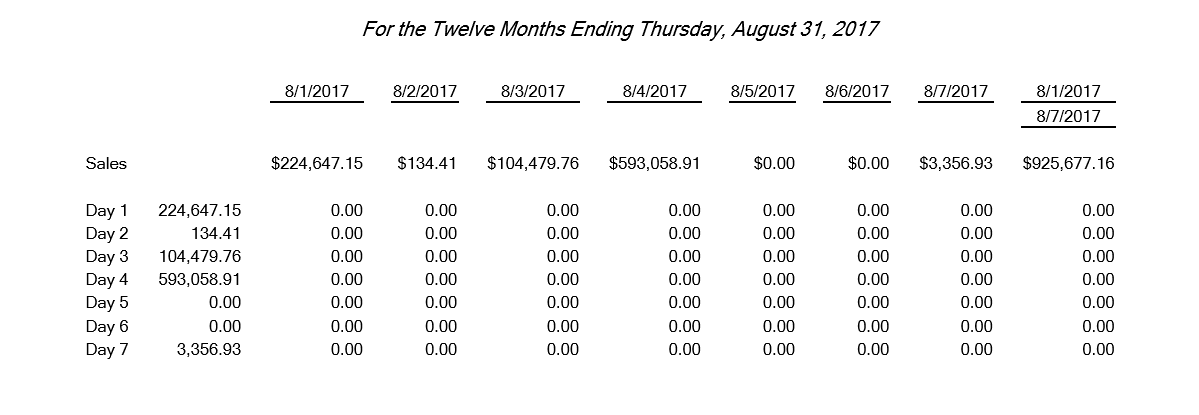
Report view to verify amounts: Before changing Print Control to ‘NP’
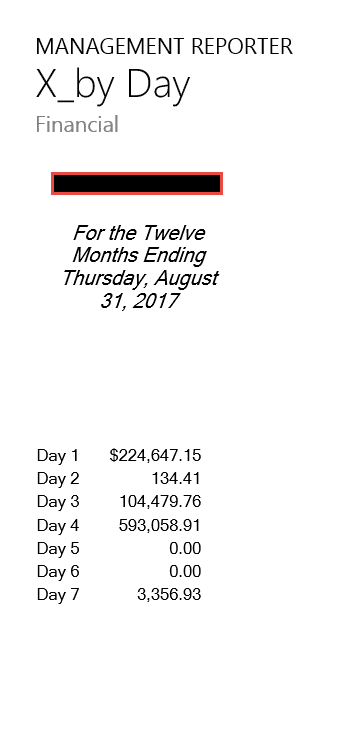
Report view of Customer’s request: After changing Print Control to ‘NP’

Under the terms of this license, you are authorized to share and redistribute the content across various mediums, subject to adherence to the specified conditions: you must provide proper attribution to Stoneridge as the original creator in a manner that does not imply their endorsement of your use, the material is to be utilized solely for non-commercial purposes, and alterations, modifications, or derivative works based on the original material are strictly prohibited.
Responsibility rests with the licensee to ensure that their use of the material does not violate any other rights.