


Managing User Groups, Permissions, and Permission Sets in Dynamics NAV and Dynamics 365 Business Central
Knowing how to deploy User Groups properly can help ensure people with defined roles in your organization are working on the right projects to get things done quickly and efficiently.
In this blog post, I will walk through the steps you need to take to create User Groups and show you how to give the people in that group-specific Permissions and Permission Sets.
Creating User Groups in Dynamics NAV and Dynamics 365 Business Central
There are two options when assigning team members to User Groups:
The first is using pre-loaded groups that Microsoft creates. These groups are available out of the box and are ready to use with permissions already assigned to them. If you find these groups already suit your business needs, then you are good to go!
The second option is to create a new User Group, which you can do from scratch or by editing one of the existing User Groups. To do that, follow the steps below.
Reminder: It is vital to test this in a sandbox environment before trying to update these things live. Thorough testing helps ensure your staff is ready and your go-live day goes off with few issues.
Step 1 - From your main screen, go to the search bar and type "User Groups", then click on the User Groups List.
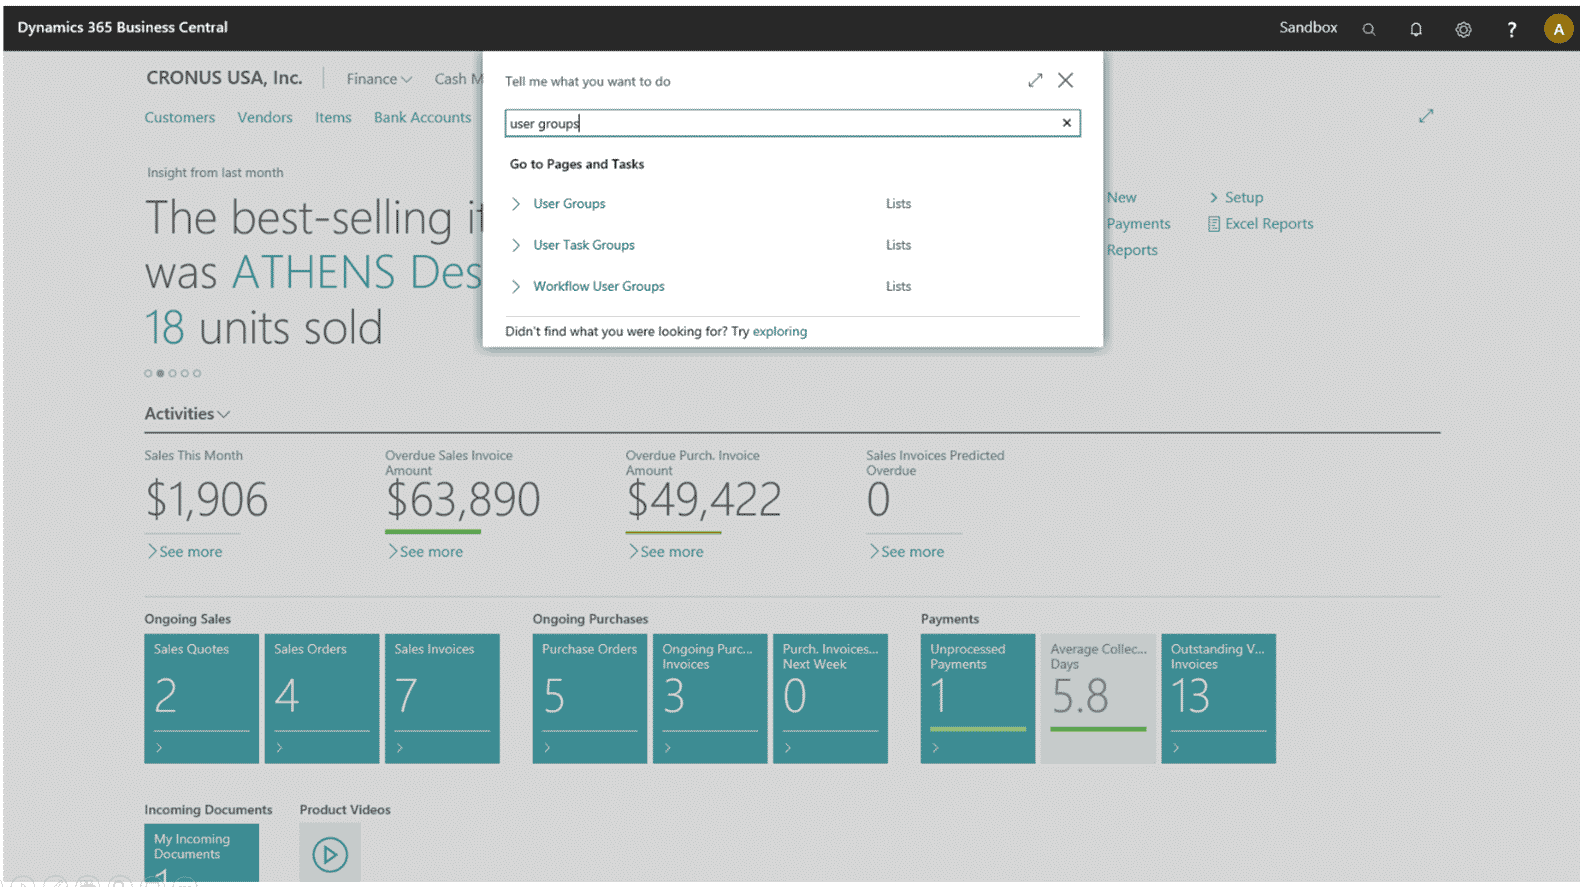
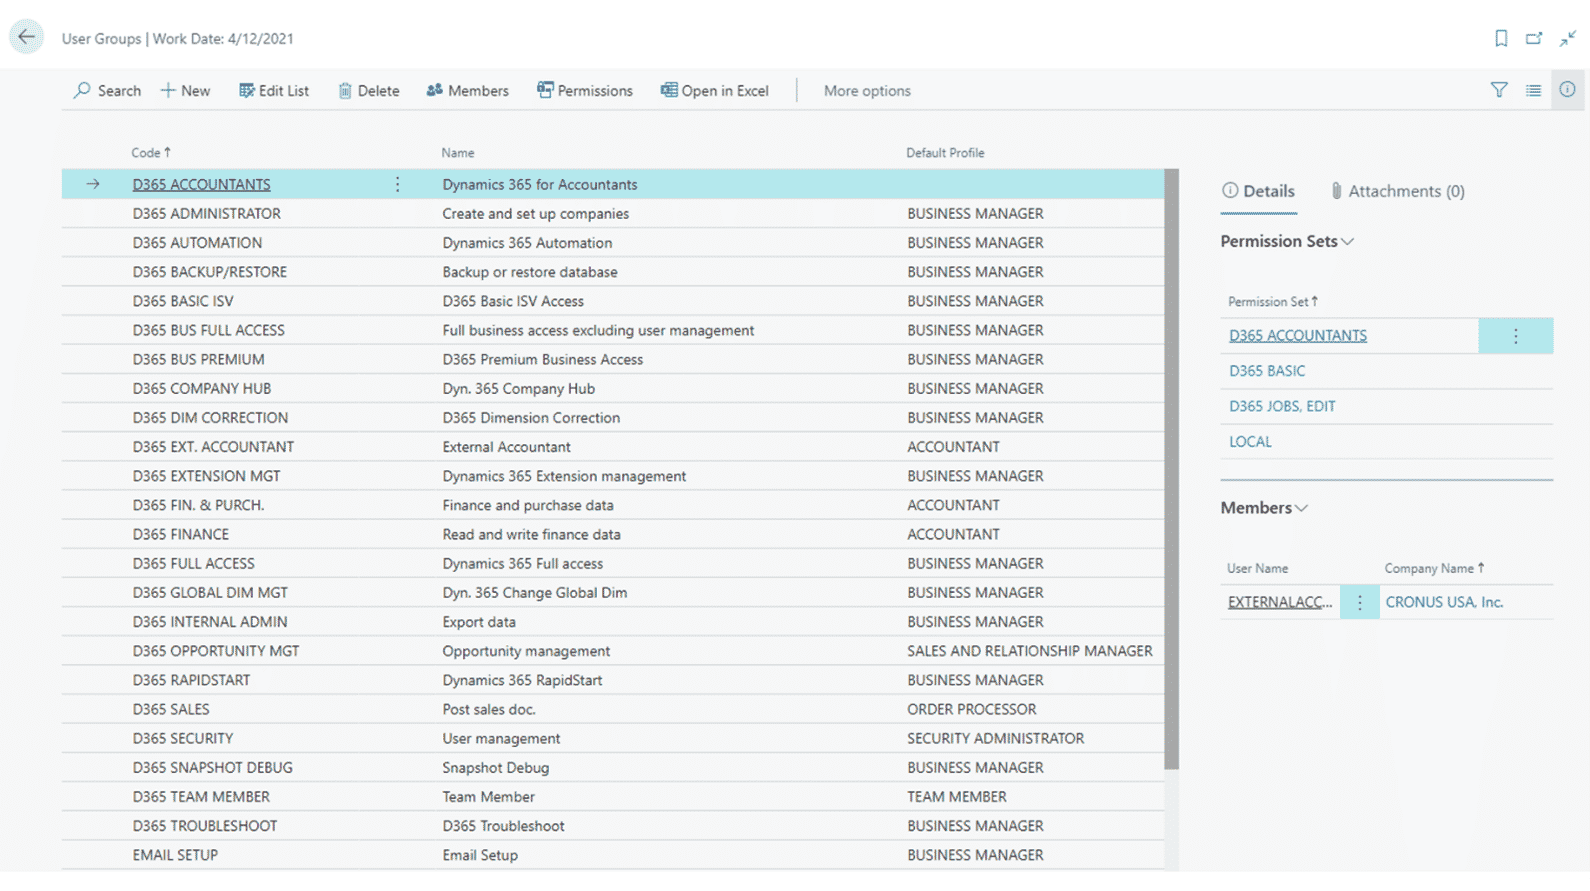
Once you’re in the list, you will see the preloaded User Groups created by Microsoft. From there you can either create a new one or you can click on one of the preexisting groups to edit it.
On this screen, you can add or delete groups, view members, and identify which permissions and permission sets apply to each group.
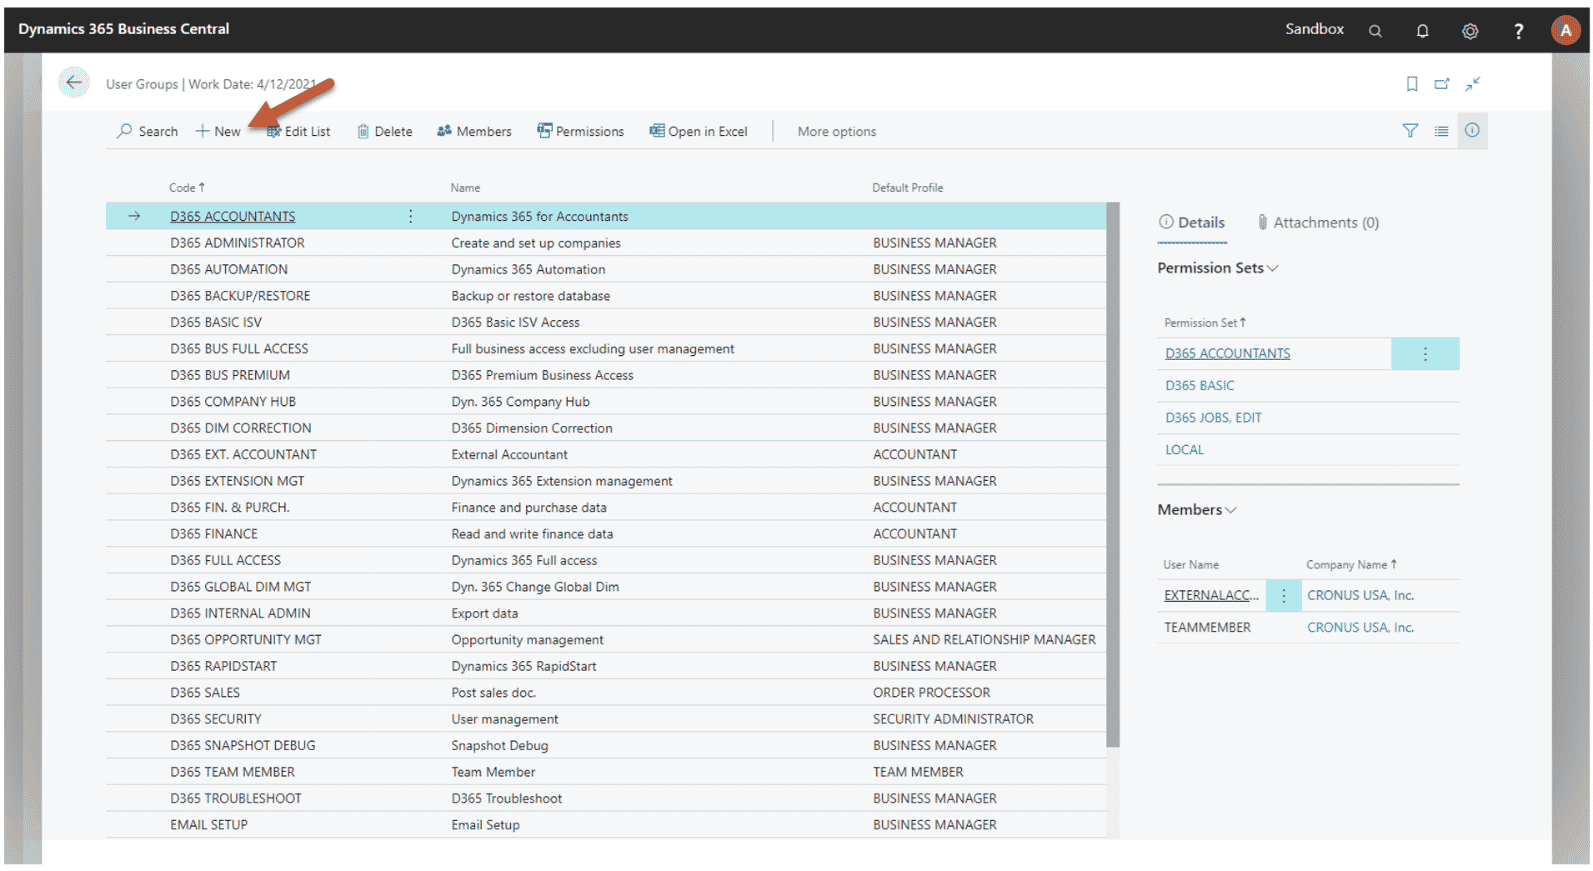
2 - Create a new User Group by clicking the +New button on your top ribbon.
3 – Enter the information for your User Group. This includes naming the group, adding users, and assigning names to users based on their roles. For this example, we are going to use the name CRONUS USA Inc.
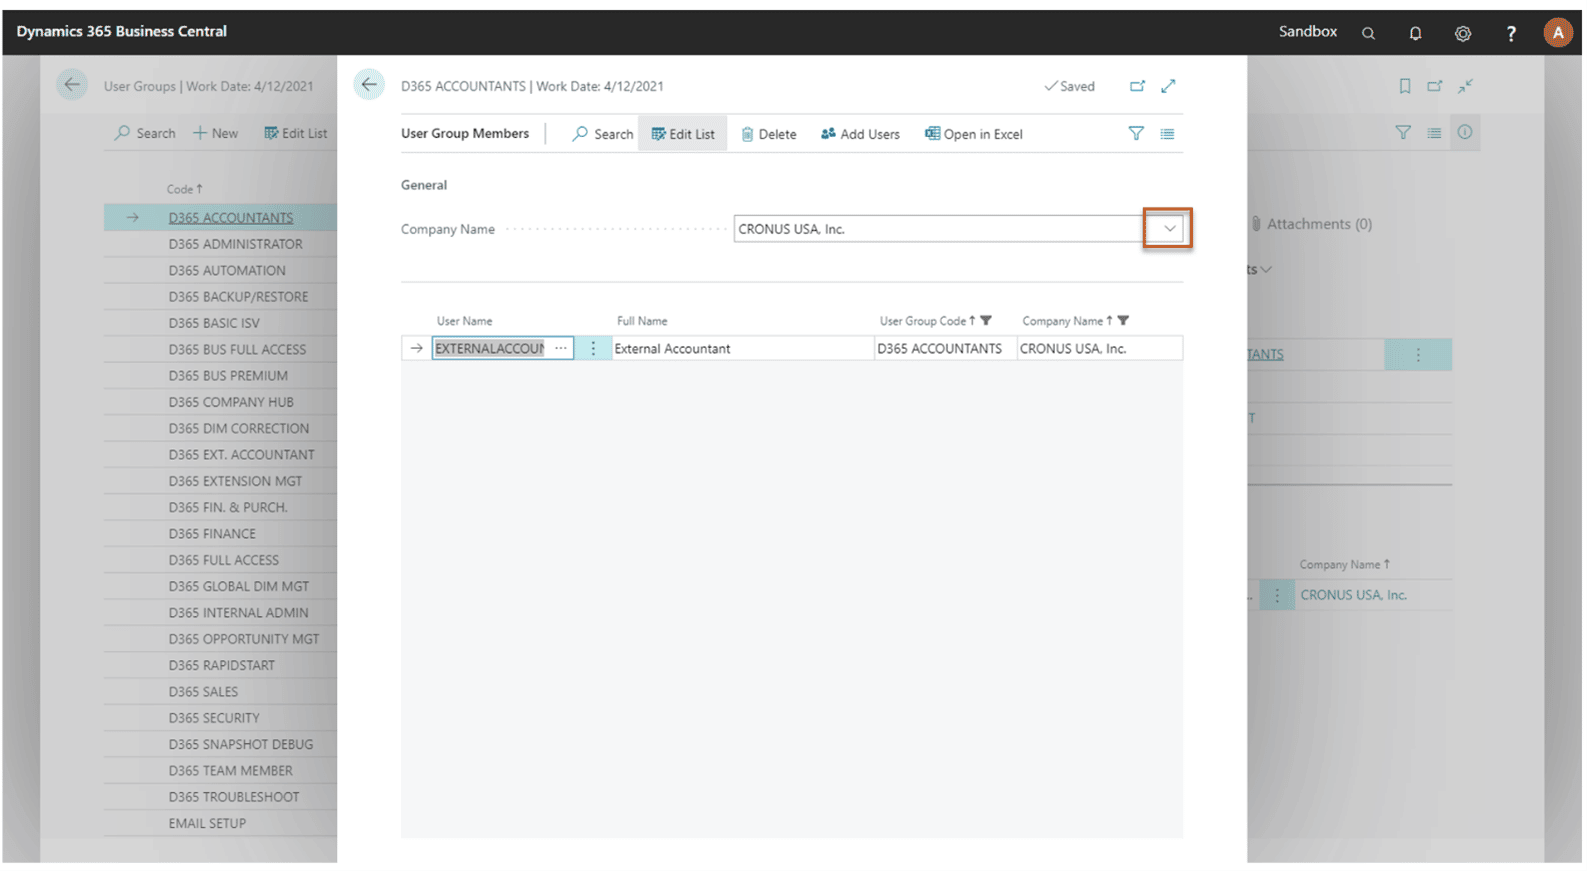
4 - Hit save and your User Group will be updated or created!
Managing Permissions and Permission Sets in Dynamics NAV and Dynamics 365 Business Central
Now that your group is created and you have assigned team members to it, you can edit permissions and permission sets. Before we get into that, let’s briefly go over why these two things are important.
Permission Sets are assigned to users based on functional areas within the application you’re using. For example, if you have an Accounts Payable User Group, you will want to assign several permission sets to them as they may be managing users, posting payment journals, or printing checks. These tasks will require different permission sets.
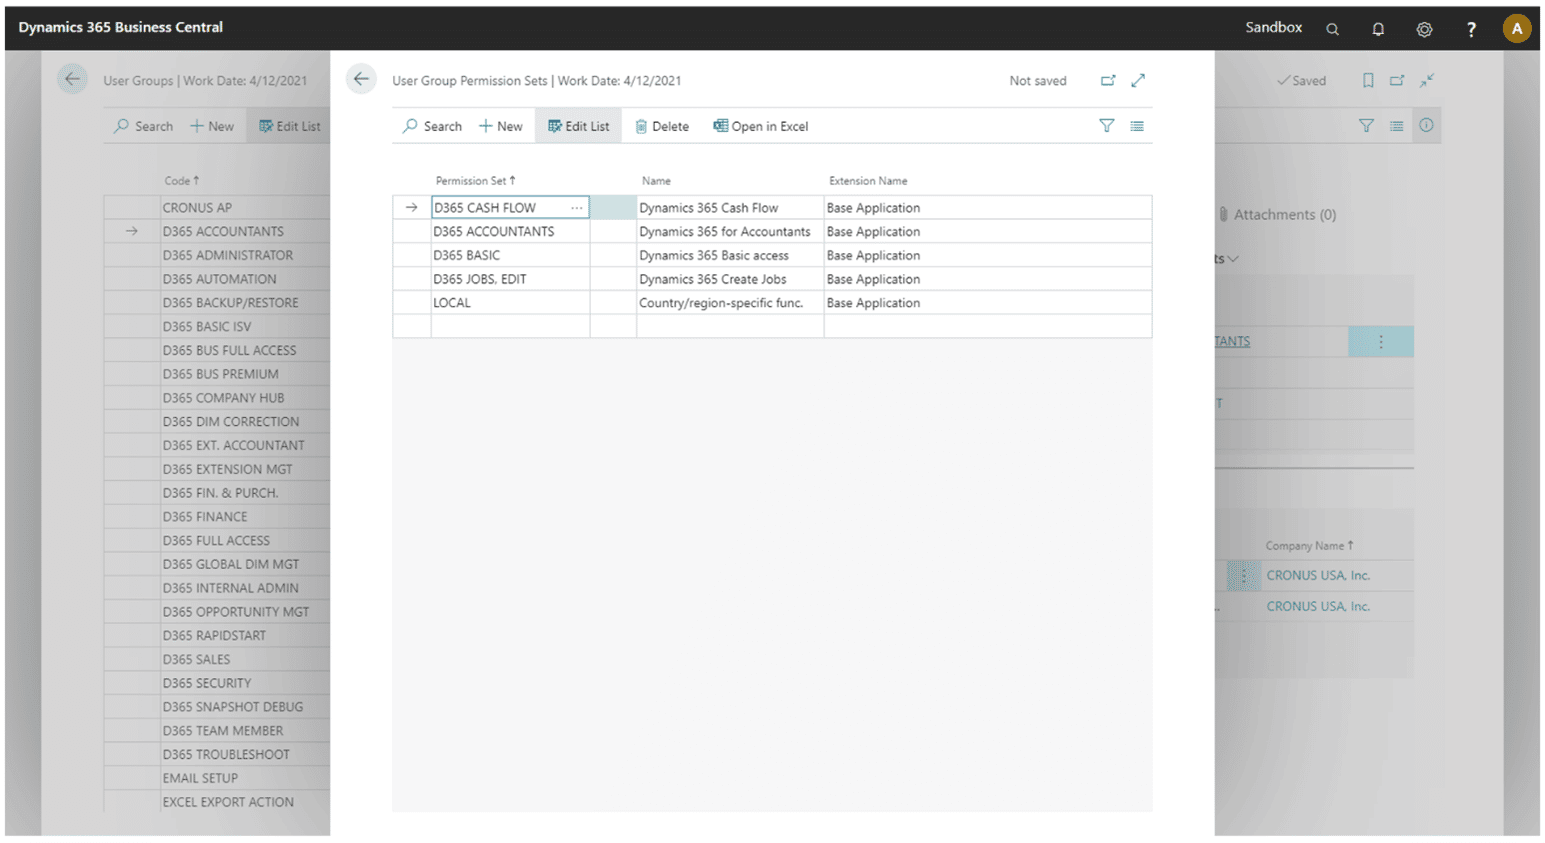
If you return to the User Group list, you will see which permission sets have been assigned to which groups on the right-hand side of your screen.
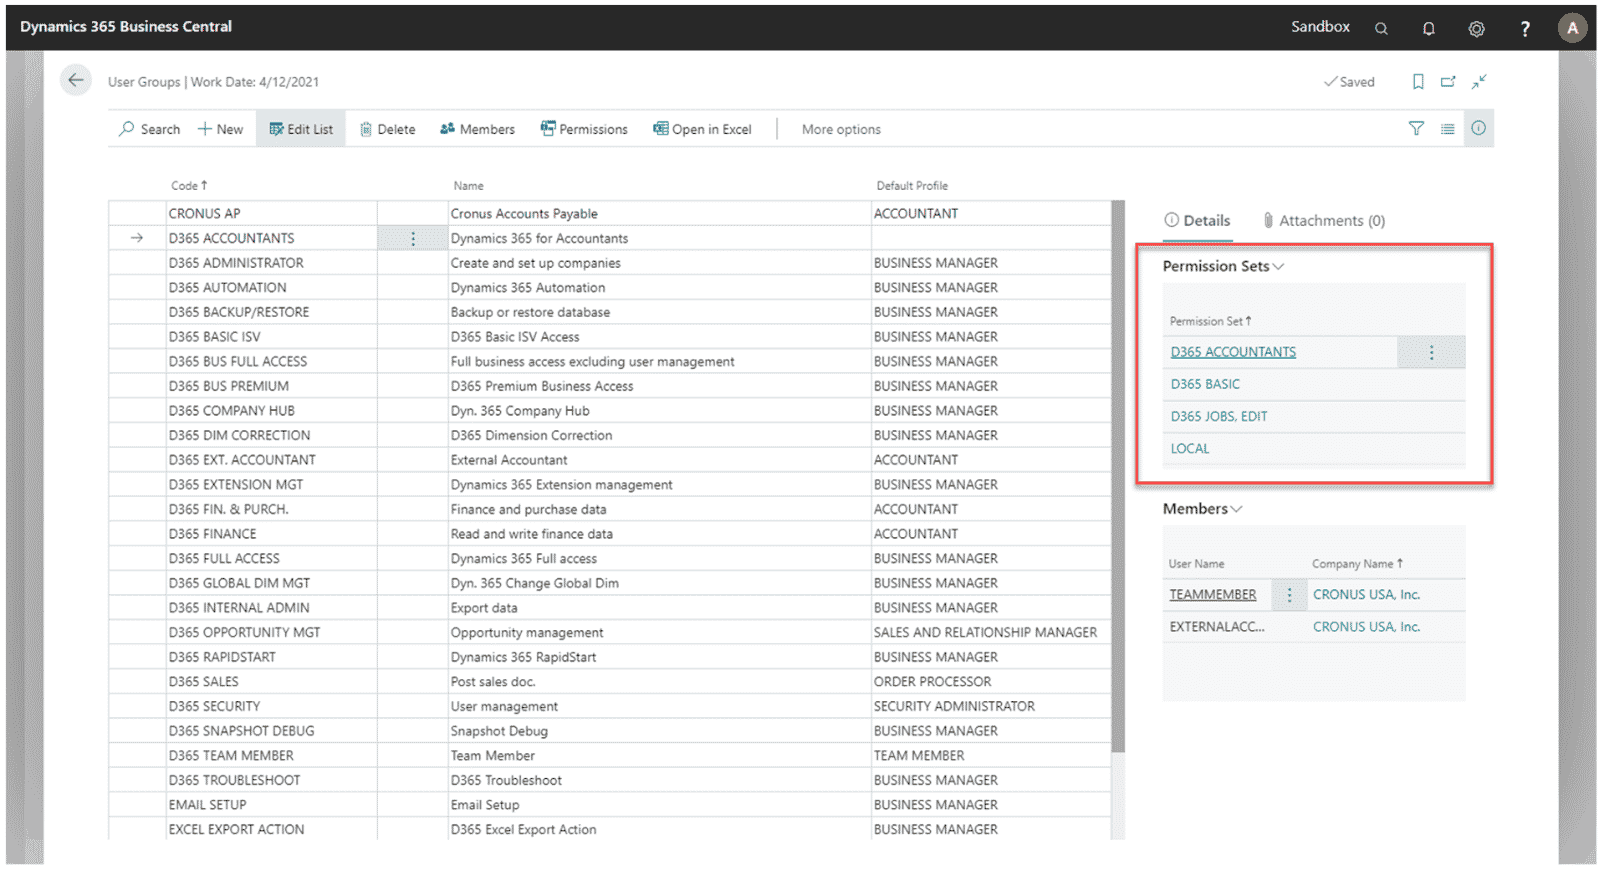
Many of the preloaded User Groups come with Permission Sets assigned to them. If those are good for your team, you don’t need to make any changes. If they aren’t, you can create new custom Permission Sets as well.
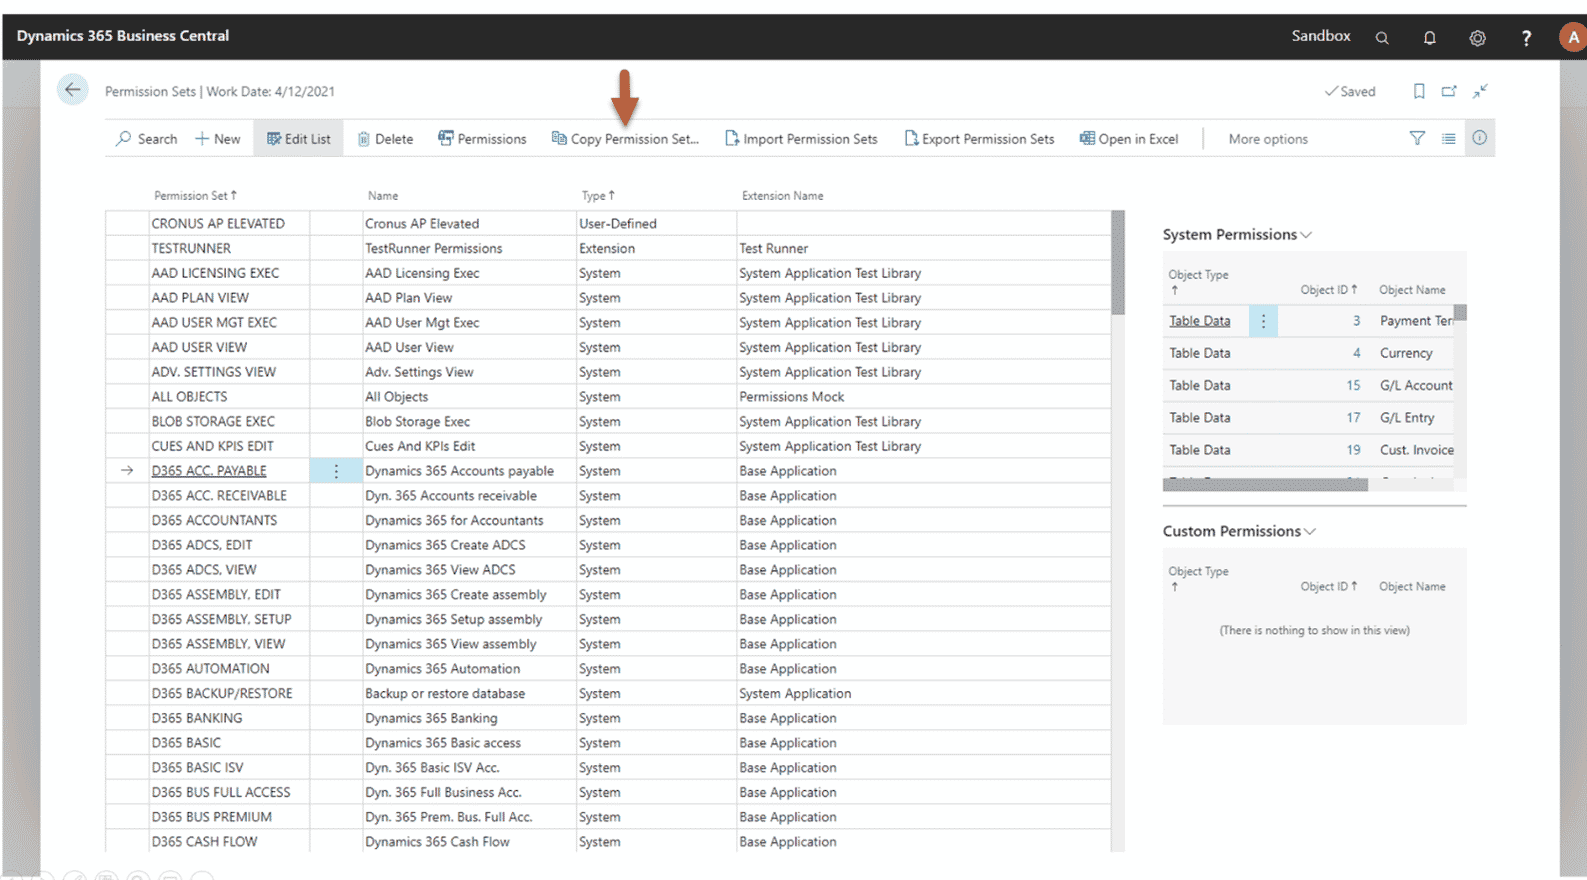
Note: Out-of-the-box Permission Sets cannot be modified, but you can copy them and apply them to new custom Permission Sets.
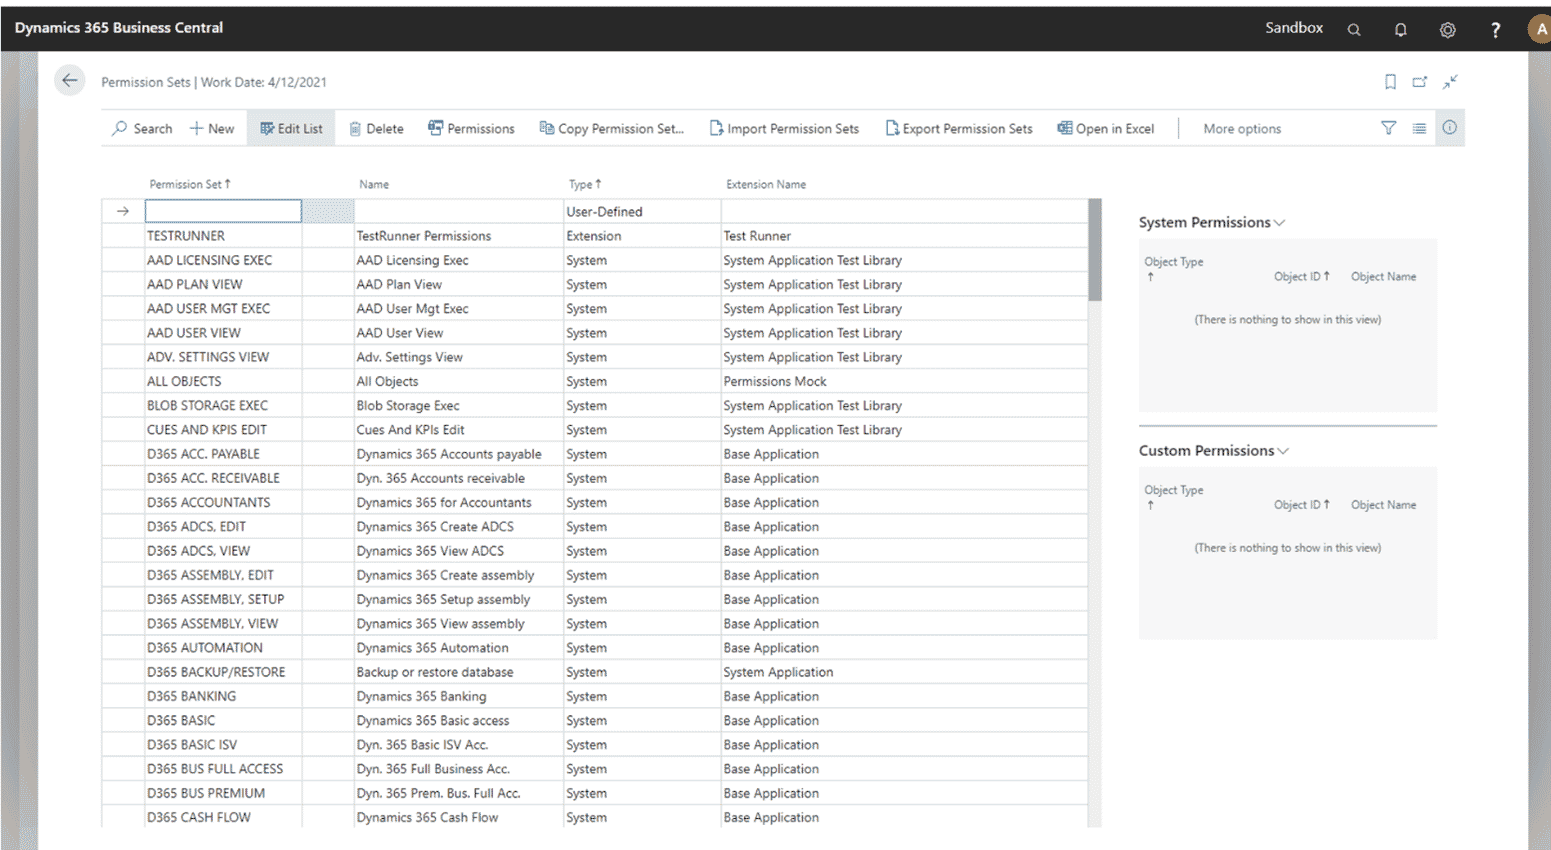
To edit the Permission Sets you’ve either created or copied, click on the “Permissions” tab in your top ribbon.

Once you are in the Permissions window, you can add, create new, and copy existing permission sets assigned to a specific group or user.
The photos below demonstrate how to add an existing Permission Set:
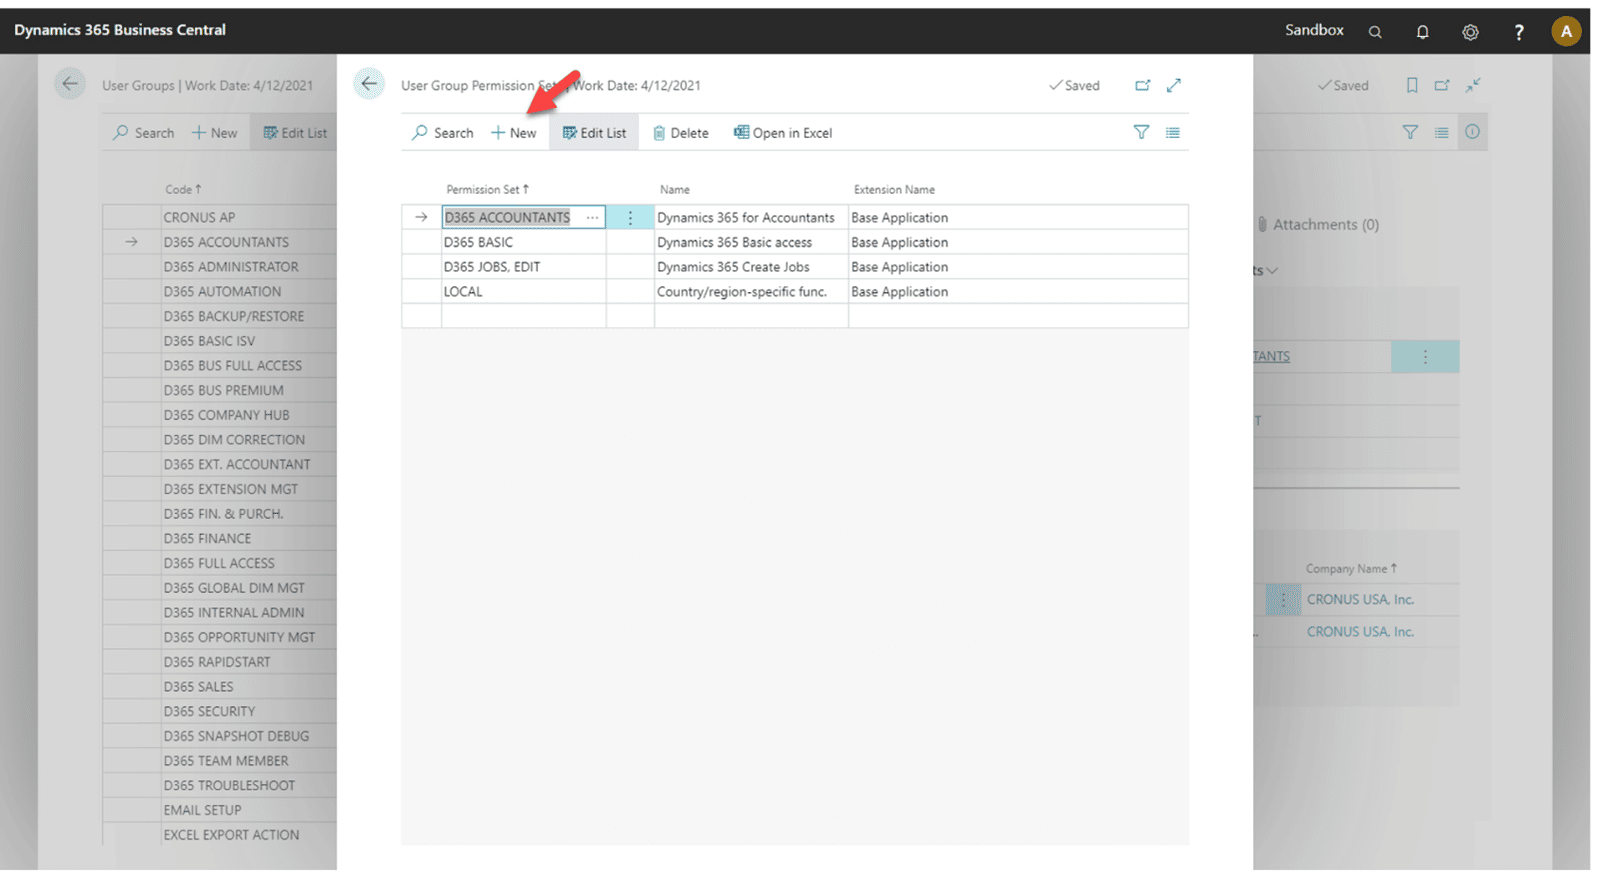
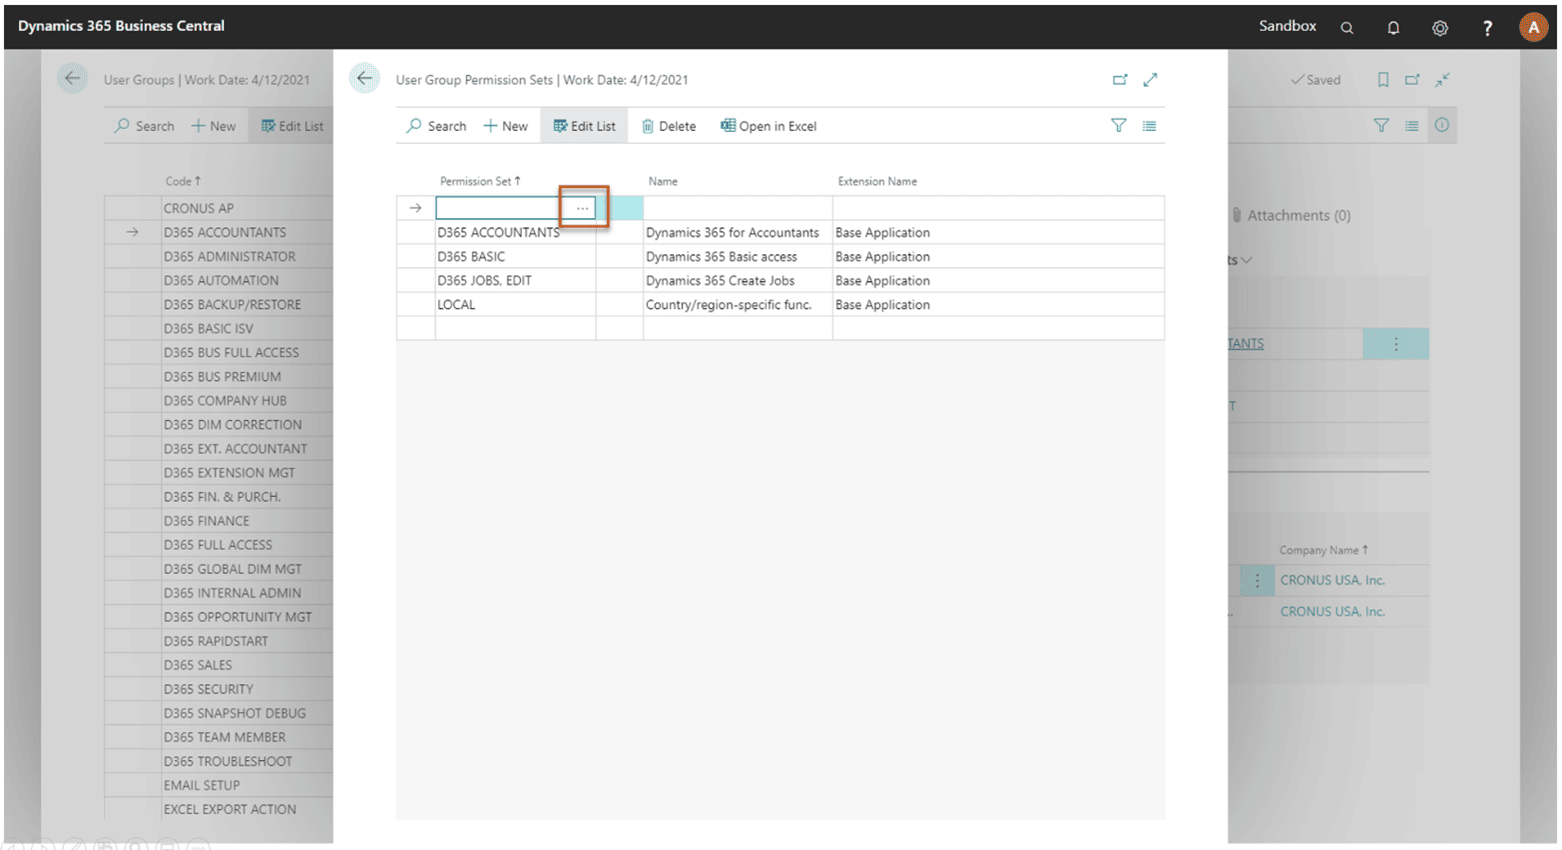
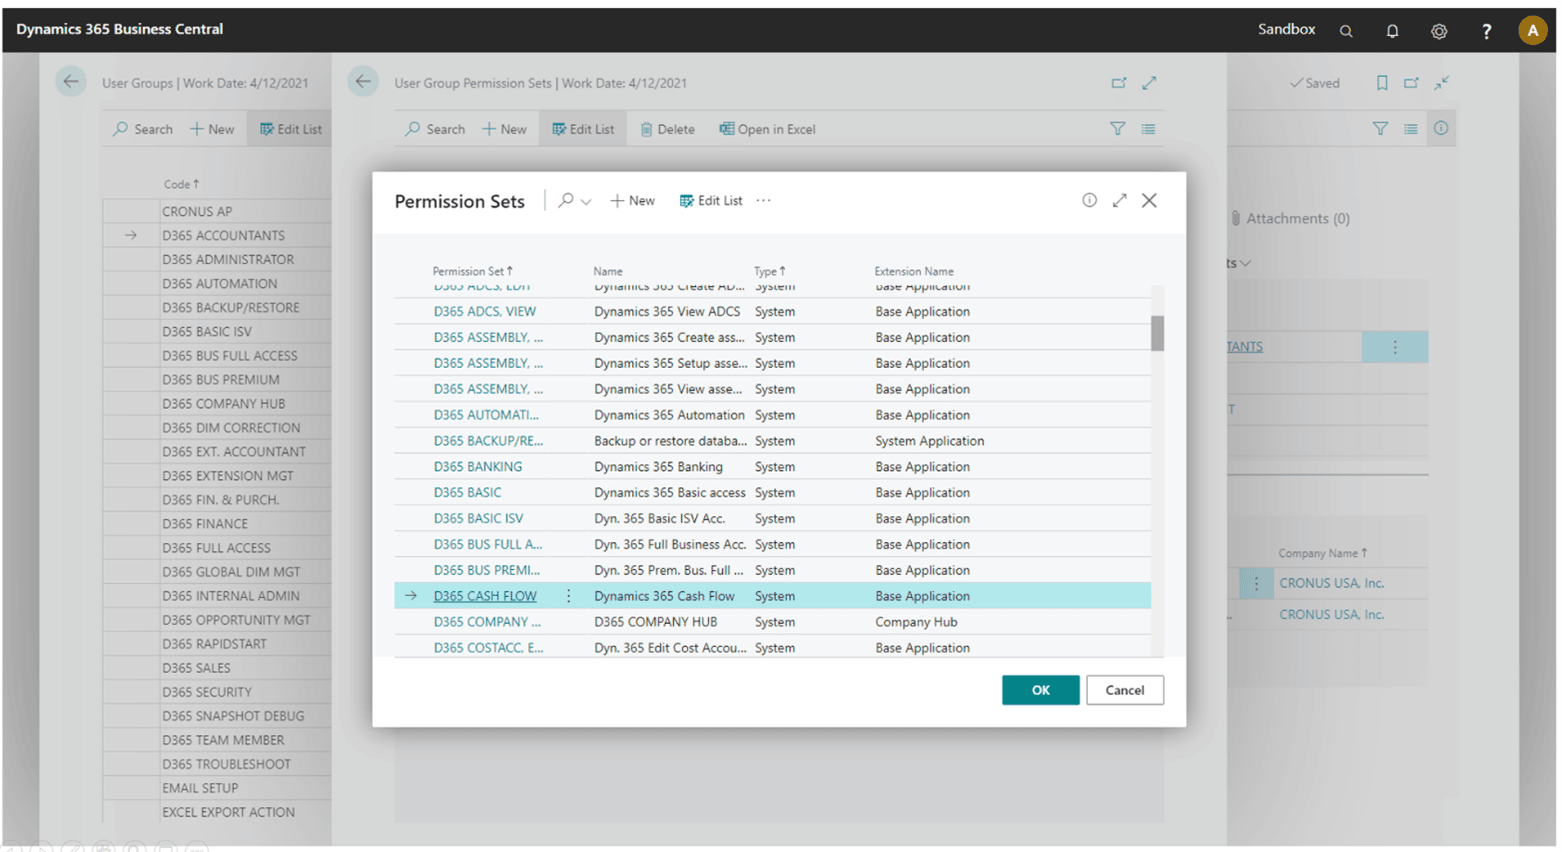
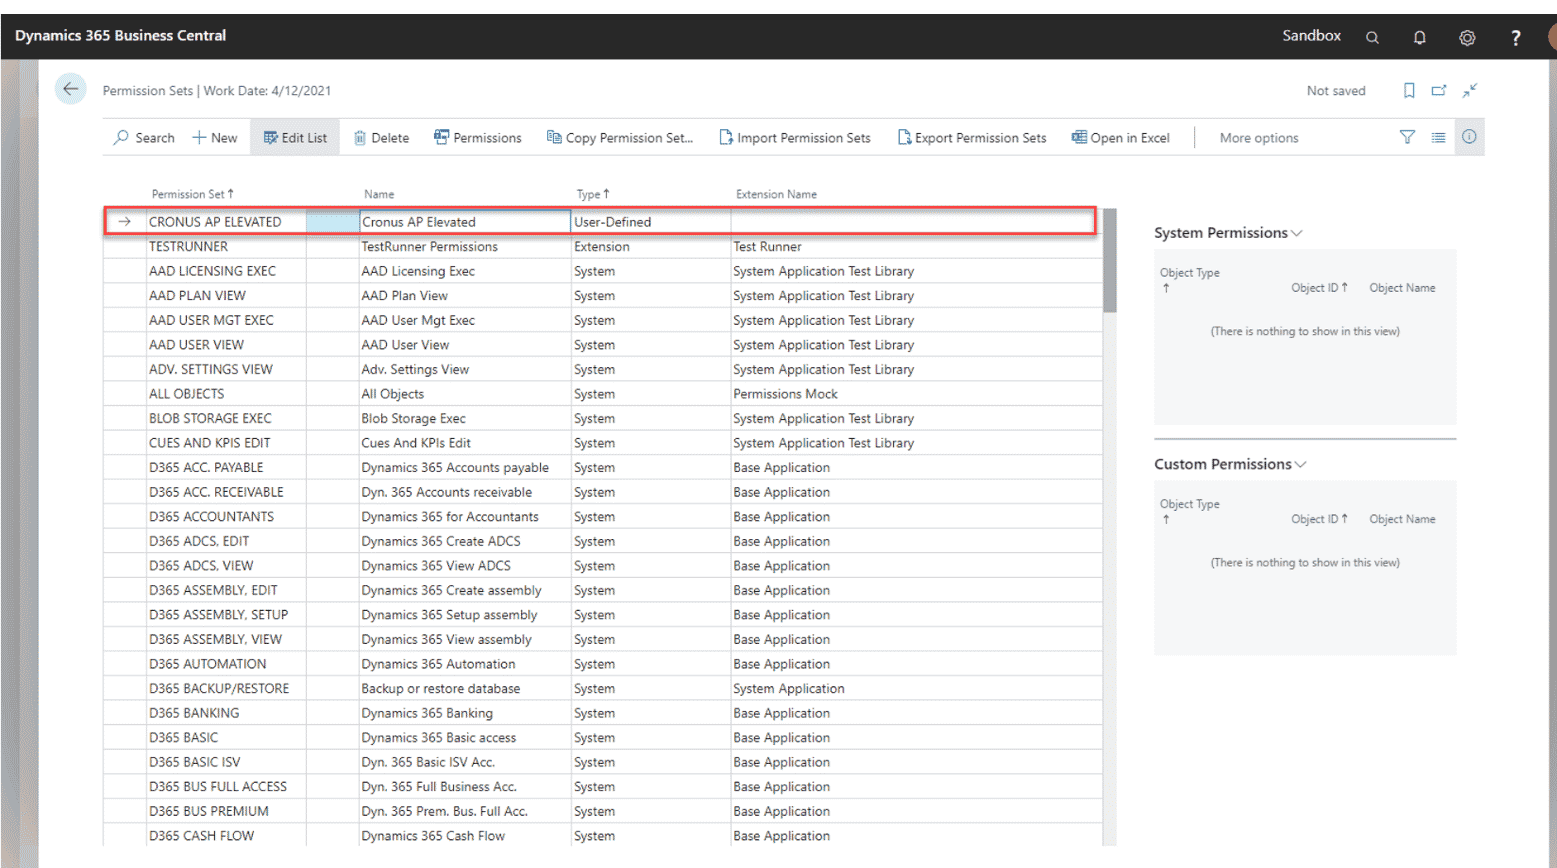
To create a new Permission Set, follow the steps detailed in these photos:

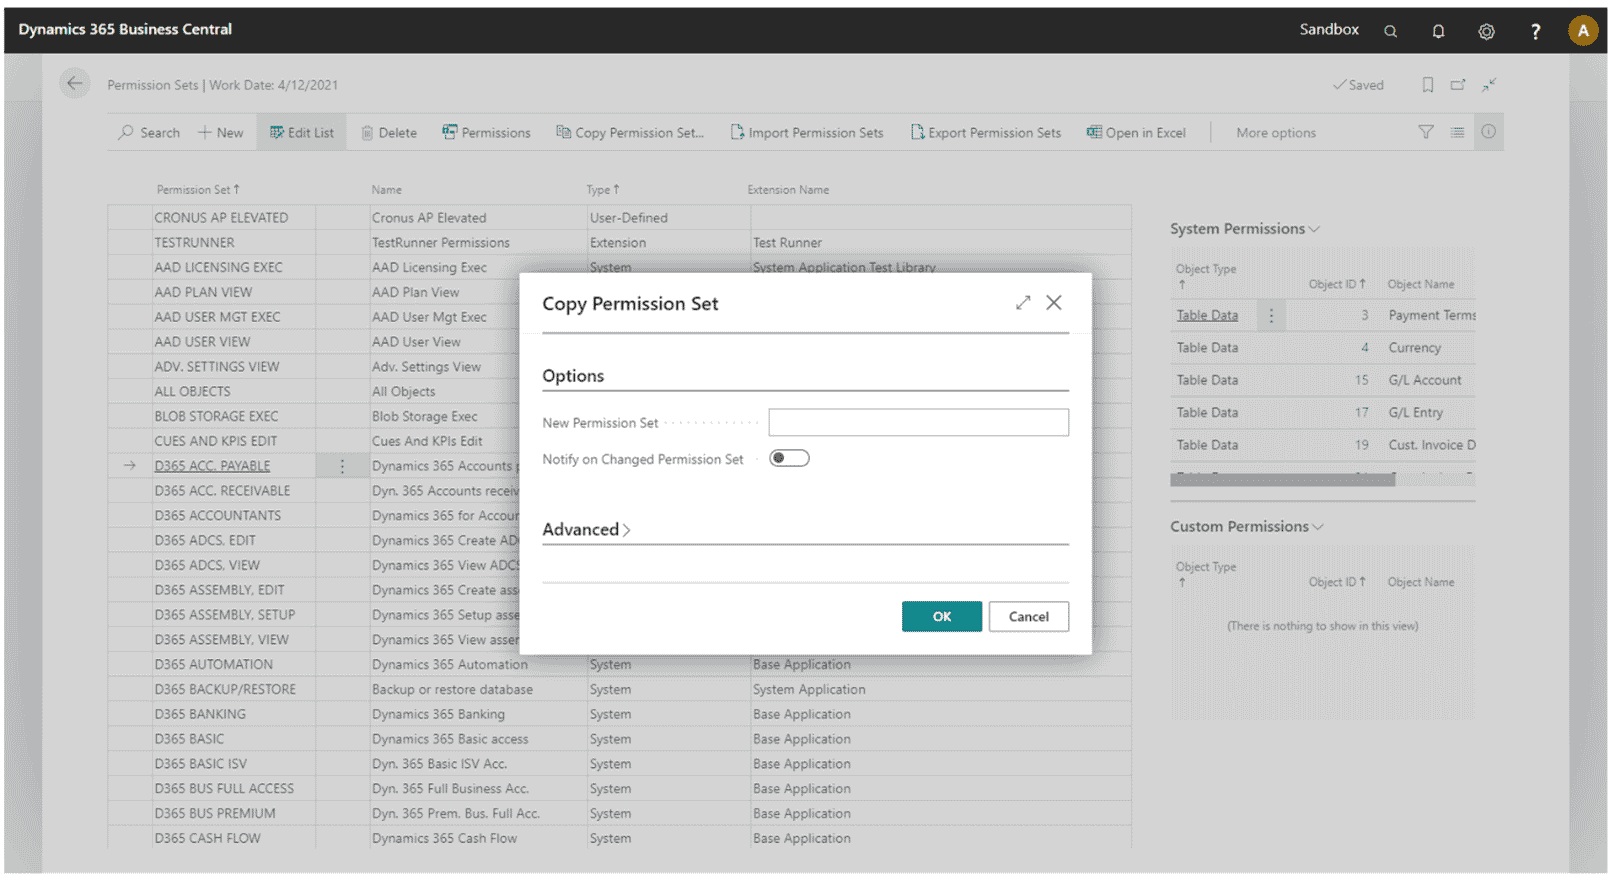
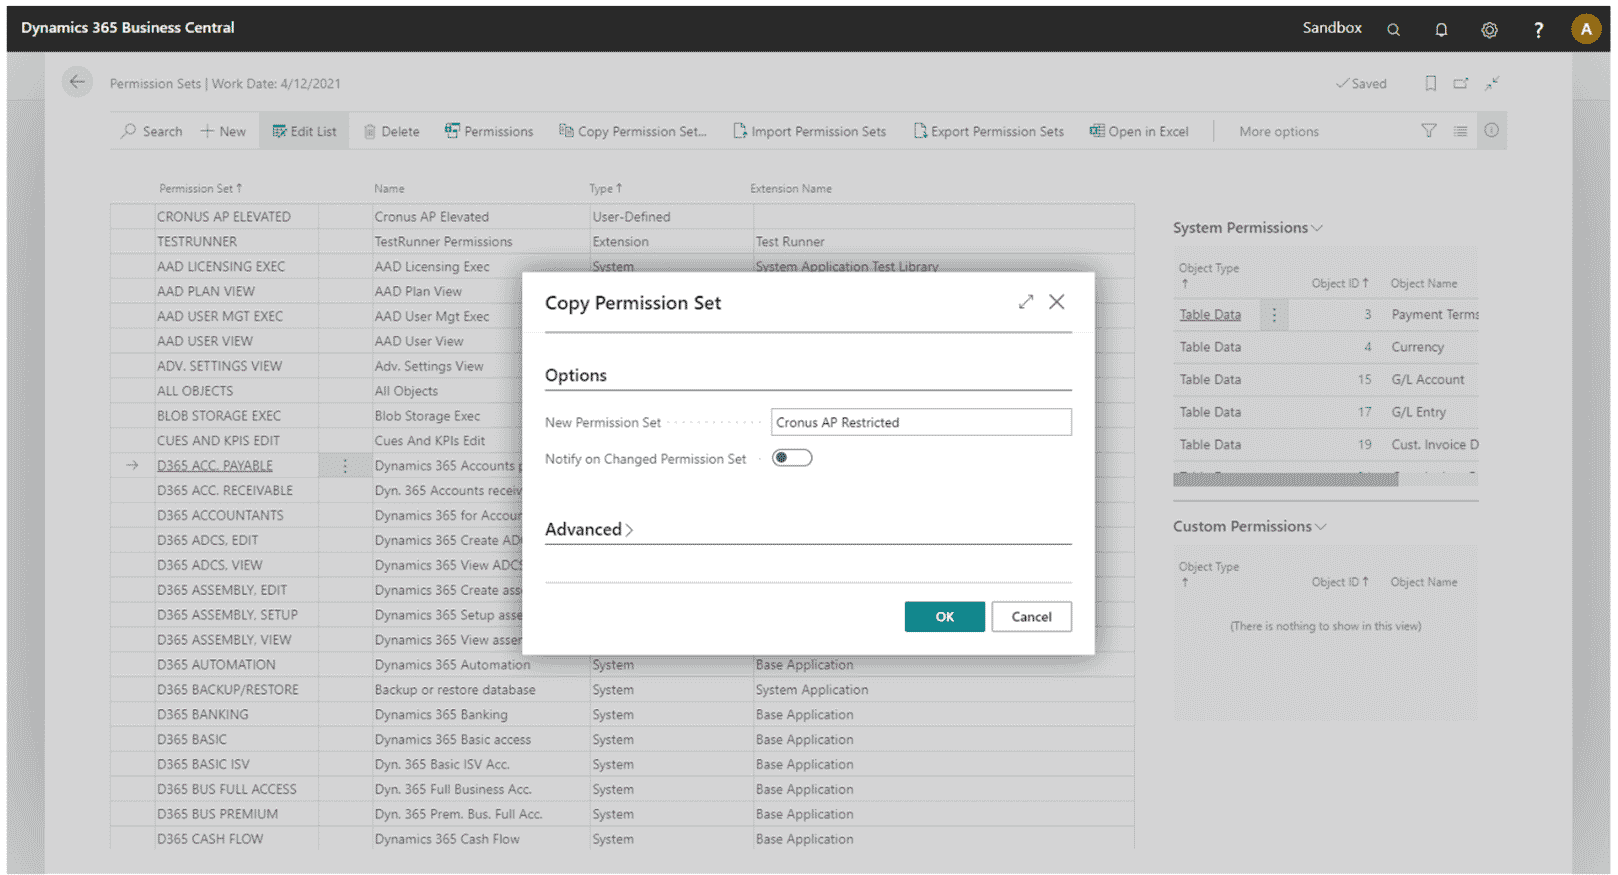
Finally, you can also copy an existing Permission Set and make changes to meet your business needs by following these steps:

Final Notes
There are just a few final thoughts to keep in mind when managing User Groups and Permission Sets in your environment:
- Before doing any of this, map out your entire user base – This includes identifying all your users and the access and restrictions that should be applied to them. Knowing what groups your users belong to and what Permission Sets they need can go a long way in making this an easier process. A good place to do this is an Excel workbook.
- Set up a test environment – Testing this in a sandbox environment will help you identify gaps and security/permissions issues and sort out which users have too many or too few permissions before you go live. It is important to work out as many kinks as you can to ensure your go-live day is as smooth as possible. If you aren’t sure which issues to look for, you can contact a Stoneridge consultant.
- Have a communication plan in place – You will almost certainly have errors on your first day. Make sure you and your team have a solid plan in place so they know who to reach out to for help and how they can submit a support request that gives the support staff a solid base to help find a solution. For example: take screenshots, know what area you were in and what you were doing at the time of the error, etc.)
- Consider Security Compliments – You don’t need to lock down your system every time there is an issue, but establishing other controls can help support security in your system. Functionalities such as Change Log and Workflows are great out-of-the-box tools in Business Central to support your controls.
Questions?
Stoneridge Software has a team of experts who can help you navigate User Groups and Permission Settings in your Dynamics NAV and Dynamics 365 Business Central environments. Please reach out to us if you have any questions.

Under the terms of this license, you are authorized to share and redistribute the content across various mediums, subject to adherence to the specified conditions: you must provide proper attribution to Stoneridge as the original creator in a manner that does not imply their endorsement of your use, the material is to be utilized solely for non-commercial purposes, and alterations, modifications, or derivative works based on the original material are strictly prohibited.
Responsibility rests with the licensee to ensure that their use of the material does not violate any other rights.