


Build a Portal in D365 CE: D365 Admin Center vs make.powerapps.com
There are a couple of ways to build a portal in D365 CE. I was going to go into detail about the differences between the two, but I changed my mind. I will give a quick overview instead. The first is via the Dynamics 365 Administration Center. The second is done at make.powerapps.com. The Dynamics 365 Admin center only allows you to create one portal where make.powerapffs.com allows multiple portals. Make.powerapps.com is the only place you should go to create and manage your portals. Even if you build your portal via the D365 Admin Center, you will still be directed to make.powerapps.com to manage it. I would also like to point out that Microsoft Documentation guides you to building your portal through make.powerapps.com.
https://docs.microsoft.com/en-us/powerapps/maker/portals/overview
Differences between D365 Admin Center and make.powerapp.com
Dynamics 365 Administration Center
This is a bit trickier to get to and takes more steps to complete. This route is not part of the documentation referenced above.
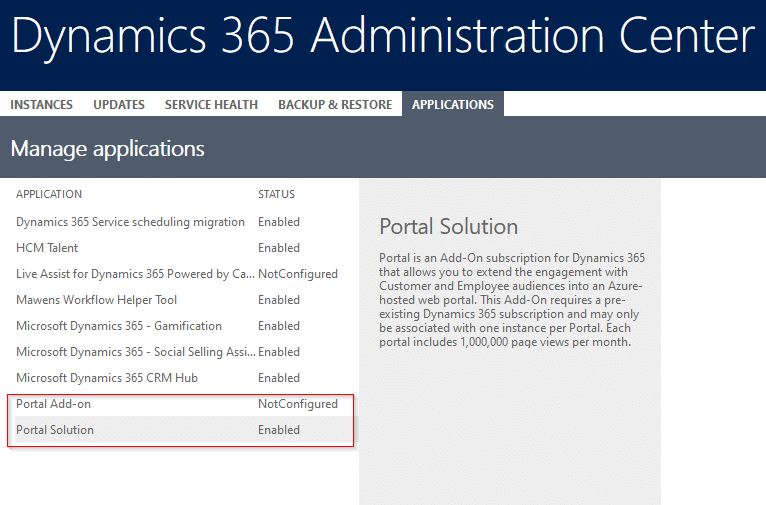
- When you arrive at the D365 Admin Center, click the Applications tab
-
-
- Scroll Applications until you see Portal Solution
- The Portal Solution must be Enabled first
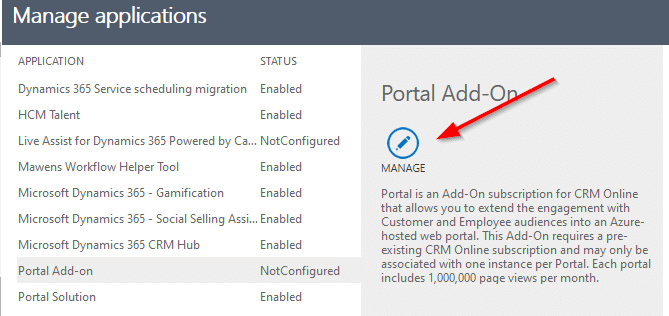
- Scroll Applications until you see Portal Add-on
- Scroll Applications until you see Portal Solution
-
-
-
-
- Click Manage
-
-
-
-
- A new tab opens and you
- You will see the various options here to start configuring your portal. The first options are self-explanatory.
- Portal Audience
- This refers to the target audience, users, of the portal.
- Select Portal to be deployed
- This allows you to choose the type of portal. Give you more focused functionality for your users. These options change based on the Portal Audience selection.
- Partner
- Custom Portal
- Community Portal
- Customer Self-Service Portal
- Partner Portal
- Customer
- Custom Portal
- Community Portal
- Customer Self-Service Portal
- Employee
- Employee Self-Service Portal
- Now that you have made your selections, click the Submit button. You will have to accept the agreement to continue.
- Next, you see the submitted page.
- Portal Audience
- You will see the various options here to start configuring your portal. The first options are self-explanatory.
- A new tab opens and you
-

-
-
-
-
-
- I have noticed it takes 10 to 15 minutes for the process to complete. Also notice that Microsoft is pushing you toward the PowerApps home page, make.powerapps.com.
-
-
-
-
make.powerapps.com
This route gives you more information about templates when you select them. It also allows you to create and manage portals in 1 place. You can also create multiple portals here too.
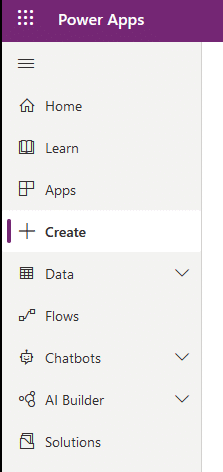
- When you arrive at make.powerapps.com, click on Create in the left navigation.
-
-
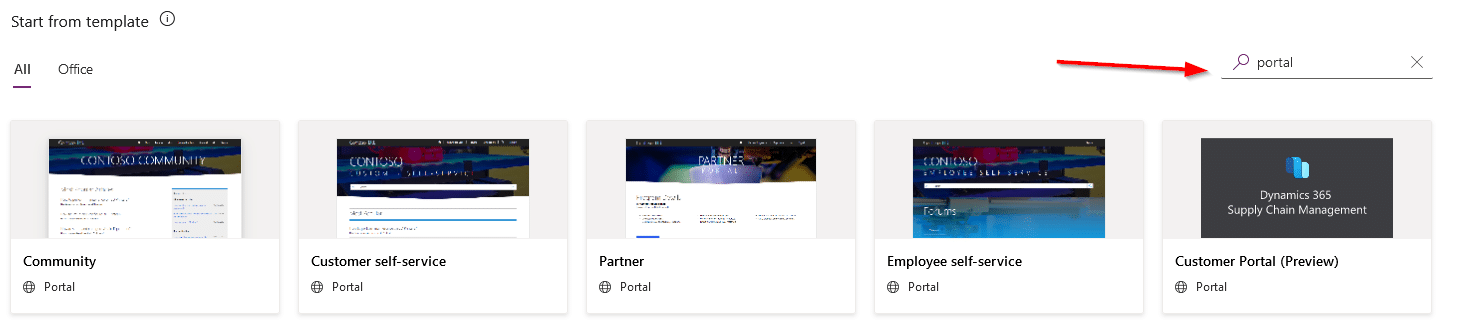
- Here you can create Portals, Canvas apps and Model-driven apps. Scroll down, filter the templates for ‘Portal’. This will give a list of portal templates available from Microsoft.
-
-
-
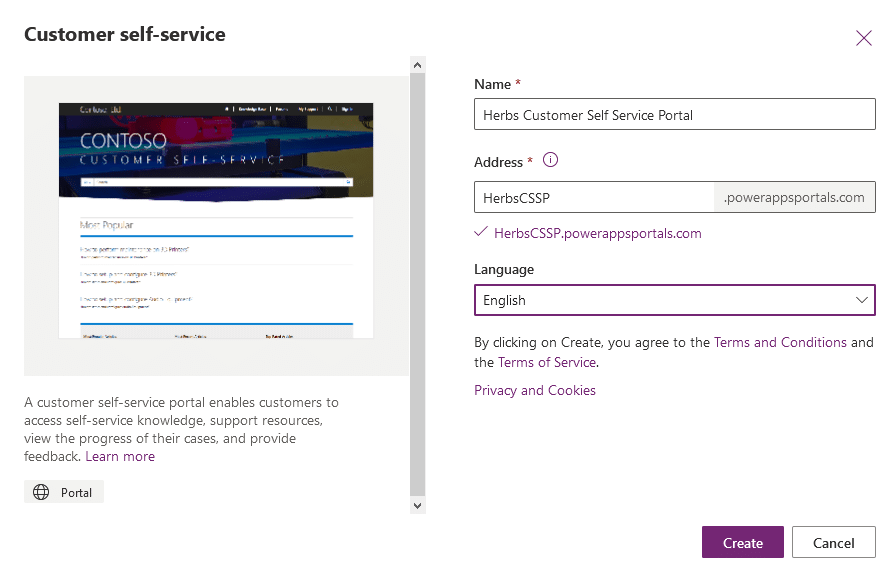
- I will select Customer self-service. Notice the sample image and description of this type of portal. I filled in the fields and clicked Create.
-
-
-
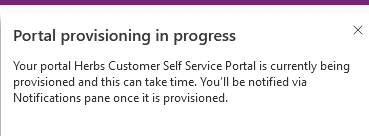
- At this point, I am sent back to the create page and shown this message. Take note this is less steps than the first option.
-
-
-
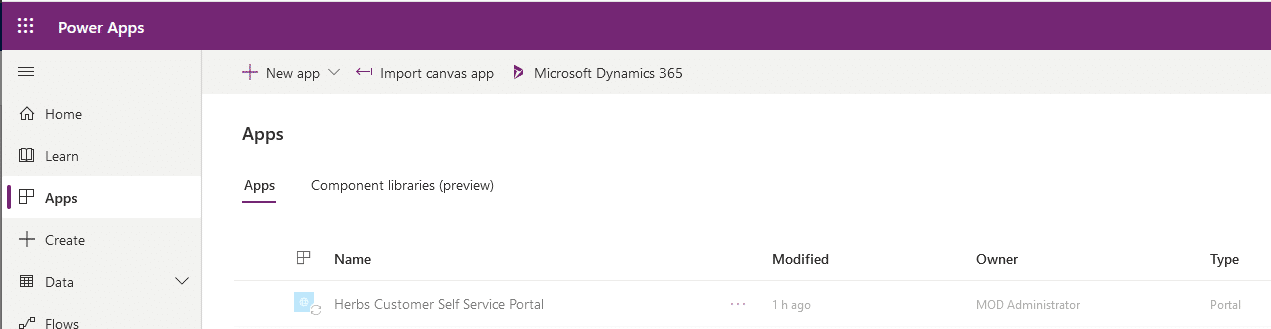
- Click on Apps I the left navigation. Here we will see the portal being setup. It takes about 10 to 15 minutes.
-
-
-
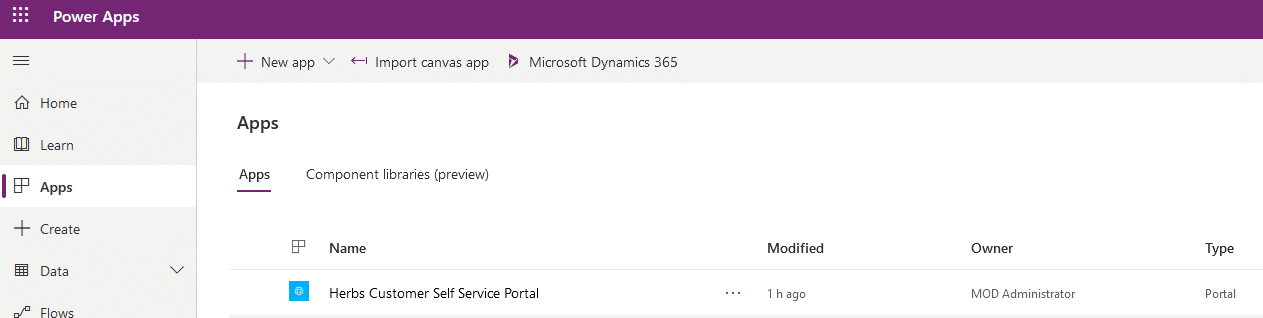
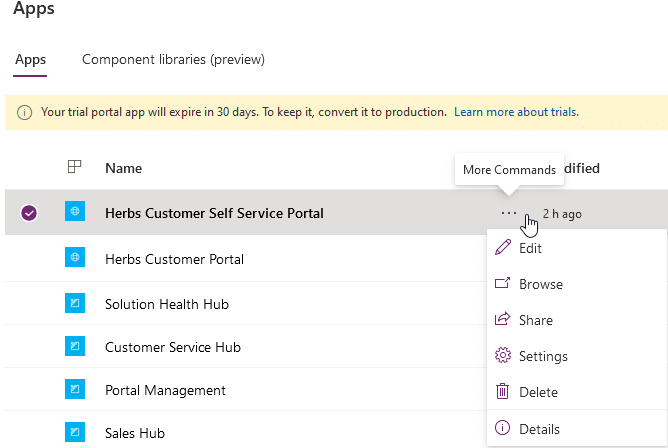
- Refresh the page and you will see that it is ready. This is the same location you go to maintain a portal created in Step 1.
-
-
-
- Click on the ellipse to manage the portal.
-
I recommend using the make.powerapps.com site to create and manage your portals. I feel it is easier to use and it includes other apps, data, flows, chatbots, AI builder and Solutions. It appears this is the location Microsoft will be using for all customizations related to your CE instance. Replacing the Settings > Customizations area we are all familiar with in CE.
Thank you for taking the time to read through this blog. As always, if you'd like help building a portal, reach out and we can chat!

Under the terms of this license, you are authorized to share and redistribute the content across various mediums, subject to adherence to the specified conditions: you must provide proper attribution to Stoneridge as the original creator in a manner that does not imply their endorsement of your use, the material is to be utilized solely for non-commercial purposes, and alterations, modifications, or derivative works based on the original material are strictly prohibited.
Responsibility rests with the licensee to ensure that their use of the material does not violate any other rights.