Customizing Report Layouts and Email Templates in Dynamics 365 Business Central
Now that you have Dynamics 365 Business Central up and running, you may want to start customizing the way you present yourself to the outside world. One easy way you can do this is to customize the report layouts for invoices and emails you send to your customers. Want to add your logo or your business motto to your communication? There are essentially three parts to setting up customer report layouts and email templates in Dynamics 365 Business Central. Here’s how…
3 Steps to Setting up custom report layouts and email body templates
- Ensure the layouts exist in Custom Report Layouts (both the report layout and the associated Email Body Template ).
- Assign the report layout in “Report Layout Selection.”
- Assign the email body template in “Report Selection – Sales” (or where appropriate).
Let’s get into the details of what’s required:
1. Custom Reports Layout
- In the custom report layouts page, you can modify an existing layout or import a new layout.
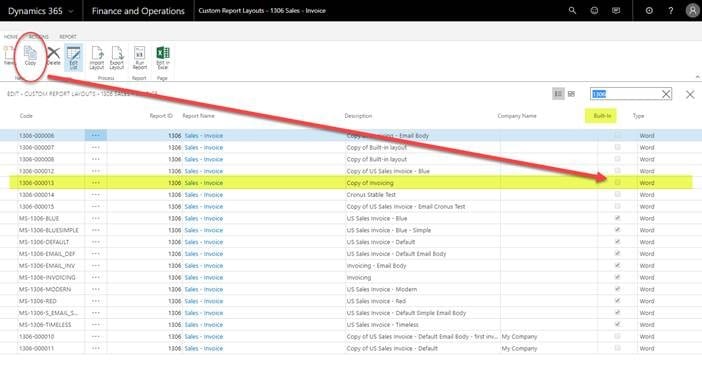
- **The system will not allow you to modify a “built in” report layout. To create your own, choose “Copy” in the top left corner, and the system will generate a “Copy of…” record, where the “Built In” value is set to false.
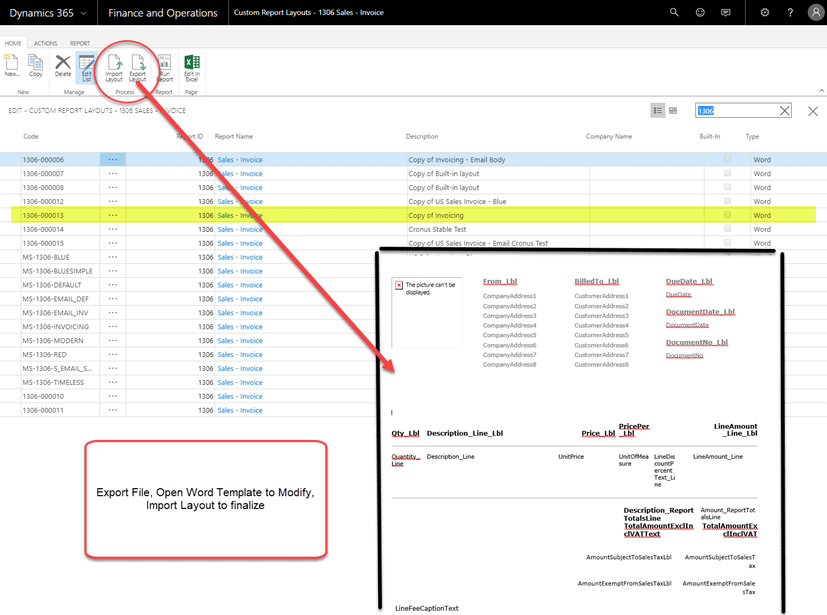
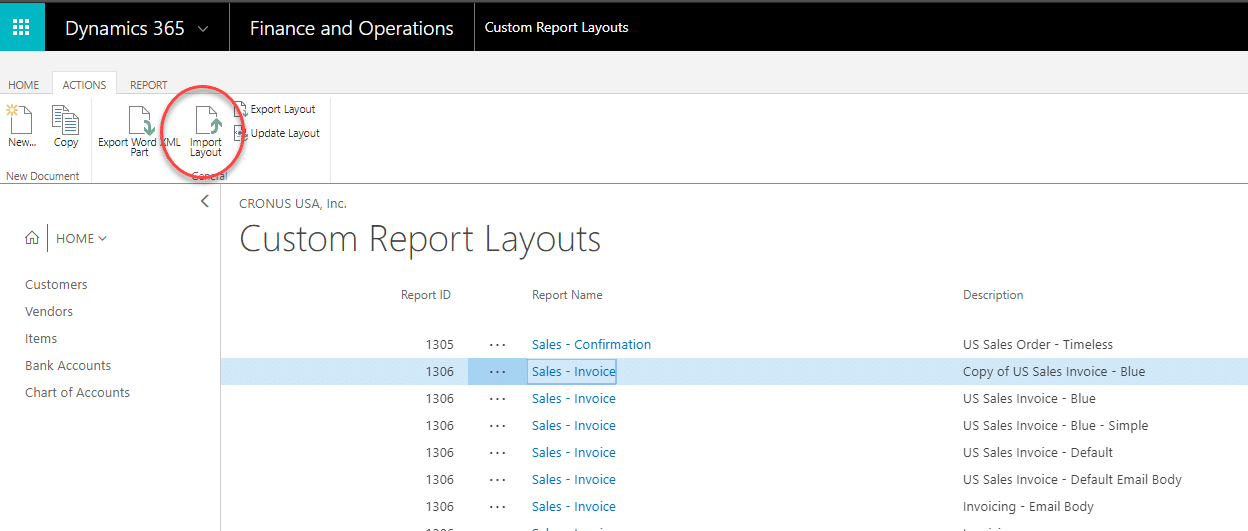
- Once your copy of the report layout exists, you can modify the description, export the layout to make changes, or import a new layout altogether.
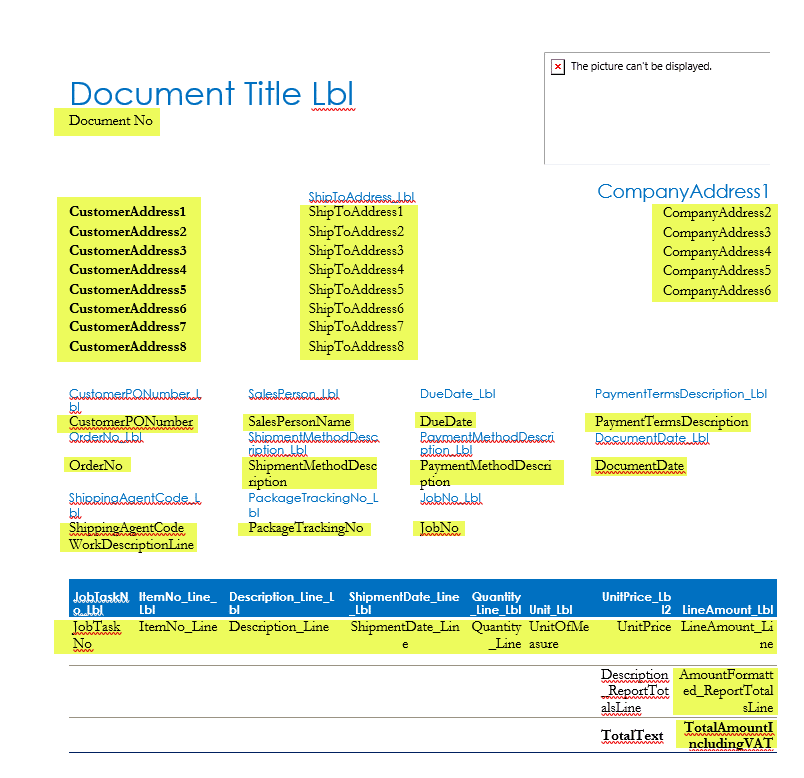
- After exporting the layout, you will need to open Word to modify it. Keep in mind that if you modify an existing layout or create your own, you’ll want to keep the field values intact for your data to print correctly. The field values typically sound like the field name where the data is stored.
- Once your layout is formatted just the way you like it, import to your custom report!
2. Report Layout Selection
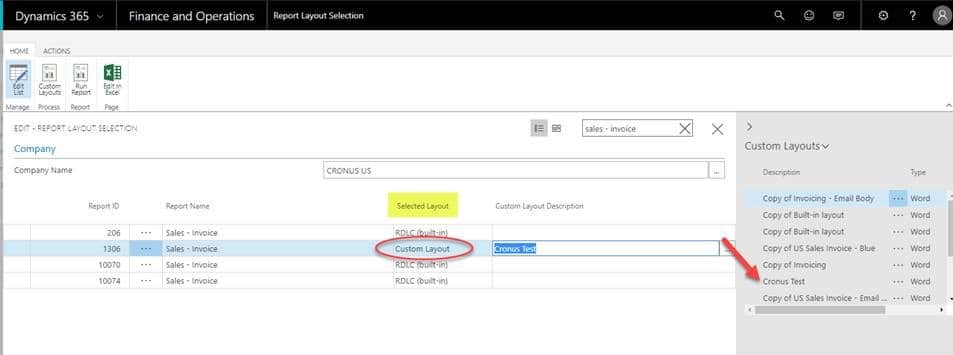
- Now that your custom layout exists, you’ll need to assign the layout to the correct report. To change the layout used on a selected report, open the “report layout selection” page, and search for your report name (or Report ID if you know it).
- Change the Selected Layout to “Custom Layout,” and you will have the option to choose the custom layout from a lookup to the “Custom Report Layout” table for that same Report ID.
- ***Note: If you assign a “Company” to the layout in the Custom Report Layout page, you will only be able to see that layout as an option in the same company when you try to assign from the Report Layout Selection page.
3. Email Body Template
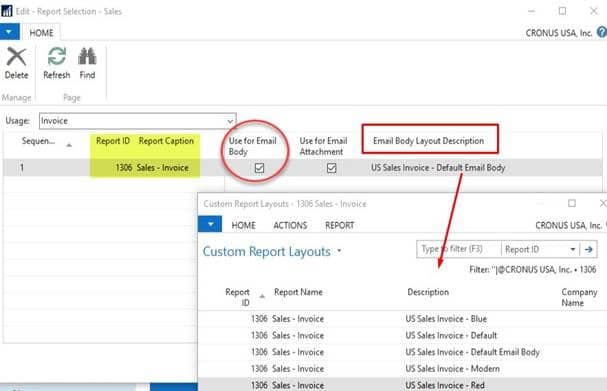
- To choose a custom email body template for a report, you assign it in the Report Selection page. For the example “Sales – Invoice,” you would navigate to the “Report Selection – Sales” page.
- In the report selection page, you would fill in the Report ID, mark “Use for Email Body” as TRUE, and choose the correct Email Body Layout through the lookup in the “Email Body Layout Description” field.
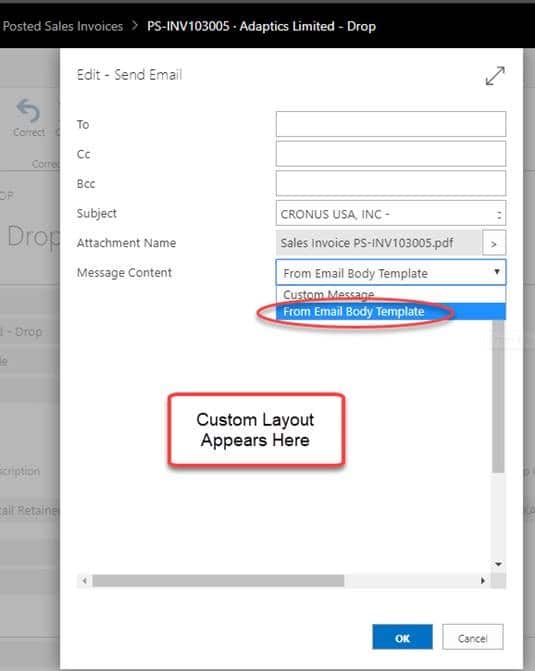
- Once the Email Body Layout is assigned, you will see the layout appear in your Sending profile, as the “Email Body Template” text.
Under the terms of this license, you are authorized to share and redistribute the content across various mediums, subject to adherence to the specified conditions: you must provide proper attribution to Stoneridge as the original creator in a manner that does not imply their endorsement of your use, the material is to be utilized solely for non-commercial purposes, and alterations, modifications, or derivative works based on the original material are strictly prohibited.
Responsibility rests with the licensee to ensure that their use of the material does not violate any other rights.

