


How to Install the Dynamics 365 App for Outlook
The Dynamics 365 App for Outlook will eventually replace the CRM Outlook Client. The new name for the Outlook client is “Dynamics 365 for Outlook add-in”. This blog will cover how to install the Dynamics 365 App for Outlook. To prevent confusion, this blog will refer to it as the Outlook Client.
Microsoft originally announced that the Outlook Client was being deprecated and that it would stop being supported in the next major release. However, this week Microsoft has decided to reverse the deprecation of Dynamics 365 for Outlook. There will not be new features added but it will continue to be supported while they continue to work on enhancing the D365 App for Outlook.
The new app is meant to replace the commonly used “Track” and “Set Regarding” features of the Outlook Client. If you’re unfamiliar with the Outlook Client, in a nutshell, it has functionality that allows for emails, appointments, tasks, and contacts to be synced between CRM and Outlook. See this Microsoft TechNet article for minimum requirements to use App for Outlook.
If you’re looking to try out the new CRM App for Outlook, first you need to set up server-side sync. Step 1 is setting up server-side sync, Step 2 is enabling mailboxes, and Step 3 is deploying the Dynamics 365 App for Outlook. If you’ve already completed Steps 1 and 2 you can jump to Step 3. If you’re not sure, in CRM go to Settings and look for “Dynamics 365 App for Outlook.” If you don’t see that then you should start at Step 1.

Step 1 – Set up Server Side Sync
You need to set your default synchronization to server-side sync and select the “Microsoft Exchange Online” server profile.
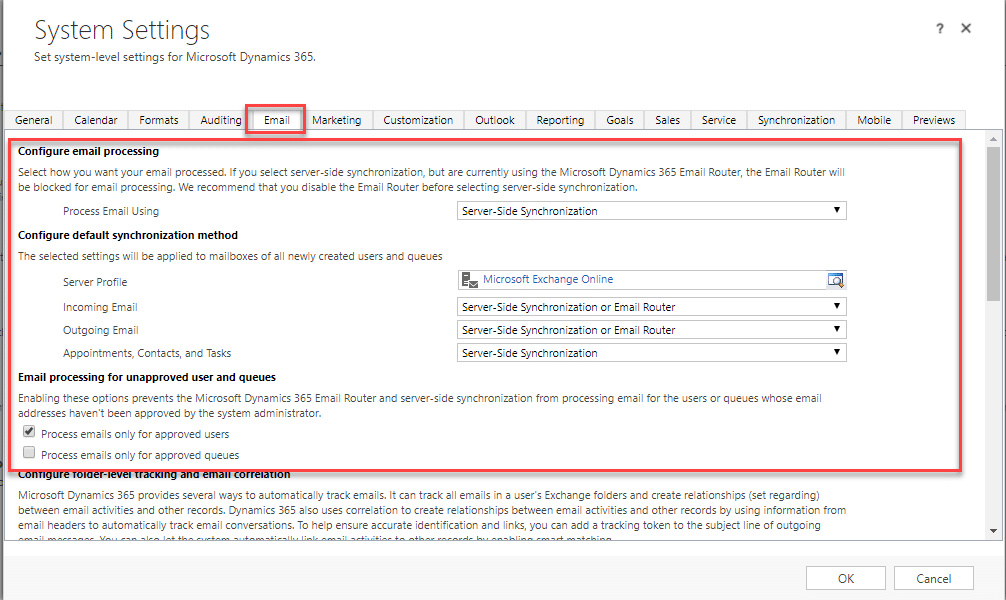
Navigate to Settings > Administration > System Settings.
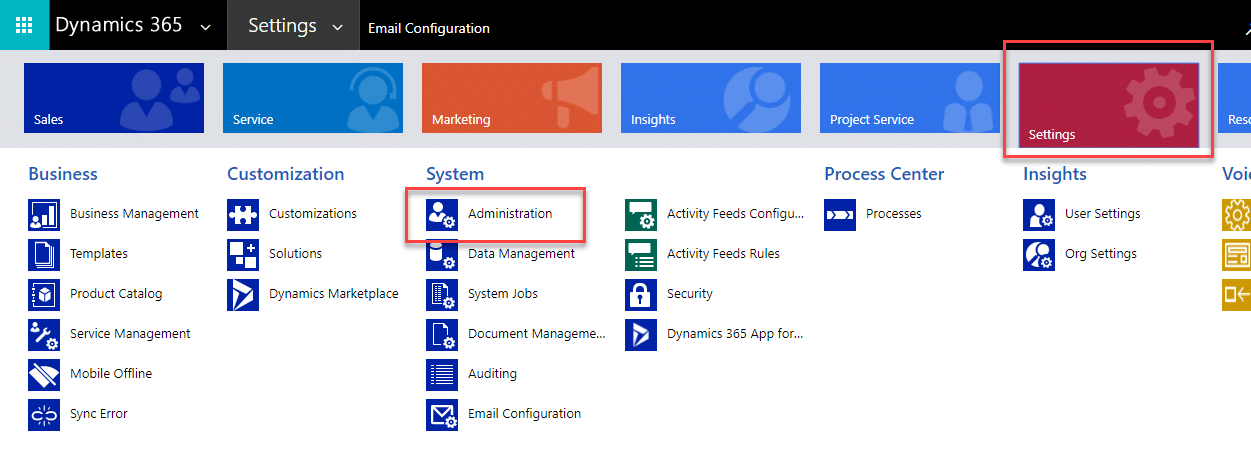
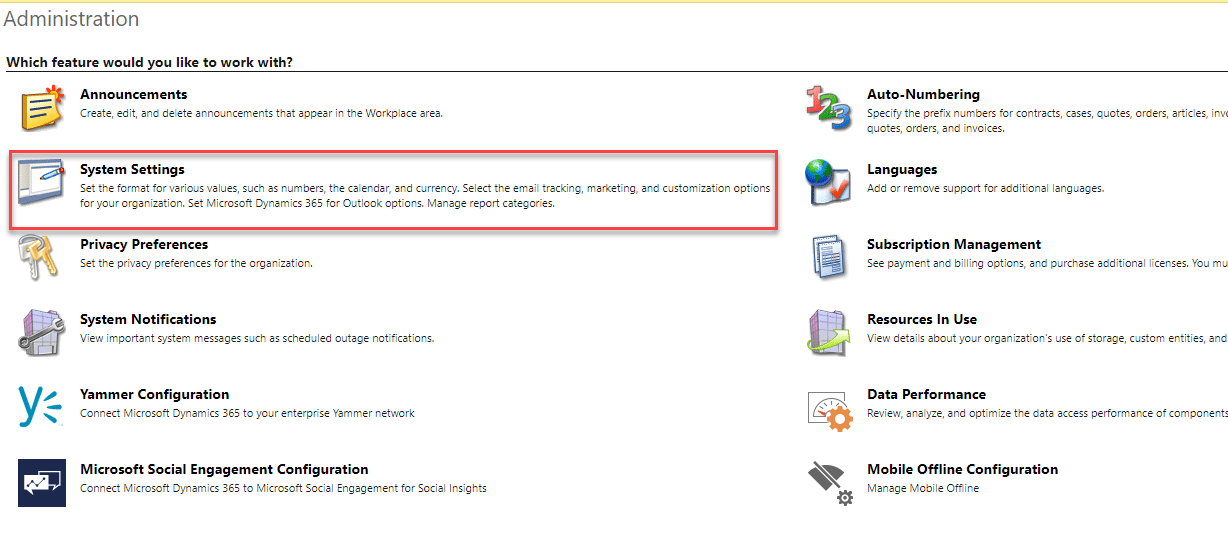
Click on the Email tab, make sure the email settings are set to server-side sync, and that the appropriate Server Profile is selected. Click OK.
Step 2 – Test & Enable Mailboxes
In order for a user to have access to the Dynamics 365 App for Outlook, their mailbox must be enabled.
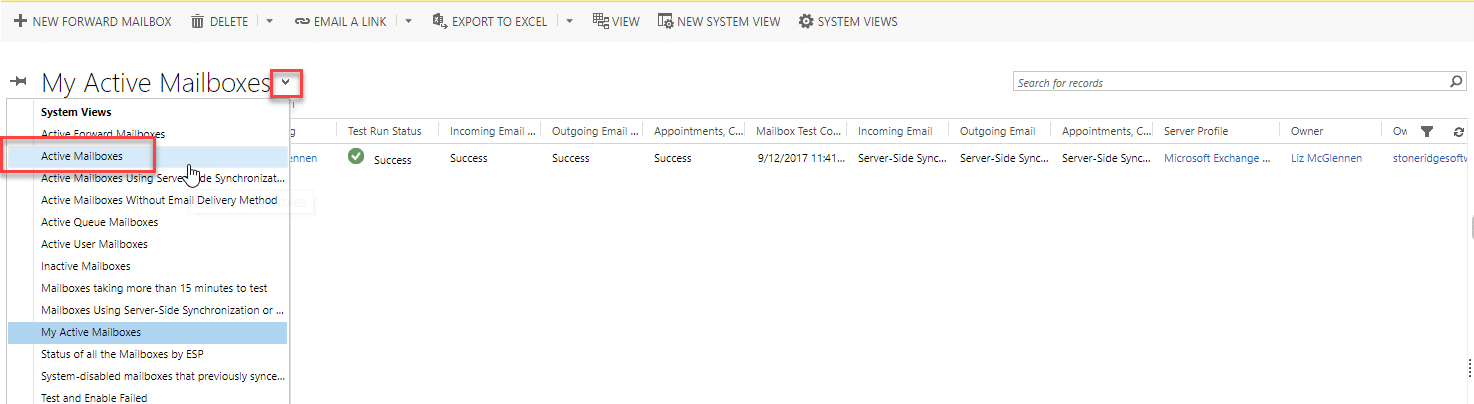
To Test & Enable Mailboxes, navigate to Settings > Email Configuration > Mailboxes.

Test & enable mailboxes

You have several options of how to find the mailbox you are looking for. You can enable mailboxes in bulk or one at a time. The first option is to search for the particular user’s mailbox.

You can also change the view to “Active Mailboxes” and find the user on this list.
If you have many mailboxes to enable you can do a bulk select by clicking the checkmark to the left of the column headers. This will select all the records on the page.
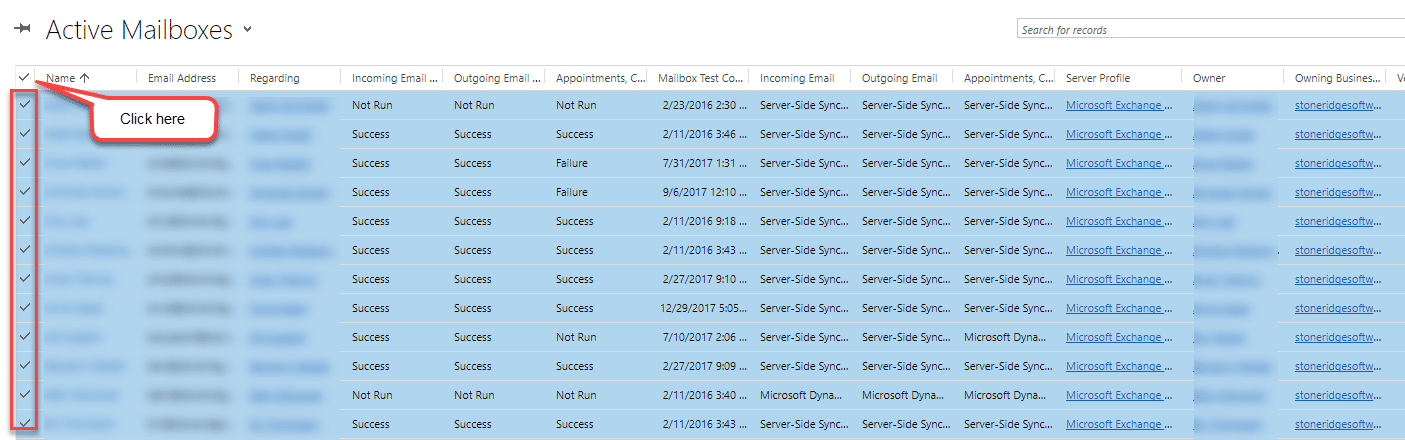
You can also selectively add or remove from the bulk select by holding down your Control (Ctrl) key while checking or unchecking the rows.
If you have many mailboxes to enable you can use the Command Bar actions and those will run for whatever records you have selected.
Note: If you have made changes to the default settings then you need to make sure to apply the default email settings to the applicable mailboxes. A change to an email setting does not automatically roll out that change to existing records.

To enable mailboxes first click the “Approve Email” button. Second, click the “Test & Enable Mailboxes” button.
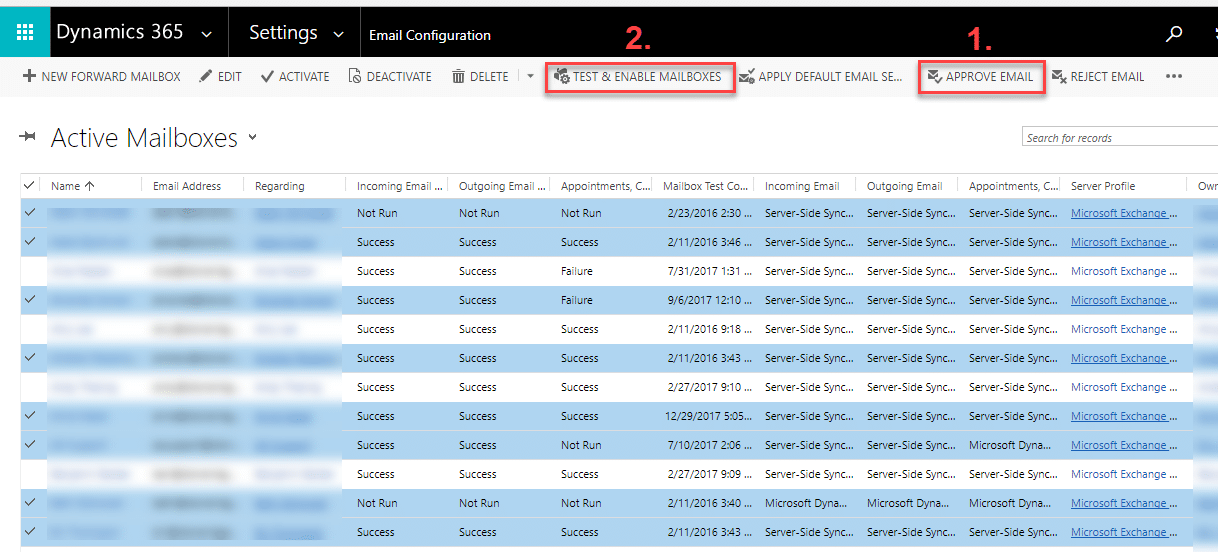
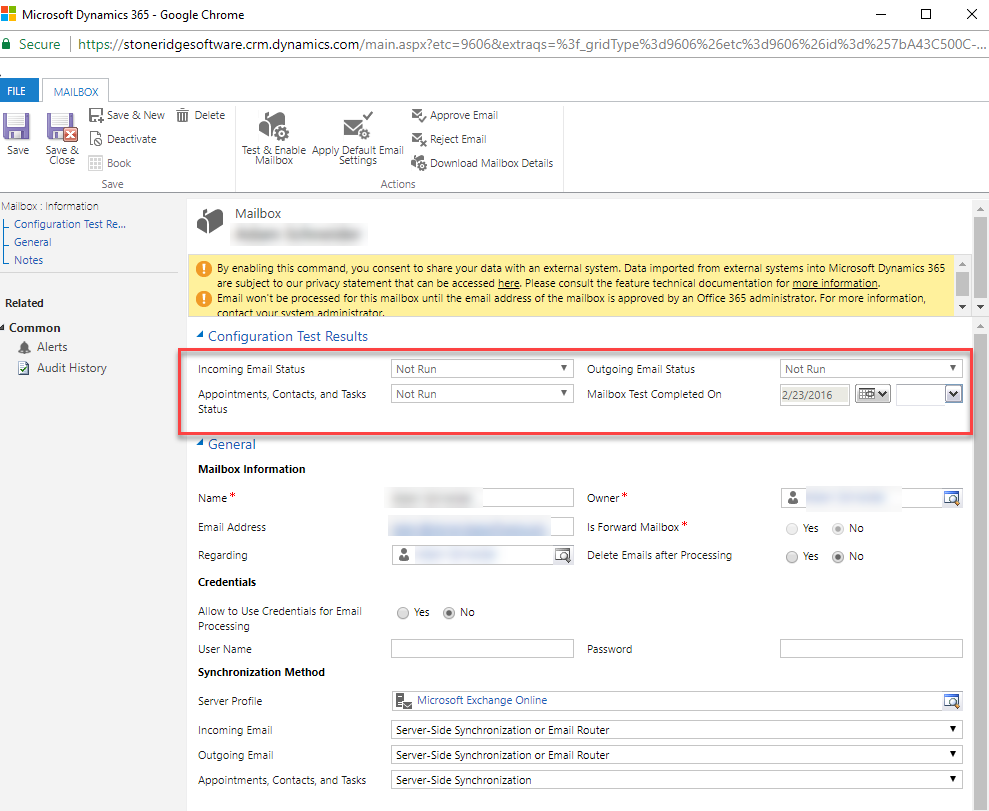
The other option is to open an individual mailbox record. From the ribbon, first, click “Approve Email”. Second, click “Test & Enable Mailboxes”.

The “Incoming Email Status”, “Outgoing Email Status” and “Appointments, Contacts, and Tasks” should change from “Not Run” to “Success”. Sometimes it can take a few minutes to run (the volume of mailboxes being enabled also affects this). I recommend going and working on something else and checking on the status later. Give it at least a half hour before you get concerned. It will come back with either a Success or Failure status, so until you see one of those it hasn’t completed the process. To check for updates or error messages click on “Alerts” on the left-hand navigation. If you run into an issue (e.g. you get a Failure status back) check out this Microsoft blog - it has troubleshooting advice.
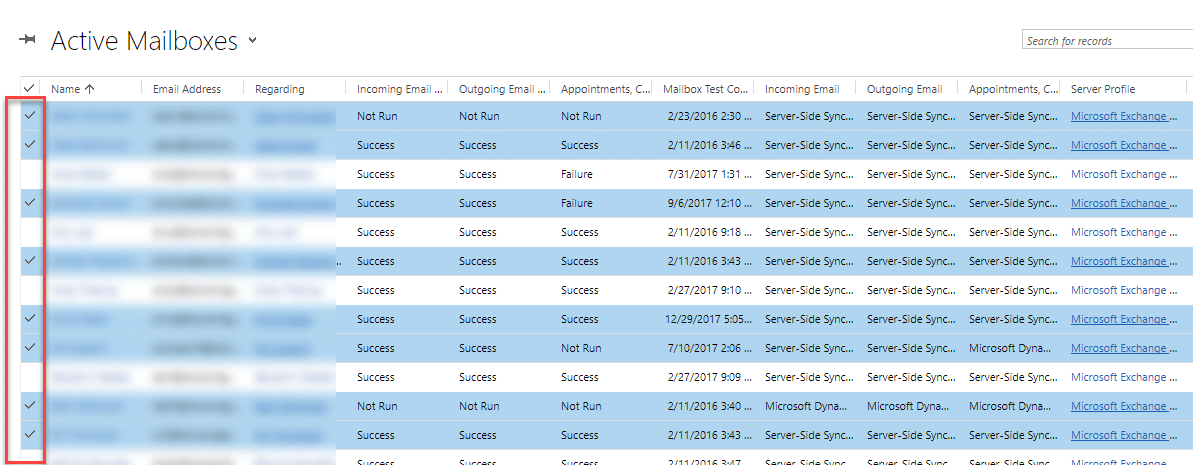
Before:
After:

Step 3 – Deploy the App for Outlook
Navigate to Settings > Dynamics 365 App for Outlook.
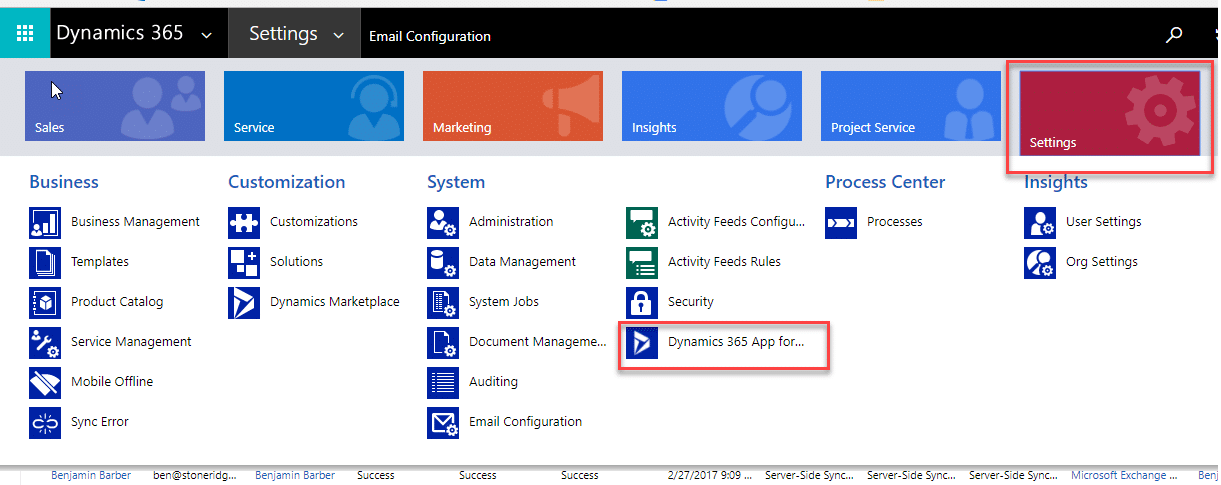
It will take you to a page where it will list all the users that have been successfully enabled for incoming mail and ACT (what we did in Step 2). From here you can click “Add App for All Eligible Users,” or you can click “edit” by Settings, and select “Automatically add the App to Outlook”.
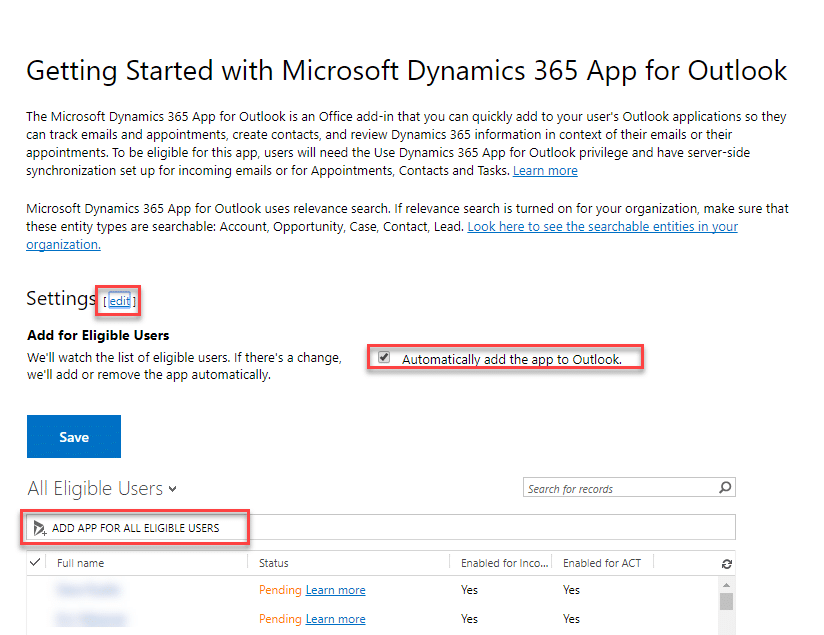
At the bottom, it lists eligible users and gives you a status for the app. If there is an issue or if it’s pending, click “Learn more” and it will give you more details.
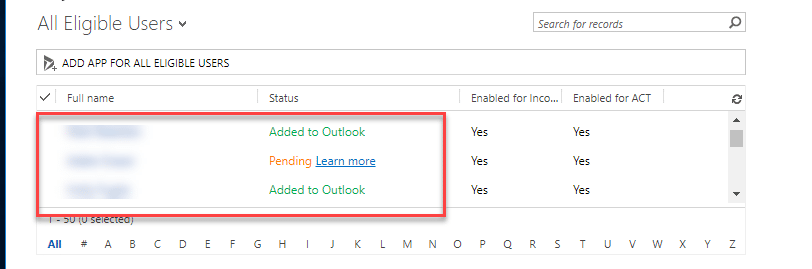
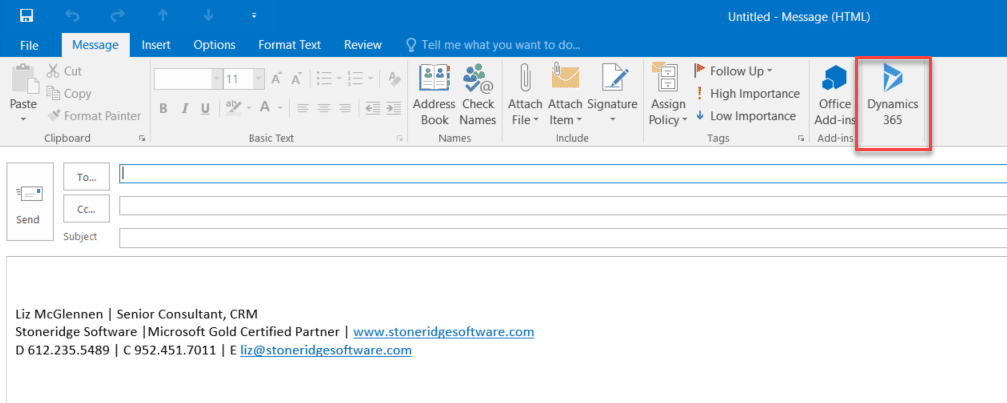
The app will appear in Outlook for all the users where the status says “Added to Outlook”. The user should be able to see the “Dynamics 365” icon in the ribbon in Outlook. The app for Outlook is different than the former Outlook Client because the user doesn’t need to download anything.
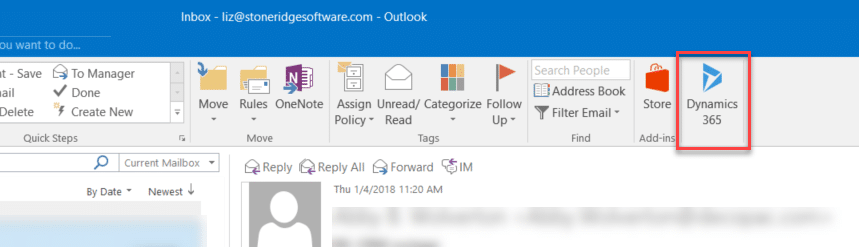
It should also be available when composing a new email or if you pop open an email in a separate window.
Check out Microsoft’s Dynamics 365 App for Outlook user guide to learn more.
Wiew more blogs in this series: Using the Dynamics 365 Outlook App from Your Phone, Everything You Need to Know About the Dynamics 365 for Outlook App.

Under the terms of this license, you are authorized to share and redistribute the content across various mediums, subject to adherence to the specified conditions: you must provide proper attribution to Stoneridge as the original creator in a manner that does not imply their endorsement of your use, the material is to be utilized solely for non-commercial purposes, and alterations, modifications, or derivative works based on the original material are strictly prohibited.
Responsibility rests with the licensee to ensure that their use of the material does not violate any other rights.