


Tracking Service Equipment Testing with Key2Act and Microsoft Dynamics GP
You can keep track of tests that are performed on service equipment, including the test date, test results, and the technician who performed the test with Service Management from Key2Act. You can also enter the next scheduled test date for a regular or recurring test, as well as set user-defined equipment information to default from a previous test to save data entry time. In addition to the user-defined results fields, when entering results for a scheduled test, you can mark the test as Passed or Failed. This is useful if you want to create a Smart List to keep track of those scheduled tests that require additional attention, such as tests that were failed or tests that have not yet been completed as of the scheduled test date.
Setting Up Testing Field Labels
To keep a record of test results, you must first define what the results of the test may include and set up the results field labels accordingly. You define the date fields, checkbox fields, number fields, text fields, etc., that you want to appear on the Equipment Test Results window for a given test. You can also define which fields hold static information that you want to be saved from one instance of a test to the next.
- Choose Microsoft Dynamics GP > Tools > Setup > Service Management > User-Defined Label Setup > Equipment Test.
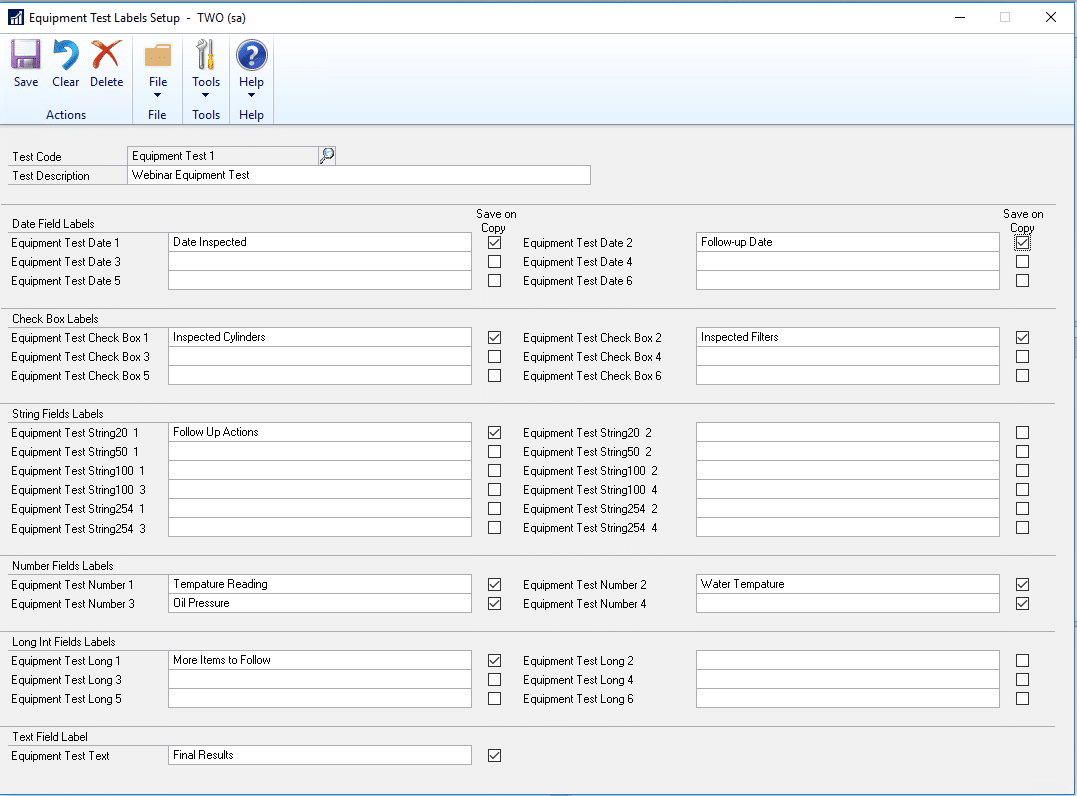
- The Equipment Test Labels Setup window opens. Enter a Test Code and Description for the test.
- For each of the available field label types, define the names of the fields that you want to make available for entering the results of this test.
- Mark the Save on Copy check box next to a field if you want the content that is entered in that field to be saved when creating a new record by copying an existing one. This is useful if you are setting up a recurring test with fields that will remain the same each time the test is done, for example, the installation or purchase date of the equipment.
- Choose Save.
Entering Equipment Test Results
When entering test results, you mark whether the equipment has passed or failed and enter any additional information in the custom results fields. If you are performing a recurring test, you can copy the results from the last time this test was performed, to save data entry time in creating a new record.
- Choose Cards > Service Management > Service Manager > Additional > Equipment. Select the equipment and then choose OR Choose Cards > Sales > Customer > Location > Equipment.
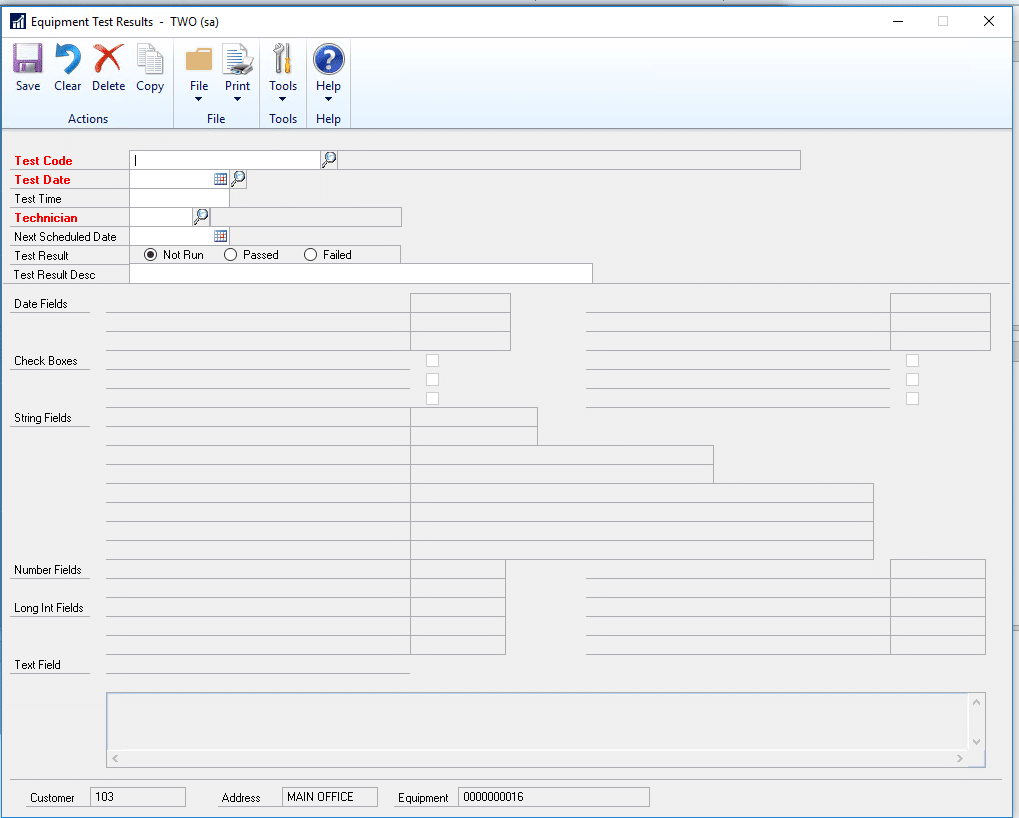
- In the Equipment Master window, choose Equipment Test Results to open the Equipment Test Results window. The customer ID, address ID, and equipment ID appear at the bottom of the window.
- Select the Test Code, and the blank fields on the window fill with the user-defined field labels that were set up for this test code.
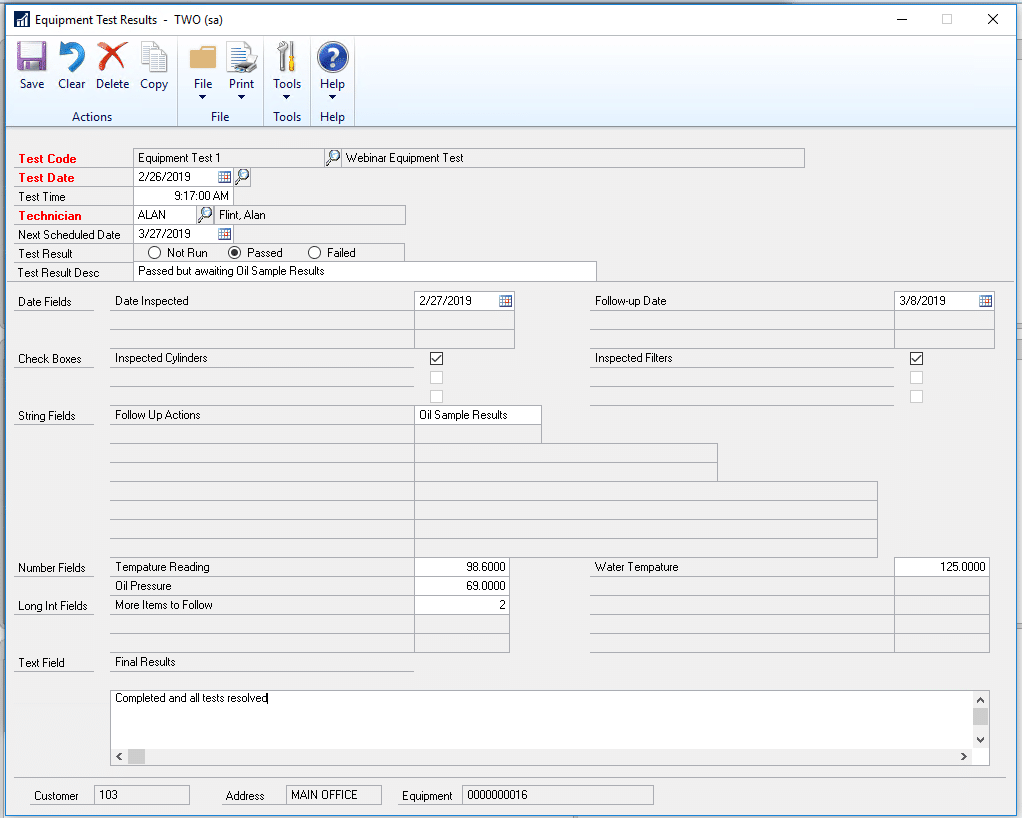
- Enter the Test Date and Technician. If this is a recurring test, enter the Next Scheduled Date that this test will be performed for this equipment.
- Mark the Passed or Failed radio button and enter a custom Test Result
- Complete the custom fields on this window and choose Save.
Copying Equipment Test Results
If you are creating a new test results record for a test that has previously been performed on this equipment, you may want to copy information from the previous test. The test date, as well as any fields that are set up to be saved when the record is copied, will default from the previous record into the new test results window.
- Choose Cards > Service Management > Service Manager > Additional > Equipment. Select the equipment and then choose OR Choose Cards > Sales > Customer > Location > Equipment.
- In the Equipment Master window, choose Equipment Test Results. The Equipment Test Results window opens.
- Select a Test Code, then use the lookup button next to the Test Date field to choose the most recent existing test.
- The selected test record opens in the Equipment Test Results window.
- Choose Copy to create a new test record for this same customer, equipment, and test code. The Next Scheduled Test Date from the previous record defaults as the Test Date for the new record.
- In addition, if the Save on Copy option has been set up for any of the user-defined fields on this window, the information entered in those fields for the previous record will automatically fill into the new test results window.
- Complete the remaining fields and choose Save when you are done entering test results.
Entering Equipment Readings
If you marked the Use Equipment Readings checkbox in the Service Options window, a Meter Readings/Hours button is present in the Equipment window. Use this button to track information for a piece of equipment.
- Choose Cards > Service Management > Service Manager > Additional > Equipment. Select the equipment and then choose OR Choose Cards > Sales > Customer > Location > Equipment.
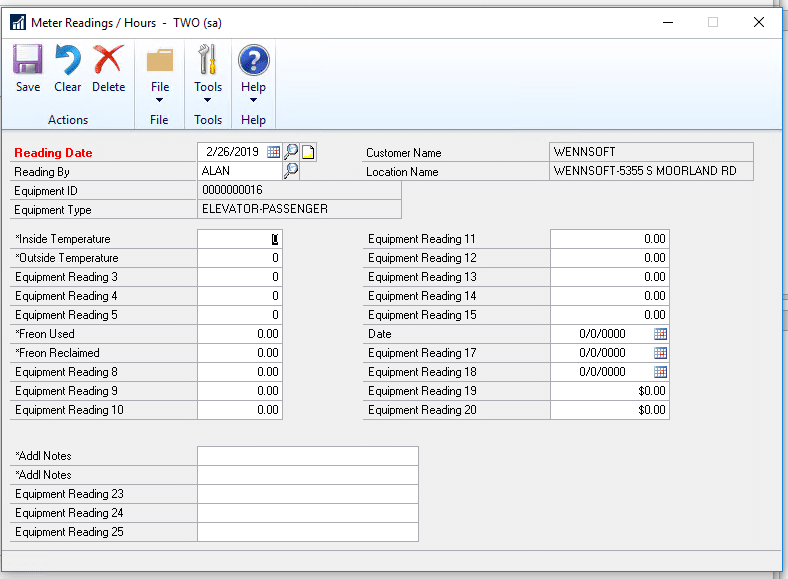
- In the Equipment Master window, choose Meter Readings/Hours.
- Enter the Reading Date.
- Enter a technician or use the lookup in the Reading By field to select a technician. If you enter a technician that is not in the lookup list, the technician will not be added to the lookup list.
- Enter additional information in the remaining 25 User-Defined fields:
- The first five fields can contain a number between 0 and 99,999,999.
- Fields 6 through 15 can contain a number between 0.00 and 999999.99.
- Fields 16 through 18 are date fields to enter the month, day, and year of user-defined information.
- Fields 19 and 20 can contain a value from $0.00 to $999,999,999.99.
- Fields 21 through 25 are text fields that can contain up to 30 alphanumeric characters or symbols.
- Choose Save. Choose the Clear button to clear all entries made in the fields and display the format of each user-defined field
Reach out to the expert Key2Act and Dynamics GP team at Stoneridge Software to learn more about tracking service equipment testing.

Under the terms of this license, you are authorized to share and redistribute the content across various mediums, subject to adherence to the specified conditions: you must provide proper attribution to Stoneridge as the original creator in a manner that does not imply their endorsement of your use, the material is to be utilized solely for non-commercial purposes, and alterations, modifications, or derivative works based on the original material are strictly prohibited.
Responsibility rests with the licensee to ensure that their use of the material does not violate any other rights.