


Configuring the Timeline in the Unified Interface for Dynamics 365 CRM
The ability to customize fields, forms, and views is one of the many reasons that people continue to choose Dynamics 365 for their CRM system. With the Dynamics 365 Unified Interface for Dynamics 365 Customer Engagement (CE), you can configure the timeline to the specifications that best fit your user's needs. This means you can hide activity types and eliminate the notes form with a few simple changes to the Activities Tab Properties on any form, for any entity.
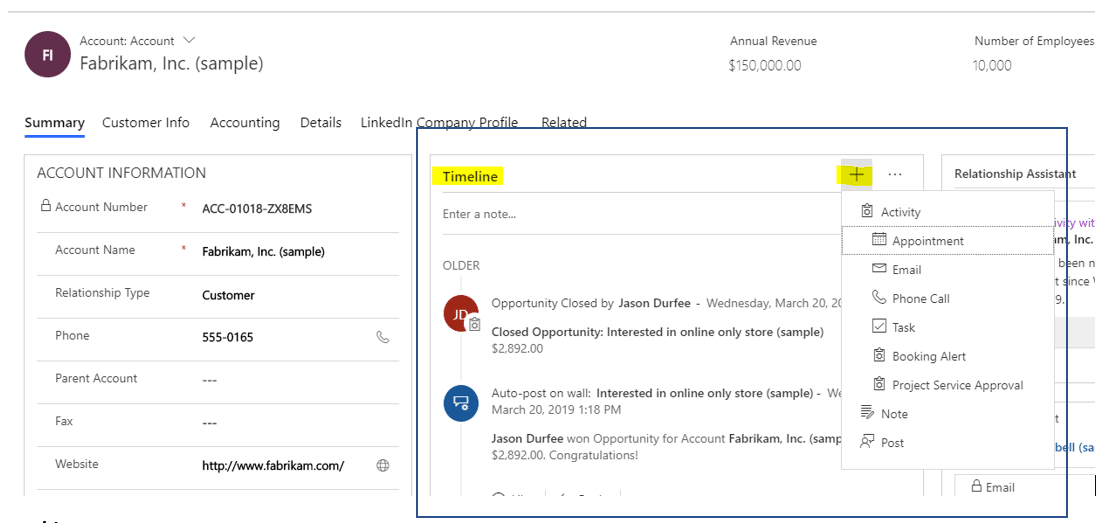
Here is a standard timeline view that comes out-of-the-box and includes a drop down with different activity types including appointment, email, phone call, task, booking alert, and project service approval. Additionally, there are options to view notes and posts.
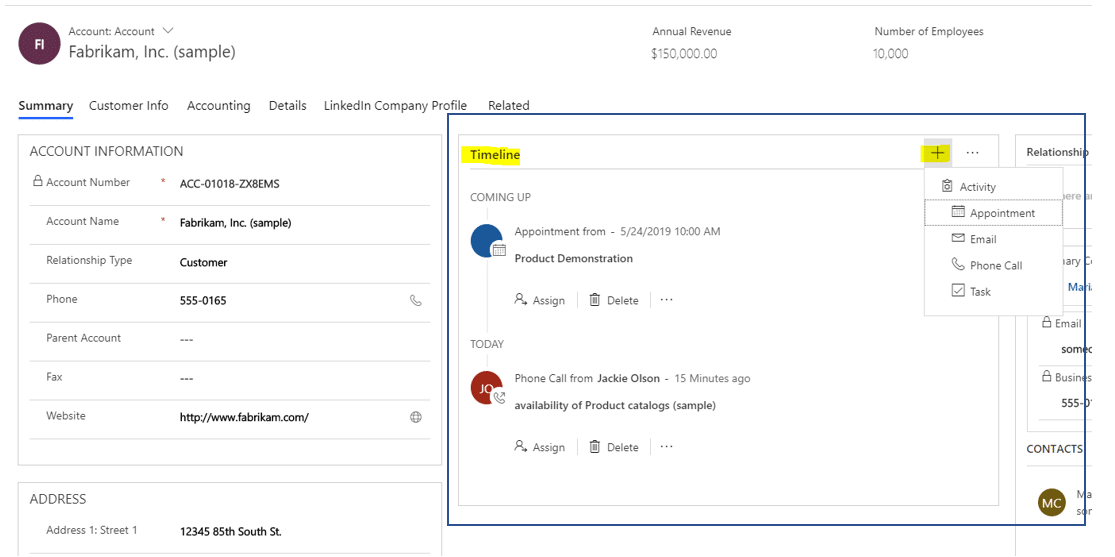
However, many companies don’t use all activities that are listed and want to simplify the activity list to just a few items. In the example below, the list only includes appointments, emails, phone calls, and tasks.
There are two steps to customize the timeline - configuring the Module and configuring the Activity Types.
Module Configuration (Activities, Notes and Posts)
1. In Dynamics 365 CE, open the entity that you want to change the Timeline.
2. Open the form that you want to make the change on.
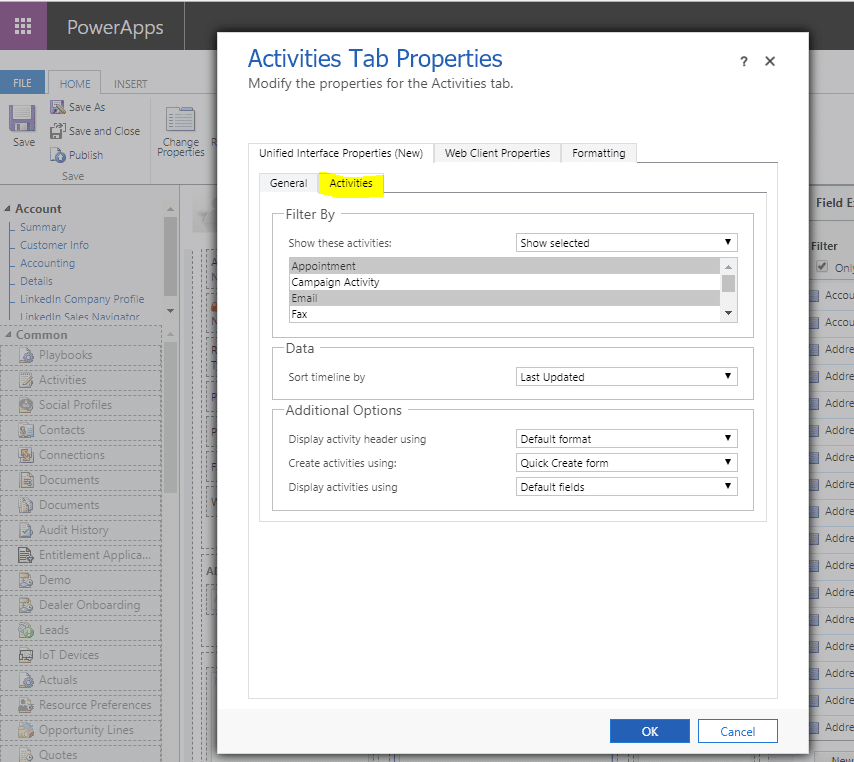
3. Double click inside the Social Pane to get to the Activities Tab Properties window shown below.
In the Filter by box you have the option to “Show all” or “Show selected” modules that you would like your users to see on the timeline.

You also have configuration options in the Additional Options box which allows you to “Show filter pane” and “Expand filter pane by default” plus options for Sorting and the Number of results. This is where you can change the options to suit your specific needs.
4. Once you have made your changes click OK at the bottom of the Activities Tab Properties window.
5. Click Save on your form and Publish.
Check out your new timeline on your form.
At this point, you only see the Activities on your timeline and notes and posts have been removed - but what happened to the other Activities that were on the first screen? That brings us to the second step - Configuring the Activities.
1. On the Activities Tab Properties screen, click on the Activities Tab and in the Filter By section, change the drop down to “Show selected”.
2. Choose the activities that you want to show your users.
You can also make changes in the Data section for sorting options and the Additional Options section for Display and Create options.
The convenience of customizing Dynamics 365 Customer Engagement to your needs and personalized views is a benefit that all users can take advantage of. If you need help customizing your software, or if you have any questions, reach out to the expert CRM support team at Stoneridge Software.

Under the terms of this license, you are authorized to share and redistribute the content across various mediums, subject to adherence to the specified conditions: you must provide proper attribution to Stoneridge as the original creator in a manner that does not imply their endorsement of your use, the material is to be utilized solely for non-commercial purposes, and alterations, modifications, or derivative works based on the original material are strictly prohibited.
Responsibility rests with the licensee to ensure that their use of the material does not violate any other rights.