Microsoft Outlook Tips and Tricks – Part 1
In this two-part series, we will take a look at 10 useful tips and tricks when using Microsoft Outlook.
Tip Number One
Did you know you can drag an email into your calendar or task to create an appointment or task?
Simply click on the email you want to convert to an appointment or task and drag it to the appropriate icon in outlook.
It will open an appointment or a task and you can enter your details.
Tip Number Two
Do you have similar tag lines or messages that you add to emails (but do not want in your signature)?
You can create a shortcut by doing the following:
- Create a new email.
- Type in the Phrase or message you want and hit CTRL C to copy.
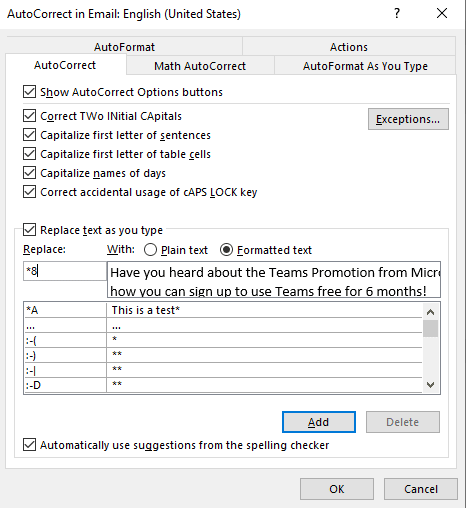
- “Have you heard about the Teams Promotion from Microsoft? Contact your Account Mananger to see how you can sign up to use Teams free for 6 months!”
- Then go to File and Options and click on > Spelling and Autocorrectand then Auto Correct Options.
- Type in your shortcut Key (mine is *8) and paste your phrase that you just copied and click Add.
Now lets start a new email. Type in your shortcut and press tab and your message will appear!
Tip Number Three
CTRL-K
This one has comes in very handy. Have you ever typed in an email address and you know that it should show up in your recent/short list but it doesn’t?
If it does not show the email you are looking for, press CTRL-K and chances are good it will find it!
Tip Number Four
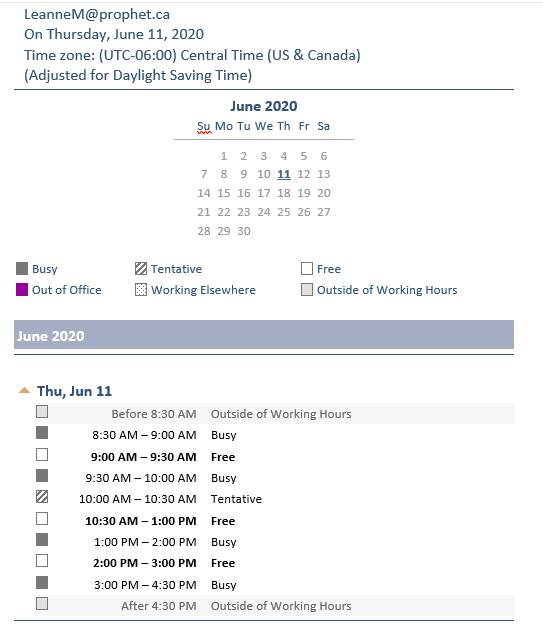
Trying to schedule a meeting with multiple parties but struggling to find a common date and time that works for everyone? You can share your calendar – without details – so other parties know when you are available.
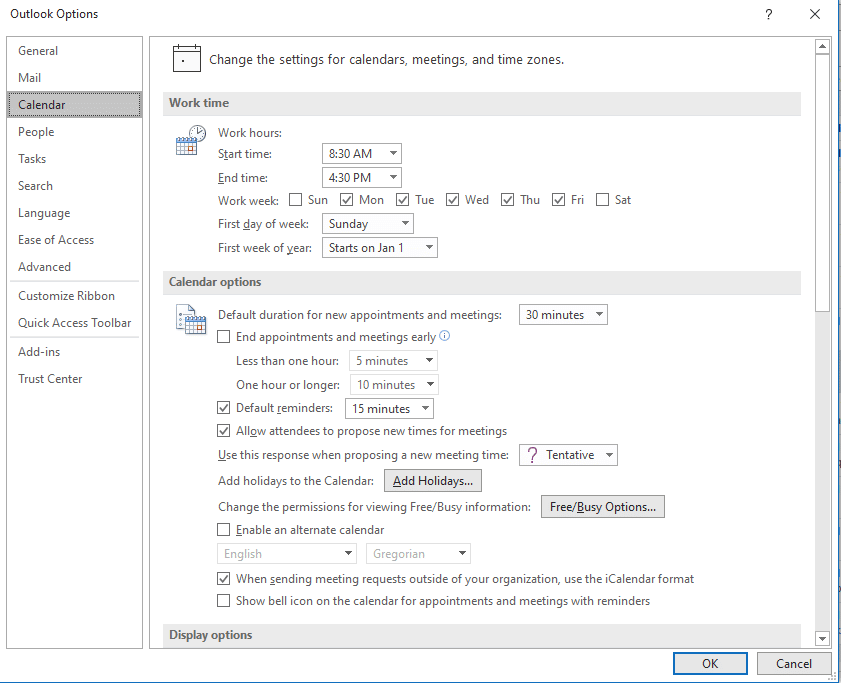
First you need to set your Calendar Work Hours.
- Click on File/Options/Calendar.
- Enter your start and end times, working days, holidays etc.
- Now start a new email.
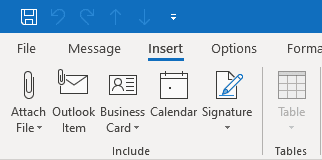
- Click Insert and choose Calendar.
- Choose your data range that you want to send and choose availability only.
- Check the Show time within my working hours only and say ok.
It will now show your availability for the time period you specified.
Tip Number Five
Voting Buttons
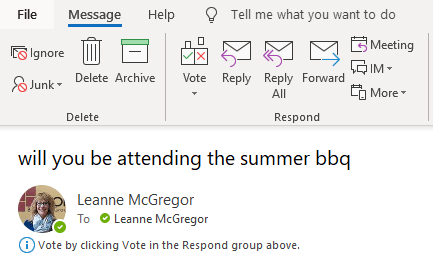
Want to find out fast and easy who will be attending the company bbq?
Start a new email and click on options.
- Click on voting buttons.
- You can choose between several options (yes, no… yes, no, maybe…)
- Then type in your question.
- Will you be attending the summer bbq?
The recipient will receive an email that asks them to vote by clicking vote in the respond group.
The person who sent the email can then go to their sent email and click on tracking to see responses.
Join us next month for part two of Outlook tips and tricks.
Questions?
Please reach out to us! We are happy to help you optimize your Microsoft Outlook email solution.
Under the terms of this license, you are authorized to share and redistribute the content across various mediums, subject to adherence to the specified conditions: you must provide proper attribution to Stoneridge as the original creator in a manner that does not imply their endorsement of your use, the material is to be utilized solely for non-commercial purposes, and alterations, modifications, or derivative works based on the original material are strictly prohibited.
Responsibility rests with the licensee to ensure that their use of the material does not violate any other rights.


